JeepParts
My Garage
My Account
Cart
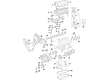
OEM Dodge Journey Piston
Engine Pistons- Select Vehicle by Model
- Select Vehicle by VIN
Select Vehicle by Model
orMake
Model
Year
Select Vehicle by VIN
For the most accurate results, select vehicle by your VIN (Vehicle Identification Number).
3 Pistons found


Dodge Journey Piston Part Number: 5191341AA
$162.84 MSRP: $247.00You Save: $84.16 (35%)Ships in 1-2 Business Days
Dodge Journey Piston Part Number: 5191342AA
$128.02 MSRP: $193.00You Save: $64.98 (34%)Ships in 1-2 Business Days
Dodge Journey Piston Part Number: R4892194AB
Dodge Journey Piston
Choose OEM Piston that meet Dodge factory standards. Dodge designs and tests every component for precision and durability. Each Piston follows strict manufacturing steps to lock in quality and fit. If your Dodge Journey matters to you, OEM parts make the smart choice. You'll get the exact look, feel, and performance you expect. Shop genuine Journey parts at the highly competitive prices online. Enjoy a manufacturer's warranty, a hassle-free return policy, and rapid delivery. No more guesswork with off brands. Get genuine parts with exact fit and true factory performance. Shop with confidence today at JeepPartsDeal.com.
This element covers the Dodge Journey Piston which is one of the critical part of the car that defines the reliability and performance of the vehicle associated with Dodge brand. Intended to convert combustion power to kinetic form, the Piston is a very important component of the journey's internal combustion engine since it transmits force to the crankshaft. Being a car part, the main material used in the manufacture of the Dodge Journey Pistons is aluminum alloys and some of them come in models that are forged or billet which are suited for performing cars. This versatility lets the Piston to fine-tune its efficiency tract the assorted Journey models, which comes fettled with both petrol as well as diesel engines. The Dodge Journey's strength is mainly in its inside space and safety options including the sophisticated braking structure and good standard of airbag provisions and is further backed by the nice performance of its Piston. First of all, it should be mentioned that the Piston may be of slipper or deflector type, which allows the Journey to remain a safe and efficient car. The Dodge Journey debuted in 2009 and has been giving customers a comfortable and affordable vehicle up into the present. Nevertheless, after discontinuation in 2020 the Dodge Journey Piston still functions as a testimony of the fact that the brand pays attention to the quality and performance and will continue to contribute to the Journey's status as a family and adventurous car.
Dodge Journey Piston Parts and Q&A
- Q: How to Remove and Replace a Piston and Its Connecting Rod on Dodge Journey?A:Before you can take out and install the piston and connecting rod, remove both the cylinder heads and the Oil Pan. Take care in removing the top ridge from the cylinder bores before removing the pistons, because you must cover their tops during this step. You need to take out the pistons and connecting rods from above the cylinder block, while rotating the Crankshaft so each connecting rod goes into the cylinder's center. Check the connecting rods and their caps to find the cylinder marks, then confirm them with paint or a scribe. Start by uncovering the connection rod cap and secure protectors to the rod, then carefully eject each piston assembly from the bore without touching the crank journals. After taking off the bearing, put the bearing cap onto the mating rod.
- Q: How to Install a Piston and Connecting Rod in an Engine on Dodge Journey?A:First, fit the piston rings, then review the bolts of the connecting rod bearing cap; if the bolts' threads are necked in any way, they will be replaced. One way to check for necking in bolts is to check along the thread lines with a straight edge or scale; if some threads don't touch the scale, the bolt is faulty and should be replaced. Be sure that one compression ring gap comes after the next so that none of them are in line with the oil ring rail gap. Let the piston head and rings into engine oil, slide the ring compressor on through the piston and affix with the special tool. Lay the bolts for connecting rod protectors onto the rod bolts, followed by turning the Crankshaft to set the connecting rod journal at the center of the cylinder. Put the rod and piston into the cylinder bore, with the rod going over the crankshaft journal. Guarantee the piston's arrow points toward the front of the engine and the oil hole in the connecting rod is on the opposite side of the cylinder bore. Slide the connecting rod on to the connecting rod journal as you gently tap the piston into the cylinder with a hammer handle. Install the rod caps after that, then insert and bolt the cleaned, checked connecting rod bolts, tightening them to 27 Nm (20 ft. lbs.) plus 1/4 extra, until the line of the bolt's star point matches theactor miss point on the rod cap. The Oil Pan and cylinder head(s) should be your final steps.


Related Dodge Journey Parts
 Dodge Journey Oil Pump
 Dodge Journey Timing Belt
 Dodge Journey Oil Pan
 Dodge Journey Oil Pan Gasket
 Dodge Journey Cam Gear
 Dodge Journey Lash Adjuster
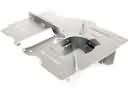 Dodge Journey Oil Pan Baffle
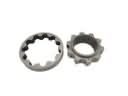 Dodge Journey Oil Pump Rotor Set
 Dodge Journey Rod Bearing
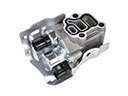 Dodge Journey Spool Valve
 Dodge Journey Timing Cover Gasket
 Dodge Journey Variable Timing Sprocket