JeepParts
My Garage
My Account
Cart
OEM Dodge Magnum Fuel Filler Neck
Fuel Tank Filler Neck Hose Pipe- Select Vehicle by Model
- Select Vehicle by VIN
Select Vehicle by Model
orMake
Model
Year
Select Vehicle by VIN
For the most accurate results, select vehicle by your VIN (Vehicle Identification Number).
2 Fuel Filler Necks found

Dodge Magnum Filler Hose, Lower Part Number: 4578196AD

Dodge Magnum Filler Neck, Upper Part Number: 5270171AB
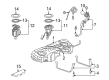
Dodge Magnum Fuel Filler Neck
Choose OEM Fuel Filler Neck that meet Dodge factory standards. Dodge designs and tests every component for precision and durability. Each Fuel Filler Neck follows strict manufacturing steps to lock in quality and fit. If your Dodge Magnum matters to you, OEM parts make the smart choice. You'll get the exact look, feel, and performance you expect. Shop genuine Magnum parts at the highly competitive prices online. Enjoy a manufacturer's warranty, a hassle-free return policy, and rapid delivery. No more guesswork with off brands. Get genuine parts with exact fit and true factory performance. Shop with confidence today at JeepPartsDeal.com.
Dodge Magnum Fuel Filler Neck Parts and Q&A
- Q: How to Install a Fuel Filler Neck on Dodge Magnum?A:You should start the installation by putting together the filler tube and checking that the groove on the rubber connects with the body sheet metal. Feed the filler tube into the rubber hose of the fuel tank and after that, slide the hose clamp on and tighten it properly. After that, add the mounting bolt for the filler tube and the vent line for the filler tube. Put in the underbody splash shield, then the left inner splash shield and then install the left rear tire again. Take the vehicle down and align the rubber filler tube to the body opening as you pull it into the inside of the vehicle and make sure the sheet metal is set into the rubber groove. First insert one end of the metal wire retaining wire into the groove on the inside rubber of the filler tube and then move it around the rubber piece. Then, hook up the negatively charged cable to the power source and put gas in the tank.
- Q: How to Service and Repair a Fuel Filler Neck on Dodge Magnum?A:Lift the negative Battery Cable, then drain the fuel from the Fuel Tank to work on the fuel filler neck. After opening the filler tube door, remove the wire within the cured rubber and begin to squeeze and push the rubber off the metal part. Take out the filler tube and rubber, support the vehicle underneath, remove the left rear tire and remove the left inner splash shield. Taking care of these in order, disconnect the vent line, remove its attached bolt and then get the underbody splash shield off. Slide the filler tube assembly through the tube as you slide the hose clamp to the fuel tank location and remove the whole assembly from under the vehicle. Slide the filler tube inside the fuel tank hose, attach the clamp and tighten it, after that place the mounting bolt at the filler tube and make sure the vent line is installed. After installing the underbody splash shield, left inner splash shield and left rear tire, you can lower the car. Be sure the rubber from the filler tube is in place at the body opening, then pull the rubber through to the body and insert it while the sheet metal goes into the groove of the rubber. Pull the retaining wire through the inside groove of the rubber on the filler tube, spread it around and then place the wire retainer. Then, attach the negative terminal to the battery and refill the gas tank.


Related Dodge Magnum Parts
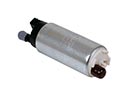 Dodge Magnum Fuel Pump
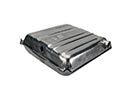 Dodge Magnum Fuel Tank
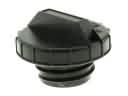 Dodge Magnum Gas Cap
 Dodge Magnum Air Filter Box
 Dodge Magnum Fuel Filler Hose
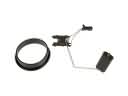 Dodge Magnum Fuel Level Sensor
 Dodge Magnum Fuel Pump Gasket
 Dodge Magnum Fuel Pump Seal
 Dodge Magnum Fuel Pump Tank Seal
 Dodge Magnum Fuel Sending Unit
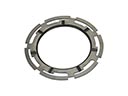 Dodge Magnum Fuel Tank Lock Ring
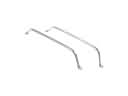 Dodge Magnum Fuel Tank Strap