JeepParts
My Garage
My Account
Cart
OEM Dodge Magnum Fuel Level Sensor
Gas Gauge Sensor- Select Vehicle by Model
- Select Vehicle by VIN
Select Vehicle by Model
orMake
Model
Year
Select Vehicle by VIN
For the most accurate results, select vehicle by your VIN (Vehicle Identification Number).
4 Fuel Level Sensors found

Dodge Magnum Fuel Pump Gasket Part Number: 68304753AA
$33.39 MSRP: $47.75You Save: $14.36 (31%)


Dodge Magnum Fuel Pump, Passenger Side Part Number: 5136023AF
$313.84 MSRP: $467.00You Save: $153.16 (33%)
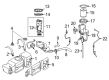
Dodge Magnum Module - Fuel Pump/Level Unit Part Number: 68102700AE
$420.22 MSRP: $612.00You Save: $191.78 (32%)
Dodge Magnum Module - Fuel Pump/Level Unit Part Number: 5136022AM
$438.54 MSRP: $639.00You Save: $200.46 (32%)
Dodge Magnum Fuel Level Sensor
Choose OEM Fuel Level Sensor that meet Dodge factory standards. Dodge designs and tests every component for precision and durability. Each Fuel Level Sensor follows strict manufacturing steps to lock in quality and fit. If your Dodge Magnum matters to you, OEM parts make the smart choice. You'll get the exact look, feel, and performance you expect. Shop genuine Magnum parts at the highly competitive prices online. Enjoy a manufacturer's warranty, a hassle-free return policy, and rapid delivery. No more guesswork with off brands. Get genuine parts with exact fit and true factory performance. Shop with confidence today at JeepPartsDeal.com.
Dodge Magnum Fuel Level Sensor Parts and Q&A
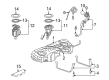
- Q: How to Service and Repair a Fuel Level Sensor on Dodge Magnum?A:Before repairing or servicing the gas gauge fuel level sensor, first let the pressure in the fuel system go. Separate the negative Battery Cable and drain the fuel so it is not above 5/8 of a tank to stop spills. Use a hard nylon tube with a 30" cut to take out about half the tank's fuel and allow the check valve to open. To access the modules, slip the rear lower seat armrest behind and above the cushion, then fold back the cover foam pad revealing it. Take out the left side module and remove the connection from the electrical connector. Insert tool #9340 into the center of the lock ring on the left side module, drain the left side tank by pushing a hose into it and keep lifting the module to allow the hose to flow in fully. Go as far as you can with the module, break the connection to the bottom electrical and then pump the left side module. Take off the top of the module and tip the base end so that the fuel can easily drip out. With the release tab pushed in, separate the fuel line from the fitting on the fuel pump. Then, take out the supply line from the module's bottom end. Disconnect the fuel return and siphon return lines by pulling them up and then take them off from under the bottom module. Open the right side floor pan, take off the plastic covers and disconnect the fuel supply hose from the module, marking it so you remember which way it connects. Use special tool #9340 to separate the right side module lock ring and empty fuel from the right side of the tank the same way you did before. Work the module out of the tank, open the latch holding the fuel level sensor card to the module and take out the ground wire from both the check valve and the fuel pressure regulator. Next, take out the fuel level sensor card from the module and cut the tie straps on the hoses to free the fuel level sensor's wiring harness.

Related Dodge Magnum Parts
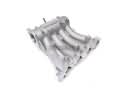 Dodge Magnum Intake Manifold
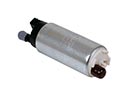 Dodge Magnum Fuel Pump
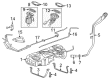
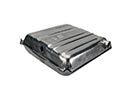 Dodge Magnum Fuel Tank
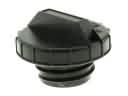 Dodge Magnum Gas Cap
 Dodge Magnum Fuel Filler Hose
 Dodge Magnum Fuel Filler Neck
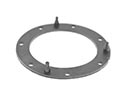 Dodge Magnum Fuel Pump Gasket
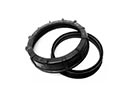 Dodge Magnum Fuel Pump Seal
 Dodge Magnum Fuel Pump Tank Seal
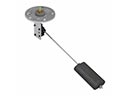 Dodge Magnum Fuel Sending Unit
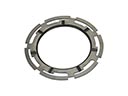 Dodge Magnum Fuel Tank Lock Ring
 Dodge Magnum Fuel Tank Strap