JeepParts
My Garage
My Account
Cart
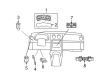
OEM Dodge Nitro Instrument Cluster
Speedometer Instrument Cluster- Select Vehicle by Model
- Select Vehicle by VIN
Select Vehicle by Model
orMake
Model
Year
Select Vehicle by VIN
For the most accurate results, select vehicle by your VIN (Vehicle Identification Number).
11 Instrument Clusters found

Dodge Nitro Instrument Cluster Part Number: 56044993AI
Dodge Nitro Instrument Cluster Part Number: 56044817AI

Dodge Nitro Instrument Cluster Part Number: 56044815AI

Dodge Nitro Instrument Cluster Part Number: 5172368AA
Dodge Nitro Instrument Cluster Part Number: 5172367AA
Dodge Nitro Instrument Cluster Part Number: 5172366AA

Dodge Nitro Cluster Lens Part Number: 68019094AA

Dodge Nitro Instrument Cluster Part Number: 5172596AB
Dodge Nitro Instrument Cluster Part Number: 5172594AB
Dodge Nitro Instrument Cluster Part Number: 5172595AB

Dodge Nitro Instrument Cluster Part Number: 5172960AC
Dodge Nitro Instrument Cluster
Choose OEM Instrument Cluster that meet Dodge factory standards. Dodge designs and tests every component for precision and durability. Each Instrument Cluster follows strict manufacturing steps to lock in quality and fit. If your Dodge Nitro matters to you, OEM parts make the smart choice. You'll get the exact look, feel, and performance you expect. Shop genuine Nitro parts at the highly competitive prices online. Enjoy a manufacturer's warranty, a hassle-free return policy, and rapid delivery. No more guesswork with off brands. Get genuine parts with exact fit and true factory performance. Shop with confidence today at JeepPartsDeal.com.
The Instrument Cluster in Dodge Nitro are interior trim fitments situated at the back of the steering wheel which is used by the drivers to inform them of their prevailing driving conditions. It contains stimulants like the speedometer, tachometer, and the fuel meter among other warning signals that notify the driver of the car's performance, engine status, seat belt among others. The Instrument Clusters different in the years, the current designs major on utility and innovative solutions. These clusters may include the touch screen, digital Hud display and real time data readouts which makes the driving experience better. It is important to keep the Instrument Cluster in good shape so that one can monitor the status of the vehicle, if this fails, then a solution could be replacing the factory Instrument Cluster with a rebuilt Instrument Cluster.
Dodge Nitro Instrument Cluster Parts and Q&A
- Q: How to Install an Instrument Cluster on a Instrument Panel on Dodge Nitro?A:Before you start installing the instrument panel, turn the negative Battery Cable off, isolate it and wait two minutes for the air bag capacitor to discharge. Rotate the Steering Wheel all the way to the center until the front wheels line up with the front of the car. Initially, secure the instrument panel to your vehicle and attach both 40 way electrical connections and the Nag1 connection for the transmission if your car features one. Connect the lower and upper instrument panel by using fasteners and install your Glove Box afterwards. Secure the fasteners to the middle area of the dashboard and put the required electrical connections on the control head, lighter and switch bank. First, install the instrument panel center bezel, then add the two bolts to the bottom and front of the pedal support bracket and finally set the electrical connector in the inner part of the bracket. Engage the panels in the center stack and the one between the climate control and the instruments and then secure the upper instrument panel with bolts. First, using two bolts, fasten the instrument panel to the body so each bolt is tight to 28 Nm (20.5 ft. lbs.) and then snap the defroster grille clips into the instrument panel openings while the rest of the defroster grille is upright. With your hands, press the defroster grille clips into place and fasten the Steering Column after that, applying 6 Nm (55 in. lbs.) of torque. Apply nuts to the lower instrument panel bolts to reach 30.5 Nm (22.5 ft.lbs.); this is followed by installing the sides of the cowling panels with clamps, bolts and screws. Let the Steering Column Cover's claps fold onto the instrument panel tabs, move the cover to put the claws into place and push up gently to engage all the clips. Attach the instrument panel support bracket and nuts, tightening to 28 Nm (20.5 ft. lbs.) and then fasten the floor console and close-out panels with bolts that are tightened to 2.5 Nm (22 in. lbs.). Connect the right and left A-pillar trim tabs to the instrument panel slot above them, slide the A-pillar trim onto each side and then attach the negative battery cable to the battery.
- Q: How to Safely Remove an Instrument Cluster on Dodge Nitro?A:Before taking out the instrument panel, turn off the air bag by isolating the negative Battery Cable and wait two minutes. Make certain the Steering Wheel is aligned with the straight direction. Ease the lock on the negative battery terminal and then disconnect it. Remove the right and left A-pillar trim moldings with a small pry tool, then pop out the fasteners and pull out the close out panels from the lower instrument panel. Take the floor console out, remove the nuts from the support bracket and lift the upper knee blocker clips by pulling the top part back. Swing your knee blocker open gently and slowly move the Steering Column Cover sideways while pulling to take it off. Take out the lower instrument panel bolts and nuts after removing both side cowl panels. Remember to mark the steering wheel location with grease pencil. Disconnect the Steering Column while preserving the retaining clips on the defroster grille so the instrument panel is not scratched. With the trim stick C-4755, free the clips holding the rearward edge of the instrument panel top cover, removing the defroster grille as well. Unbolt the instrument panel attachment, remove the electrical connector on the inside of the pedal support bracket and take out both bolts from the pedal support bracket's front and bottom. Lift off the center bezel of the instrument panel and break all links to the control head, lighter and switch bank. Take off the screws that connect the center instrument panel, remove the Glove Box and take out the fasteners from both upper and lower instrument panel attachments. After that, remove both 40-way connectors, as well as the Nag1 for the transmission if fitted and disconnect all the electrical connectors on the instrument panel before moving the panel out of the vehicle compartment.


Related Dodge Nitro Parts
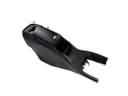 Dodge Nitro Center Console
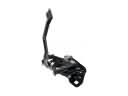 Dodge Nitro Hood Latch
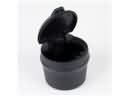 Dodge Nitro Ashtray
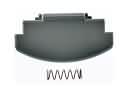 Dodge Nitro Center Console Latch
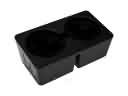 Dodge Nitro Cup Holder
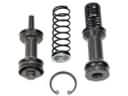 Dodge Nitro Master Cylinder Repair Kit
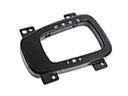 Dodge Nitro Shift Indicator
 Dodge Nitro Shift Knob
 Dodge Nitro Shift Linkage Boot
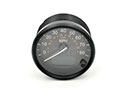 Dodge Nitro Speedometer
 Dodge Nitro Wheelhouse
 Dodge Nitro Wiper Motor