JeepParts
My Garage
My Account
Cart
OEM Dodge Ram 2500 Van Headlight Switch
Headlamp Switch- Select Vehicle by Model
- Select Vehicle by VIN
Select Vehicle by Model
orMake
Model
Year
Select Vehicle by VIN
For the most accurate results, select vehicle by your VIN (Vehicle Identification Number).
4 Headlight Switches found

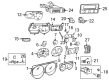
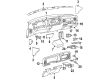
Dodge Ram 2500 Van Switch Panel Part Number: 56021889AA
$80.33 MSRP: $90.50You Save: $10.17 (12%)Ships in 1-2 Business Days


Dodge Ram 2500 Van Ignition Switch Part Number: 4728424


Dodge Ram 2500 Van Combination Switch Part Number: 56049111AA

Dodge Ram 2500 Van Headlamp Switch Knob Part Number: 4565339AA
Dodge Ram 2500 Van Headlight Switch
Choose OEM Headlight Switch that meet Dodge factory standards. Dodge designs and tests every component for precision and durability. Each Headlight Switch follows strict manufacturing steps to lock in quality and fit. If your Dodge Ram 2500 Van matters to you, OEM parts make the smart choice. You'll get the exact look, feel, and performance you expect. Shop genuine Ram 2500 Van parts at the highly competitive prices online. Enjoy a manufacturer's warranty, a hassle-free return policy, and rapid delivery. No more guesswork with off brands. Get genuine parts with exact fit and true factory performance. Shop with confidence today at JeepPartsDeal.com.
Dodge Ram 2500 Van Headlight Switch Parts and Q&A
- Q: How to service the Headlight Switch on Dodge Ram 2500 Van?A:For your safety, first remove the negative battery cable and give the ceramic dimmer resistor time to cool if it has been used. First, lift out the cluster bezel and afterward, remove the three screws that hold the headlamp switch bezel in place. Pull the headlamp switch and bezel out until you can see the two connectors. Then unplug these connectors. Pull the knob on the switch out to turn it ON, then squish the button on top of the switch body. Whilst still securing the release button, pull the entire unit out by turning the control knob. After that, take out the nut under the spanner, disconnect the bracket and bezel from the switch and remove both pieces. For installation, put the switch bezel and mounting bracket onto the headlamp switch, then install and tighten the spanner nut. Pierce the bezel with the shaft of the control knob and shaft unit and then place everything in the headlamp switch, making sure it is pushed all the way. Mount the headlamp switch to the instrument panel and link up the wire harness connectors. Place the headlamp switch bezel on the panel and use the three screws to connect and tighten it to 2.2 Nm (20 in. lbs.). After that, place the cluster bezel back in its place and attach the negative battery cable again.

Related Dodge Ram 2500 Van Parts
 Dodge Ram 2500 Van Back Up Light Switch
 Dodge Ram 2500 Van Brake Light Switch
 Dodge Ram 2500 Van Dimmer Switch
 Dodge Ram 2500 Van Ignition Lock Assembly
 Dodge Ram 2500 Van Ignition Lock Cylinder
 Dodge Ram 2500 Van Ignition Switch
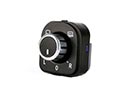 Dodge Ram 2500 Van Mirror Switch
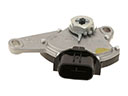 Dodge Ram 2500 Van Neutral Safety Switch
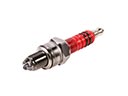 Dodge Ram 2500 Van Spark Plug
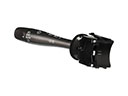 Dodge Ram 2500 Van Turn Signal Switch
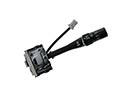 Dodge Ram 2500 Van Windshield Wiper Switch
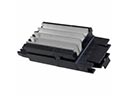 Dodge Ram 2500 Van Wiper Pulse Module
Browse Dodge Ram 2500 Van Headlight Switch by Years
2003
2002
2001
2000
1999