JeepParts
My Garage
My Account
Cart
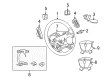
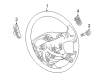
OEM Dodge Ram 3500 Steering Wheel
Navigation Steering Wheel- Select Vehicle by Model
- Select Vehicle by VIN
Select Vehicle by Model
orMake
Model
Year
Select Vehicle by VIN
For the most accurate results, select vehicle by your VIN (Vehicle Identification Number).
30 Steering Wheels found


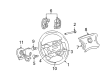
Dodge Ram 3500 Steering Wheel Part Number: YV191J8AD


Dodge Ram 3500 Steering Wheel Part Number: 5EH10DX9AC


Dodge Ram 3500 Steering Wheel Part Number: 1PS32XDVAC


Dodge Ram 3500 Steering Wheel Part Number: YP211J8AD

Dodge Ram 3500 Steering Wheel Part Number: YV251J8AD


Dodge Ram 3500 Steering Wheel, Gray Part Number: 1PS351DVAD
Dodge Ram 3500 Steering Wheel, Gray Part Number: 1PS441DVAC
$670.97 MSRP: $979.00You Save: $308.03 (32%)
Dodge Ram 3500 Steering Wheel, Taupe Part Number: YV251L8AB

Dodge Ram 3500 Steering Wheel, Gray Part Number: YV251DVAB

Dodge Ram 3500 Steering Wheel, Gray/Taupe Part Number: YV251DHAE
Dodge Ram 3500 Steering Wheel, Taupe Part Number: YV191L8AB
Dodge Ram 3500 Steering Wheel, Gray Part Number: YV191DVAB
Dodge Ram 3500 Steering Wheel, Taupe Part Number: YP211L8AB
Dodge Ram 3500 Steering Wheel, Gray Part Number: YP211DVAB
Dodge Ram 3500 Steering Wheel, Gray Part Number: 1AK381DVAA
Dodge Ram 3500 Steering Wheel, Blue Part Number: XF49YQLAC
Dodge Ram 3500 Steering Wheel, Gray/Taupe Part Number: YP211DHAE
Dodge Ram 3500 Steering Wheel, Gray Part Number: XF49XDVAC
Dodge Ram 3500 Steering Wheel, Taupe Part Number: XF451L8AC
Dodge Ram 3500 Steering Wheel, Gray Part Number: XF471DVAC
| Page 1 of 2 |Next >
1-20 of 30 Results
Dodge Ram 3500 Steering Wheel
Choose OEM Steering Wheel that meet Dodge factory standards. Dodge designs and tests every component for precision and durability. Each Steering Wheel follows strict manufacturing steps to lock in quality and fit. If your Dodge Ram 3500 matters to you, OEM parts make the smart choice. You'll get the exact look, feel, and performance you expect. Shop genuine Ram 3500 parts at the highly competitive prices online. Enjoy a manufacturer's warranty, a hassle-free return policy, and rapid delivery. No more guesswork with off brands. Get genuine parts with exact fit and true factory performance. Shop with confidence today at JeepPartsDeal.com.
Dodge Ram 3500 Steering Wheel Parts and Q&A
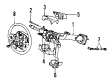
- Q: How to Remove and Reinstall a Steering Wheel and Column on Dodge Ram 3500?A:Slide the front wheels forward and place the car in neutral, remove the negative battery wire and take out the air bag to remove the steering wheel. Place the puller around the lockring in the steering wheel so its bolts only go into the wheel, not into the lockspring, to keep from damaging anything. Should you have a shift link rod, take it out from the grommet in the shift lever using a flat-blade screwdriver. Make a mark near the top of the column shaft-to-coupler using a pen and remove it later. Then, open the Steering Column cover/knee blocker, move the shift lever on type Prndl cars to Park, pull on the cable and twist it to detach it from the position arm. If you have a tilt lever, get rid of it, along with the upper and lower lock housing shroud and the lower fixed shroud. With a 7 mm socket, disconnect the turn signal multi-function switch connector and then loosen the upper Support Bracket nuts to give you slack. Also, take off the electrical connections from the Key Light, Ignition Position Switch, Horn, Overdrive and Clock Spring. By taking out the plastic retainer buttons, you extricate the harness wire from the column. Following that, loosen the fasteners of the toe plate and the column and you will be ready to remove them from the car. Disconnect the Ignition and Multi-function Switch and remove the Clock Spring, taping it to make sure it doesn't turn. While setting up, begin with the clock spring and switches, with your Ignition Switch in the on position, to ensure the gear shift can be moved. Replace the grommet in column shift vehicles with multi-purpose lubricant and get rid of the shipping lock pin if needed. Insert the column through the floor pan, place the column bracket breakaway capsules on the mounting studs and gently assemble the two upper nuts on both brackets. Ensure the steering column shaft matches the coupler at the front while the wheels are straight, put the new pinch bolt on and tighten to 49 Nm (36 ft. lbs.). Attach the wiring harness to the steering column, connect the multi-function switch wiring and use a 7 mm socket to tighten everything. Attach the upper aft shroud, lower the capsules into their slots of the column support bracket, pull back the column and tighten each nut on the top bracket to 12 Nm (105 inch lbs.). Attach the toe plate to the floor plan with 22.5 Nm/200 inch lbs., secure the wiring connections near the column and finally fit the lower fixed shroud. For vehicles with a column shift, install the Prndl cable, put the shifter in Park and make any indicator adjustments by turning the thumb screw on the cable retainer. Replace the housing shrouds, the tilt lever if you have one, the knee blocker and the cover for the steering column. Then, mount the steering wheel, tighten the bolt to 45 ft. lbs. or 61 Nm, add the air bag, join the shift link rod with the transmission lever using lubricant and put the ground cable for the battery back on. Make sure the linkage in the automatic transmission is operating correctly and make any improvements that are required.
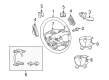
- Q: How to Safely Detach a Steering Wheel on Dodge Ram 3500?A:You need to first take off and disable the driver's side air bag to remove the steering wheel. Pull out part of the bolt, but do not take it out of the column. Push down the bolt with an equivalent tool on top of the bolt to lift the cylinder. Once done, get rid of the steering wheel bolt and then dislodge the steering wheel.


Related Dodge Ram 3500 Parts
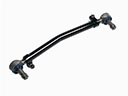 Dodge Ram 3500 Drag Link
 Dodge Ram 3500 Power Steering Pump
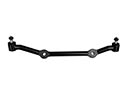 Dodge Ram 3500 Center Link
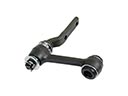 Dodge Ram 3500 Idler Arm
 Dodge Ram 3500 Power Steering Reservoir
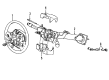
 Dodge Ram 3500 Steering Column
 Dodge Ram 3500 Steering Column Cover
 Dodge Ram 3500 Steering Gear Box
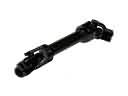 Dodge Ram 3500 Steering Shaft
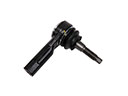 Dodge Ram 3500 Tie Rod
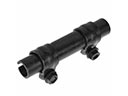 Dodge Ram 3500 Tie Rod Adjusting Sleeve
 Dodge Ram 3500 Tie Rod Bushing