JeepParts
My Garage
My Account
Cart
OEM Dodge Sprinter 2500 Windshield
Glass Windshield- Select Vehicle by Model
- Select Vehicle by VIN
Select Vehicle by Model
orMake
Model
Year
Select Vehicle by VIN
For the most accurate results, select vehicle by your VIN (Vehicle Identification Number).
11 Windshields found

Dodge Sprinter 2500 Windshield, Front Part Number: 68018761AA

Dodge Sprinter 2500 Windshield, Front Part Number: 5136429AA
Dodge Sprinter 2500 Windshield, Front Part Number: 5122274AA
Dodge Sprinter 2500 Windshield, Front Part Number: 5122272AA
Dodge Sprinter 2500 Windshield, Front Part Number: 5104240AA
Dodge Sprinter 2500 Windshield, Front Part Number: 5103586AA
Dodge Sprinter 2500 Windshield, Front Part Number: 5103585AA
Dodge Sprinter 2500 Windshield, Front Part Number: 68018759AB
Dodge Sprinter 2500 Windshield, Front Part Number: 5122335AA
Dodge Sprinter 2500 Windshield, Front Part Number: 68018760AA
Dodge Sprinter 2500 Windshield, Front Part Number: 68018758AA
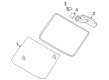
Dodge Sprinter 2500 Windshield
Choose OEM Windshield that meet Dodge factory standards. Dodge designs and tests every component for precision and durability. Each Windshield follows strict manufacturing steps to lock in quality and fit. If your Dodge Sprinter 2500 matters to you, OEM parts make the smart choice. You'll get the exact look, feel, and performance you expect. Shop genuine Sprinter 2500 parts at the highly competitive prices online. Enjoy a manufacturer's warranty, a hassle-free return policy, and rapid delivery. No more guesswork with off brands. Get genuine parts with exact fit and true factory performance. Shop with confidence today at JeepPartsDeal.com.
Dodge Sprinter 2500 Windshield Parts and Q&A
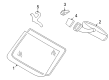
- Q: How to Install a Windshield to Ensure Proper Curing and Prevent Water Leaks on Dodge Sprinter 2500?A:After installation, leave the vehicle with the urethane undisturbed for 24 hours to help it dry. Unless you have a hard top, lower the front doors and open the back glass slider to guarantee the interior isn't pressured or you could have water leaks. Clean most of the old urethane from the windshield fence, leaving 1 mm of bonding material behind. Remove too much and it might weaken the paint or stop it from sticking. If your windshield is already installed, scrape away the old adhesive until it is level with the glass and remove any pieces that don't stick well. Apply the windshield seal first at a corner without any lubricants. Place the windshield straight inside the opening, tape its edges before you install it and check that the gap is parallel. Cut off the masking tape, remove the windshield and clean the whole glass area with the recommended solvent. Look for problems in the glass primer and cover any areas needing to be repriced; make sure all repricing is fully dry before I proceed. For a new windshield, clean it and check for any damage, then use the same way to seal and place as you did with the other one. Open the windshield entrance, detach any remaining rubber and get the area ready for a new seal adhesive. Put on a coat of primer when required and let it dry. To install, use a triangular nozzle to place a bead of glue onto the windshield seal and be sure to install it within 5 minutes. Put the windshield into its frame with the tape as a reference, press it flat and ensure you're not pushing down on both sides at the same time to avoid accidents. Once you've completed all the above, it's time to put in the rear view mirror, headliner and Wiper Arms.
- Q: How to Safely Remove a Windshield on Dodge Sprinter 2500?A:Before taking out the windshield, detach the Wiper Arms, pull out the headliner and get rid of the rear view mirror. Secure all the instrument health panel and vents to prevent damages and no injuries. Then, pry the windshield seal away using a trim stick C-4755 or something similar and as you do, protect the rubber instrument panel with a guard created from 2 mm thick plastic or the equivalent material. The plastic protection guard holds the windshield in place by resting between the seal on the windshield and the instrument panel. Separate the glue on the windshield with a cut-out wire and carefully remove windshield 1 afterward.

Related Dodge Sprinter 2500 Parts
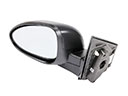 Dodge Sprinter 2500 Car Mirror
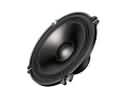 Dodge Sprinter 2500 Car Speakers
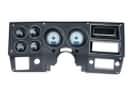 Dodge Sprinter 2500 Dash Panel
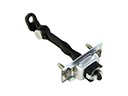 Dodge Sprinter 2500 Door Check
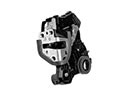 Dodge Sprinter 2500 Door Lock
 Dodge Sprinter 2500 Exhaust Nut
 Dodge Sprinter 2500 Front Cross-Member
 Dodge Sprinter 2500 Hood
 Dodge Sprinter 2500 Hood Hinge
 Dodge Sprinter 2500 Seat Covers
 Dodge Sprinter 2500 Seat Cushion
 Dodge Sprinter 2500 Seat Switch