JeepParts
My Garage
My Account
Cart
OEM Jeep Cherokee Thermostat
Engine Coolant Thermostat- Select Vehicle by Model
- Select Vehicle by VIN
Select Vehicle by Model
orMake
Model
Year
Select Vehicle by VIN
For the most accurate results, select vehicle by your VIN (Vehicle Identification Number).
4 Thermostats found


Jeep Cherokee Thermostat (Not Including Gaskets) Part Number: 52028186AC
$38.76 MSRP: $56.70You Save: $17.94 (32%)Ships in 1-2 Business Days
Jeep Cherokee Thermostat Housing Part Number: 5048423AD
$135.15 MSRP: $177.00You Save: $41.85 (24%)


Jeep Cherokee Thermostat Part Number: 83501426AD

Jeep Cherokee Thermostat Part Number: 83500813
Jeep Cherokee Thermostat
Choose OEM Thermostat that meet Jeep factory standards. Jeep designs and tests every component for precision and durability. Each Thermostat follows strict manufacturing steps to lock in quality and fit. If your Jeep Cherokee matters to you, OEM parts make the smart choice. You'll get the exact look, feel, and performance you expect. Shop genuine Cherokee parts at the highly competitive prices online. Enjoy a manufacturer's warranty, a hassle-free return policy, and rapid delivery. No more guesswork with off brands. Get genuine parts with exact fit and true factory performance. Shop with confidence today at JeepPartsDeal.com.
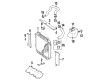
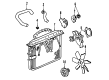
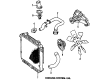
The Thermostat in Jeep Cherokee vehicles is regarded as being a part of the cooling system and often located close to the radiator. Its overall purpose is to control the temperature of the engine so as to make it perform and be efficient at the same time. That is a closed loop control instrument which regulates the flow of the heat transfer fluids to achieve the desired temperature. Various designs of thermostats have been installed in Jeep Cherokees at different times, including the bimetallic strip and the wax pellet thermostat types. Wax pellet thermostats are specially used because with the changes in temperatures, the wax pellets either swell or contract, to achieve the necessary desired temperatures for engines. These developments in thermostat enhance general running efficiency of the vehicle and also the comfort of the interior.
Jeep Cherokee Thermostat Parts and Q&A
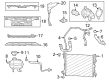
- Q: How to Maintain a Thermostat on Jeep Cherokee?A:First make certain the Radiator draincock is not open while the system is at a high temperature and pressure to prevent severe burns from coolant. Make sure the radiator coolant doesn't go past the thermostat housing and don't forget to save clean coolant by placing it into a suitable container. Always use the 6094 special clamp or the HPC-20 Snap-On tool, along with safety glasses, whenever installing constant tension hose clamps. Observe that original equipment constant tension clamps carry a label on the tongue and when replacing, only a corresponding clamp should be selected. Release the upper radiator hose and heater hose found at the thermostat housing, unhook the wiring from the engine Coolant Temperature Sensor and take off the thermostat housing bolts, thermostat housing, gasket and thermostat. After that, discard the old gasket. Before fixing the new thermostat with the pellet toward the engine, make sure to clean the gasket mating surfaces and set the arrow and air bleed hole correctly in place on the engine cylinder's recess. Slide in the new gasket and thermostat housing, then tighten the housing bolts, making sure to do it evenly so as not to crack the case and use a torque wrench to tighten to 20 Nm (15 ft. lbs.). Hook the hoses onto the thermostat housing and plug the electrical connector back into the coolant temperature sensor. Either remove the radiator draincock or tighten it and fill the cooling system properly with the prescribed coolant mix. After you have done everything, start the engine and also inspect it for leaks.
")
Related Jeep Cherokee Parts
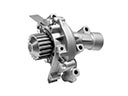 Jeep Cherokee Water Pump
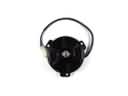 Jeep Cherokee Fan Motor
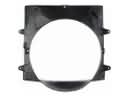 Jeep Cherokee Fan Shroud
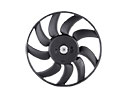 Jeep Cherokee Radiator fan
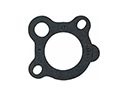 Jeep Cherokee Thermostat Gasket
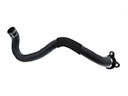 Jeep Cherokee Coolant Pipe
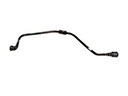 Jeep Cherokee Coolant Reservoir Hose
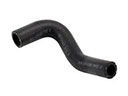 Jeep Cherokee Cooling Hose
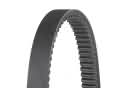 Jeep Cherokee Drive Belt
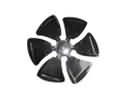 Jeep Cherokee Fan Blade
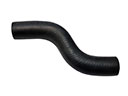 Jeep Cherokee Water Hose
 Jeep Cherokee Water Pump Gasket