JeepParts
My Garage
My Account
Cart
OEM Jeep Commander Seat Motor
Car Seat Motor- Select Vehicle by Model
- Select Vehicle by VIN
Select Vehicle by Model
orMake
Model
Year
Select Vehicle by VIN
For the most accurate results, select vehicle by your VIN (Vehicle Identification Number).
3 Seat Motors found

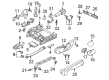
Jeep Commander Seat Track, Driver Side Part Number: 5138979AA

Jeep Commander Motor, Front Passenger Side Part Number: 5135155AA

Jeep Commander Motor, Front Driver Side Part Number: 5135113AB
Jeep Commander Seat Motor
Choose OEM Seat Motor that meet Jeep factory standards. Jeep designs and tests every component for precision and durability. Each Seat Motor follows strict manufacturing steps to lock in quality and fit. If your Jeep Commander matters to you, OEM parts make the smart choice. You'll get the exact look, feel, and performance you expect. Shop genuine Commander parts at the highly competitive prices online. Enjoy a manufacturer's warranty, a hassle-free return policy, and rapid delivery. No more guesswork with off brands. Get genuine parts with exact fit and true factory performance. Shop with confidence today at JeepPartsDeal.com.
Jeep Commander Seat Motor Parts and Q&A
- Q: How to Safely Remove a Seat Motor on Jeep Commander?A:You should start by separating and disconnecting the negative Battery Cable. If your front tilting motor does not function, remove that seat, then take the Seat Cushion and its pan out as well. First, disconnect the motor's electrical connection and then remove the bolts that hold the motor to the seat adjuster. If your height adjust motor doesn't work and your seat isn't all the way up, motor could move or rotate due to the height adjust spring, so use caution to avoid injury. Before removing the battery, move the seat up all the way unless the seat height adjust motion is broken. Remove the seat and seat cushion and pan as you started and next, disconnect the electrical connection to the motor. Untighten the motor from the seat adjuster, take off the screw and washer and finally remove the motor from the seat adjuster. If you notice any loose locking pawl, the pawl secured into the frame or a broken shear pin, just replace the height adjuster assembly immediately, because not doing so could result in dangerous injuries or death.
- Q: How to Safely and Effectively Service a Seat Motor on Jeep Commander?A:The first thing to do when servicing the power seat motor is to make sure the battery is safe by disconnecting its negative cable. To work on the front tilt motor, first remove the seat with the motor that does not tilt, then remove the seat's cushion and pan. Seat motor disconnection starts with taking out the fasteners holding it to the seat adjuster and then removing the electrical connector from the motor. For installation, set up the motor on the seat adjuster, screw it in until the force is 5 N.m (44 in. lbs.), connect the cable, replace the Seat Cushion, fasten the wire harness to the pan underneath, reassemble the seat and connect the battery negative cable, checking the system works properly. If the height adjust motor is not working and the seat is neither fully lowered nor fully raised, take care, since the assembly may be loaded. Separate the battery negative terminal, get rid of the problematic motor seat and remove the seat's pad and pan. First, disconnect the connector for the motor, take off the screw and washer from the motor shaft and then remove the fasteners tightly holding the motor to the seat adjuster. When putting in the motor, first raise the seat adjuster fully, place the motor where it will fit, add the motor shaft screw and washer loosely, cover it with screws tightened to 9 N.m (80 in. lbs.) and then tighten the motor shaft screw and washer to 6.5 N.m (57.5 in. lbs.). Restore the connection of the motor wire, place the seat cushion back in position, join the wire harness to the pan, assemble the seat, link the negative battery wire again and see if the power seat is working properly. Replace the height adjuster assembly immediately if you find a loose locking pawl, locking pawl active in the seat frame or a broken or missing shear pin.


Related Jeep Commander Parts
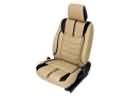 Jeep Commander Seat Covers
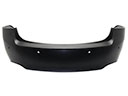 Jeep Commander Bumper Cover
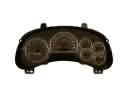 Jeep Commander Instrument Cluster
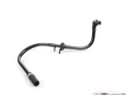 Jeep Commander Brake Booster Vacuum Hose
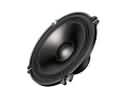 Jeep Commander Car Speakers
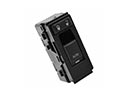 Jeep Commander Door Lock Switch
 Jeep Commander Liftgate Lock Actuator
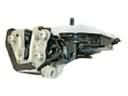 Jeep Commander Rear Passenger Door Handle Latch
 Jeep Commander Seat Cushion
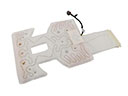 Jeep Commander Seat Heater
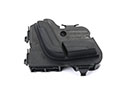 Jeep Commander Seat Switch
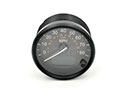 Jeep Commander Speedometer