JeepParts
My Garage
My Account
Cart
OEM Jeep Grand Cherokee Universal Joint
U-Joint- Select Vehicle by Model
- Select Vehicle by VIN
Select Vehicle by Model
orMake
Model
Year
Select Vehicle by VIN
For the most accurate results, select vehicle by your VIN (Vehicle Identification Number).
5 Universal Joints found


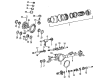
Jeep Grand Cherokee Axle Shaft, Front Part Number: 4137757
$73.28 MSRP: $165.00You Save: $91.72 (56%)Ships in 1-2 Business Days


Jeep Grand Cherokee Universal Joints Part Number: 5014733AB
$43.51 MSRP: $74.45You Save: $30.94 (42%)Ships in 1-3 Business Days


Jeep Grand Cherokee Universal Joints Part Number: 5015694AB
$66.90 MSRP: $100.00You Save: $33.10 (34%)Ships in 1-2 Business Days
Jeep Grand Cherokee Universal Joints, Front Part Number: J8126637
$51.75 MSRP: $66.61You Save: $14.86 (23%)Ships in 1-2 Business Days
Jeep Grand Cherokee Universal Joints Part Number: J8130750
Jeep Grand Cherokee Universal Joint
Choose OEM Universal Joint that meet Jeep factory standards. Jeep designs and tests every component for precision and durability. Each Universal Joint follows strict manufacturing steps to lock in quality and fit. If your Jeep Grand Cherokee matters to you, OEM parts make the smart choice. You'll get the exact look, feel, and performance you expect. Shop genuine Grand Cherokee parts at the highly competitive prices online. Enjoy a manufacturer's warranty, a hassle-free return policy, and rapid delivery. No more guesswork with off brands. Get genuine parts with exact fit and true factory performance. Shop with confidence today at JeepPartsDeal.com.
Universal Joint in the Jeep Grand Cherokee cars holds a very important function of connecting the driveshaft with the differential to provide the necessary lateral mobility for the proper functioning of the car. This mechanical part offset angle alterations caused by axle assembly and suspension movement making it efficient on both rocky terrains and high ways. Over the time that Jeep has been manufacturing the Grand Cherokee, several types of Universal Joints have been incorporated within the transmission system such as the conventional universal joint and their improved versions. It has realized enhancements over the basic design which has its applications in civil engineering with an enhanced durability factor. The fact that the Universal Joint has stayed relevant over time is evident through the Jeep Grand Cherokee which has built its reputation, reliability and performance factor on some of its engineering factors such as the Universal Joint.
Jeep Grand Cherokee Universal Joint Parts and Q&A
- Q: How to Maintain and Repair a Universal Joint on Jeep Grand Cherokee?A:Before servicing or repairing one universal joint, take out the propeller shaft first. Hit the bearing cap assembly on its outside with a drift to loosen the snap ring and then take out the snap rings from both sides of the yoke. Place the yoke in an arbor press or vise so that the large socket under it fits the bearing cap and the grease fitting is pointing up if it's present. Press the upper bearing cap through the yoke by using a socket with a smaller outside diameter which should release the lower bearing cap too. After you have pressed the bearing cap, tap the yoke ear by the bearing cap if it won't pull out with your hands. After turning the yoke over and straightening the cross in the open hole, gently push the end of the cross to remove the remaining bearing cap. As you install the cross or bearing cap, adjust until it's straight to avoid scratching the walls in the yoke bore. While assembling, put extreme pressure (EP) N.L.G.I. Grade 1 or 2 grease inside the yoke bores. Place the cross into the yoke, making sure any lube fitting is pointed upwards. Then cover the trunion with a bearing cap, make sure the needle bearings face up and line up the bearing cap with the yoke bore. Push the bearing cap snugly against the yoke bore, so it covers the entire snap ring groove and then add in a snap ring. Proceed in the same manner for the opposite bearing cap too. For a stiff or stuck joint, hammer the yoke gently to settle the needle bearings firmly in place. If your boat has a lube fitting, make sure to grease it before placing back the propeller shaft.
- Q: How to Maintain Universal Joints for Optimal Performance on Jeep Grand Cherokee?A:Single parts of cardan universal joints are not repairable; the entire assembly should be changed when they start to fail or are leaking. The first step is to take off the propeller shaft. Gently hit around the outer edge of the bearing cap assembly to get the snap rings moving, then remove the snap rings from both sides of the yoke. Place the yoke into either an arbor press or a vise, together with a large socket that will contain the bearing cap underneath. Be sure the fixture's grease fitting, if there is one, is up. Slide a socket over the upper bearing cap's outer end until it fits inside the cap and use it to push the lower bearing cap up and out. Should the bearing cap not come free by hand when you press, use a hammer to tap the yoke ear next to it. Lay the yoke with the crankshaft down and push the cross straight and level into the empty hole. Then, carefully press the end of the cross to pop out the other bearing cap. During installation, make sure the cross or bearing cap is level so the walls of the yoke bore are not scratched. Apply EP N.L.G.I. Grade 1 or 2 grease, inside each yoke bore, before installing the assembly to allow it to fit properly. Make sure the cross is in the yoke, with the lube fitting facing upward if your aircraft has one. Insert a bearing cap onto the trunnion and line up the cap bore with the yoke, so the needle bearings stay upright in their places. Place the bearing cap into the top of the yoke bore so there is plenty of room for a snap ring and install the snap ring. Attach the other bearing cap in the exact same way and in case the yoke feels stiff or bound, whack it lightly with a soft hammer to push the needle bearings into place. If your engine has a grease fitting on the lube connection, grease it. Afterward, install the propeller shaft.


Related Jeep Grand Cherokee Parts
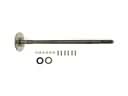 Jeep Grand Cherokee Axle Shaft
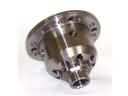 Jeep Grand Cherokee Differential
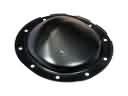 Jeep Grand Cherokee Differential Cover
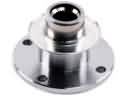 Jeep Grand Cherokee CV Joint Companion Flange
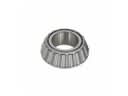 Jeep Grand Cherokee Differential Pinion Bearing
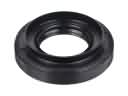 Jeep Grand Cherokee Differential Seal
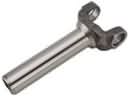 Jeep Grand Cherokee Driveshaft Yokes
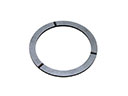 Jeep Grand Cherokee Mainshaft Washer
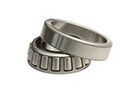 Jeep Grand Cherokee Pinion Bearing
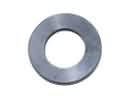 Jeep Grand Cherokee Pinion Washer
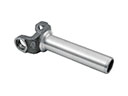 Jeep Grand Cherokee Slip Yoke
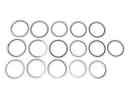 Jeep Grand Cherokee Transfer Case Shim
Browse Jeep Grand Cherokee Universal Joint by Years
2004
2003
2002
2001
2000
1999
1998
1997
1996
1995
1994
1993