JeepParts
My Garage
My Account
Cart
OEM Jeep Grand Cherokee Valve Stem Seal
Engine Valve Seal- Select Vehicle by Model
- Select Vehicle by VIN
Select Vehicle by Model
orMake
Model
Year
Select Vehicle by VIN
For the most accurate results, select vehicle by your VIN (Vehicle Identification Number).
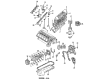
13 Valve Stem Seals found


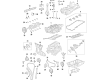
Jeep Grand Cherokee Valve Seals Part Number: 5048348AA
$4.09 MSRP: $6.20You Save: $2.11 (35%)Ships in 1-2 Business Days


Jeep Grand Cherokee Valve Seals, Black/Brown Part Number: 5048025AA
$3.35 MSRP: $4.95You Save: $1.60 (33%)


Jeep Grand Cherokee Valve Seals Part Number: 53009886
$6.02 MSRP: $8.95You Save: $2.93 (33%)Ships in 1-2 Business Days


Jeep Grand Cherokee Valve Seals Part Number: 5037798AA
$12.83 MSRP: $18.95You Save: $6.12 (33%)Ships in 1-2 Business Days

Jeep Grand Cherokee Valve Seals Part Number: 53009887
$10.79 MSRP: $15.65You Save: $4.86 (32%)Ships in 1-2 Business Days


Jeep Grand Cherokee Valve Seals Part Number: 53021578AA
$10.96 MSRP: $15.90You Save: $4.94 (32%)Ships in 1-3 Business Days


Jeep Grand Cherokee Valve Seals Part Number: 53021974AA
$8.12 MSRP: $11.70You Save: $3.58 (31%)Ships in 1-2 Business Days


Jeep Grand Cherokee Valve Seals, Black/Brown Part Number: 5184168AB
$9.28 MSRP: $13.35You Save: $4.07 (31%)Ships in 1-2 Business Days


Jeep Grand Cherokee Valve Seals Part Number: 53022090AB
$11.60 MSRP: $16.70You Save: $5.10 (31%)Ships in 1-2 Business Days

Jeep Grand Cherokee Valve Seals Part Number: 4893586AA
$4.82 MSRP: $7.35You Save: $2.53 (35%)Ships in 1-2 Business Days
Jeep Grand Cherokee Valve Seals Part Number: 5175438AA
$13.62 MSRP: $30.35You Save: $16.73 (56%)Ships in 1-2 Business Days

Jeep Grand Cherokee Valve Seals Part Number: 68295813AA
$4.47 MSRP: $6.50You Save: $2.03 (32%)Ships in 1-2 Business Days
Jeep Grand Cherokee Seal Valve Guide Part Number: 68093294AA
$6.32 MSRP: $9.20You Save: $2.88 (32%)Ships in 1-2 Business Days
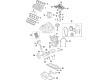
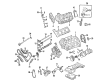
Jeep Grand Cherokee Valve Stem Seal
Choose OEM Valve Stem Seal that meet Jeep factory standards. Jeep designs and tests every component for precision and durability. Each Valve Stem Seal follows strict manufacturing steps to lock in quality and fit. If your Jeep Grand Cherokee matters to you, OEM parts make the smart choice. You'll get the exact look, feel, and performance you expect. Shop genuine Grand Cherokee parts at the highly competitive prices online. Enjoy a manufacturer's warranty, a hassle-free return policy, and rapid delivery. No more guesswork with off brands. Get genuine parts with exact fit and true factory performance. Shop with confidence today at JeepPartsDeal.com.
A Jeep Grand Cherokee relies on its Valve Stem Seal as an essential part which boosts both reliability as well as performance capabilities. The Valve Stem Seal sits tightly around the stem to stop oil leakages into the combustion chambers as it allows Smooth movement of the valve stem. The system plays an essential role to sustain peak engine performance and reduce oil usage specifically crucial for multiple Jeep Grand Cherokee vehicle model generations. Every Grand Cherokee version incorporates distinct types of Valve Stem Seals since the main purpose remains to create effective sealing and maintain engine operational performance. The proper working condition of Valve Stem Seals eliminates excessive oil drain and engine power reduction which leads to better performance and safety measures. The Jeep Grand Cherokee enhances its famous durability characteristics because its Valve Stem Seal maintains high standards of robust construction and reliability in the automotive industry. The Valve Stem Seal supports the overall driving performance because it helps maintain smooth engine functions for Jeep enthusiasts. The Valve Stem Seal stands as an essential component of the Jeep Grand Cherokee because it merges exceptional performance with safety features while demonstrating modern engineering capabilities thus solidifying this SUV at the top of luxury sectors.
Jeep Grand Cherokee Valve Stem Seal Parts and Q&A
- Q: How to Service and Repair a Valve Stem Seal with the Engine Cylinder Head Still Installed on Jeep Grand Cherokee?A:Start by looking for damaged and raised areas on the valve stems when the engine cylinder head is on the block. Replace any damaged valves. After removing the cylinder head bolt cover, remove the nuts, assemble capscrews, bridge and pivot assemblies and Rocker Arms to gain access to the valve springs. Hold the push rods, bridges, pivots and rocker arms in precisely the spots and arrangement they had originally. Check over the springs and clamps for cracks, replace them if they appear weak and take out the spark plug(s) next to the cylinder(s) that have valve springs. Place the flexible portion of the air adaptor on the A/C service port and inflate the system to at least 621 kPa (90 psi), to hold the valves against their seats when working on the No.1 cylinder of a car with an air conditioner. Knock the retainer or tip with a rawhide malt to make the lock loose, then press it down using the Valve Spring Compressor Tool MD-998772A and remove the lock. Remove the valve spring, the retainer and the valve stem seals, as each side has different intake and exhaust valve stem seals shown as INT (Gray) and EXH (Brown), respectively. When installing, make sure the valve stem seal is pushed all the way down over the stem and the valve guide boss. Add the valve spring and retainer, compress the spring using the MD-998772A valve spring compressor, insert the valve locks, relax the spring by removing the tool and finally hit the spring to ensure it is correctly seated. Pull out the air pressure from the tire, take off the air hose, get rid of the adaptor inside the plug hole and install the spark plug. Rinse and repeat for the rest of the valve springs, too. Push rod installation is complete once the bottom end of each rod lines up with the plunger cap seat inside the hydraulic valve tappet and then the rocker arms, pivots and bridge are placed as they were original. After every four shoulder screws on the bridge are tightened, go on to the next four with alternating rotations until you reach 28 Nm (21 ft. lbs.).

Related Jeep Grand Cherokee Parts
 Jeep Grand Cherokee Timing Chain
 Jeep Grand Cherokee Oil Pan
 Jeep Grand Cherokee Cylinder Head
 Jeep Grand Cherokee Transmission Mount
 Jeep Grand Cherokee Cam Gear
 Jeep Grand Cherokee Crankshaft Seal
 Jeep Grand Cherokee Engine Mount Bracket
 Jeep Grand Cherokee Lash Adjuster
 Jeep Grand Cherokee Motor And Transmission Mount
 Jeep Grand Cherokee Oil Pan Baffle
 Jeep Grand Cherokee Piston
 Jeep Grand Cherokee Timing Chain Tensioner