JeepParts
My Garage
My Account
Cart
OEM Jeep Side Marker Light
Side Marker Lamp- Select Vehicle by Model
- Select Vehicle by VIN
Select Vehicle by Model
orMake
Model
Year
Select Vehicle by VIN
For the most accurate results, select vehicle by your VIN (Vehicle Identification Number).
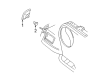
46 Side Marker Lights found


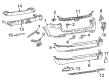
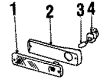
Jeep Reflector, Rear Passenger Side Part Number: 55112678AA
$23.37 MSRP: $34.20You Save: $10.83 (32%)Ships in 1-3 Business DaysProduct Specifications- Other Name: Reflector - Fascia; Reflector Panel, Rear Right; Bumper Reflector; Reflector Fascia
- Position: Rear Passenger Side


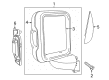
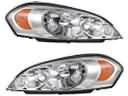
Jeep Side Marker Lamp, Front Passenger Side Part Number: 55078144AA
$63.71 MSRP: $132.00You Save: $68.29 (52%)Ships in 1-2 Business DaysProduct Specifications- Other Name: Lamp - Side Marker; Front Right Light Assembly; Turn Signal Lights.; Lamp Side Marker Socket Is Not Serviced Separately; Lamp Side Marker Socket Not Serviced Separately
- Position: Front Passenger Side


Jeep Signal Lamp, Front Passenger Side Part Number: 68361956AA
$68.24 MSRP: $102.00You Save: $33.76 (34%)Ships in 1-2 Business DaysProduct Specifications- Other Name: Lamp - Turn Signal; Turn Signal Light Assembly, Center Right, Front Right; Turn Signal Lights; Lamp Turn Signal
- Position: Front Passenger Side


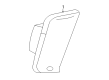
Jeep Side Marker Lamp, Driver Side Part Number: 55156883AB
$45.79 MSRP: $67.85You Save: $22.06 (33%)Ships in 1-3 Business DaysProduct Specifications- Other Name: Lamp - Side Marker; Left Side Marker Light Assembly; Turn Signal; Parking Light; Lamp Side Marker; Side Marker Light
- Position: Driver Side

Jeep Side Marker Lamp, Front Driver Side Part Number: 55078145AA
$89.51 MSRP: $132.00You Save: $42.49 (33%)Ships in 1-3 Business DaysProduct Specifications- Other Name: Lamp - Side Marker; Front Left Light Assembly; Turn Signal Lights.; Lamp Side Marker Socket Is Not Serviced Separately; Lamp Side Marker Socket Not Serviced Separately
- Position: Front Driver Side


Jeep Side Marker Lamp, Passenger Side Part Number: 55155628AC
$21.77 MSRP: $31.85You Save: $10.08 (32%)Ships in 1-2 Business DaysProduct Specifications- Other Name: Lamp - Side Marker; Side Marker Light, Right; Side Marker Lights; Turn Signal Lights; Other Lamp; Lamp Side Marker; Side Marker Light
- Position: Passenger Side
- Replaces: 55155628AB


Jeep Reflector, Rear Driver Side Part Number: 55112679AA
$23.27 MSRP: $34.20You Save: $10.93 (32%)Ships in 1-2 Business DaysProduct Specifications- Other Name: Reflector - Fascia; Reflector Panel, Rear Left; Bumper Reflector; Reflector Fascia
- Position: Rear Driver Side


Jeep Side Marker Lamp, Driver Side Part Number: 55155629AC
$23.37 MSRP: $34.20You Save: $10.83 (32%)Ships in 1-2 Business DaysProduct Specifications- Other Name: Lamp - Side Marker; Side Marker Light, Left; Side Marker Lights; Turn Signal Lights; Other Lamp; Lamp Side Marker; Side Marker Light
- Position: Driver Side
- Replaces: 55155629AB


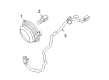
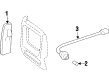
Jeep Repeater Lamp Part Number: 4806224AE
$25.76 MSRP: $37.70You Save: $11.94 (32%)Ships in 1-2 Business DaysProduct Specifications- Other Name: Lamp - Side Repeater; Turn Signal & Parking Light Lens; Light Assembly; Side Repeater.; Bulbs; Lamp Side Repeater
- Replaces: 4806224AC, 4806224AB, 4806224AD


Jeep Side Marker Lamp, Front Driver Side Part Number: 68256050AA
$33.35 MSRP: $48.85You Save: $15.50 (32%)Ships in 1-2 Business DaysProduct Specifications- Other Name: Lamp - Side Marker; Front Left Light Assembly; Turn Signal Lights.; Lamp Side Marker
- Position: Front Driver Side


Jeep Side Marker Lamp, Front Passenger Side Part Number: 68256049AA
$33.35 MSRP: $48.85You Save: $15.50 (32%)Ships in 1-2 Business DaysProduct Specifications- Other Name: Lamp - Side Marker; Front Right Light Assembly; Turn Signal Lights.; Lamp Side Marker
- Position: Front Passenger Side


Jeep Side Marker Lamp, Front Driver Side Part Number: 68302120AB
$54.89 MSRP: $80.35You Save: $25.46 (32%)Ships in 1-2 Business DaysProduct Specifications- Other Name: Lamp - Side Marker; Front Left/Right Light Assembly; Turn Signal Lights.; Lamp Side Marker Right; Lamp Side Marker
- Position: Front Driver Side
- Replaces: 68302120AA


Jeep Turn Signal Lamp Part Number: 56005099AB
$64.90 MSRP: $82.35You Save: $17.45 (22%)Ships in 1-2 Business DaysProduct Specifications- Other Name: Lamp - Parking, Turn, Side Marker; Turn Signal / Parking Light Assembly; Park Turn Signal Lamp.; Lamp Parking, Turn, Side Marker

Jeep Side Marker Lamp, Front Driver Side Part Number: 68378433AB
$37.05 MSRP: $54.20You Save: $17.15 (32%)Ships in 1-2 Business DaysProduct Specifications- Other Name: Lamp - Side Marker; Side Marker Light, Front Left; Side Marker Lights; Turn Signal Lights
- Position: Front Driver Side
Jeep Side Marker Lamp, Front Passenger Side Part Number: 68378432AB
$37.05 MSRP: $54.20You Save: $17.15 (32%)Ships in 1-2 Business DaysProduct Specifications- Other Name: Lamp - Side Marker; Side Marker Light, Front Right; Side Marker Lights; Turn Signal Lights
- Position: Front Passenger Side


Jeep Side Marker Lamp Part Number: J0994021
Product Specifications- Other Name: Side Mark; Side Marker Light Lens; Lamp; Lens; Lamp, Marker


Jeep Turn Signal Lamp Part Number: 56005098AB
Product Specifications- Other Name: Lamp - Parking, Turn, Side Marker; Turn Signal / Parking Light Assembly; Park Turn Signal Lamp.; Lamp Parking, Turn, Side Marker


Jeep Side Marker Lamp Part Number: 56000111
Product Specifications- Other Name: Lamp - Side Marker; Side Marker Light Assembly; Side Marker Leftamp; Side Marker Light; Parking Light; Lamp, Side Marker, Right; Lamp, Marker, Right; Lamp, Marker, Left; Lamp, Marker Left


Jeep Side Marker Lamp Part Number: 56000110
Product Specifications- Other Name: Lamp - Side Marker; Lamp, Side Marker, Right; Lamp, Marker, Right; Lamp, Marker Right


Jeep Side Marker Lamp Part Number: 55055146
Product Specifications- Other Name: Lamp - Side Marker; Side Marker Lights; Turn Signal Lights; Side Marker Light; Other Lamp; Lamp Side Marker
| Page 1 of 3 |Next >
1-20 of 46 Results
Jeep Side Marker Light
OEM parts sourced directly from Jeep deliver superior quality, long lasting strength, and a precise fit you can trust. Each item goes through strict quality checks to ensure safety, toughness, and performance that matches your factory equipment. At JeepPartsDeal online shop, you'll get top-quality, budget-friendly OEM Jeep Side Marker Light for your vehicle. We focus on giving you a high standard without pushing up the price. Our full selection of genuine factory products comes backed by the original manufacturer's warranty. You'll love our fast delivery, seamless shopping experience, and convenient return policy, saving you all the hassle.
Jeep Side Marker Light is with you, announcing your position and the direction to all people around. Jeep expanded into the wartime workhorse and a go-anywhere badge that lets the driver enjoy the open skies and sturdy frames as well as unshakable four-wheel traction and a community that exchanges trail tales more than spec sheets, which reinforced the culture of off-road recovery camaraderie. Jeep combines mechanical grit with modern brains, allowing you to call snow, sand, or mud to Selec-Terrain and voice commands and over-the-air updates mean the interior is up to date as your phone without drowning you in useless options. Jeep does not flinch, confident in the hardness of its axles, clear views, and plain materials to withstand rock hits, unexpected weather, and weekend adventurers and daily commuters have the same level of assurance, both on the driveway and on the ridgeline, without having to kowtow to showroom shine or corporate jargon. The Side Marker Light switches on with the main lamps when the sun sets or the roadway is busy, and the Jeep is wired to federal color codes, so amber on the front and red on the back, marking the car's position as it is passing lanes, at nightfall, and in rainy weather when the car abruptly turns. The Side Marker Light is also compatible with turn signals where it will pulse in sync with the turn signal to make it noticeable to the other drivers, eliminating surprises in the blind spots and simplifying a night merger. The Side Marker Light is engineered to be tough enough to withstand discoloration, but simple enough to be replaced in a few minutes, making it a low-cost insurance against tickets, fender scrapes, and the type of headaches that begin when nobody notices you.
Jeep Side Marker Light Parts and Q&A
- Q: How to Replace a Side Marker Light on Jeep Wrangler?A:The first step for changing the side marker lamp is to isolate the battery's negative cable. After that, twist the side marker bulb socket on the underside of the fender one-third turn to the left and pull it out of the side marker lamp body. Pull the bulb directly at an angle away from its base to remove it from the socket. Insert your replacement bulb into the socket and fit the new bulb with the socket back into the side marker lamp housing. After that, reconnect the end of the negative cable back to the battery.
- Q: How to Service the Front Side Marker Light on Jeep Liberty?A:Cars sold in North America are serviced at the front side marker lamp using a series of steps. Rotate the front wheels all the way to the side close to the light you are servicing and then remove the negative cable from the battery. Come to the four fasteners that tie the next right or left front fender wheel liner in place under the front bumper fascia and on the outside frame rail. Get behind the front side marker lamp unit housing by sliding your hand between the front of the wheel liner and the lower fascia. Hold the front side marker bulb socket at the back of the lamp housing after rotating it counterclockwise about 30 degrees to unlock it and after that, pull the socket and bulb straight out of the keyed opening. Pull the base of the bulb to take it out of the socket. Allow the base of the new bulb to sit easily in the marker bulb at the front side of the headlight, then push it in straight. Turn around the housing again to its previous position, slide the bulb and socket into the socket hole and lock them into place. Insert all four fasteners in the front of the wheel liner to secure it, making sure the socket is tight and won't move. Then, re-connect the battery's negative cable. If a lamp is installed, you should turn the front wheels completely, unplug the negative battery terminal and remove the fasteners just as with a non-equipped vehicle. From the rear of the front side marker lamp, grab the bulb socket and open it if the vehicle is so equipped. To disassemble, take your socket and bulb out, lift the small clip on the lower part of the lamp housing off and push the lower portion of the lamp through the fascia to come free from the top. Pull the lamp off the outside edge of the fascia. For installation, fit the unit with the front side marker lamp into the mounting hole, insert the notch on the top tab into the notch on the base and drive the pin through the round hole there. Slide the retaining clip onto the pin at the back of the lamp housing, then set the socket and bulb in it if you have those, making sure it is locked. Secure the four fasteners again and link the battery negative cable once more.


Related Jeep Parts
 Jeep Headlight
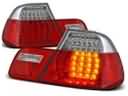 Jeep Tail Light
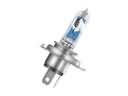 Jeep Headlight Bulb
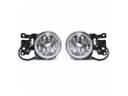 Jeep Fog Light
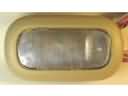 Jeep Dome Light
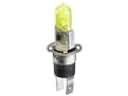 Jeep Fog Light Bulb
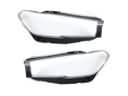 Jeep Headlight Cover
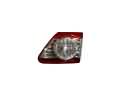 Jeep Back Up Light
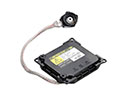 Jeep Hid Bulb Ballast
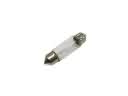 Jeep Interior Light Bulb
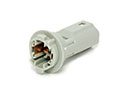 Jeep Light Socket
 Jeep Lighting Control Module