JeepParts
My Garage
My Account
Cart
OEM Jeep Wrangler Pressure Plate
Clutch Pressure Plate- Select Vehicle by Model
- Select Vehicle by VIN
Select Vehicle by Model
orMake
Model
Year
Select Vehicle by VIN
For the most accurate results, select vehicle by your VIN (Vehicle Identification Number).
5 Pressure Plates found


Jeep Wrangler Pressure Plate Part Number: 68273845AD
$266.92 MSRP: $374.00You Save: $107.08 (29%)
Jeep Wrangler Pressure Plate Part Number: 68044869AA
$456.94 MSRP: $542.00You Save: $85.06 (16%)Ships in 1-2 Business DaysJeep Wrangler Pressure Plate Part Number: 4874175AD
$366.07 MSRP: $400.00You Save: $33.93 (9%)Ships in 1-2 Business DaysJeep Wrangler Pressure Plate Part Number: 4626211AB
Jeep Wrangler Pressure Plate Part Number: 52107570AB
Jeep Wrangler Pressure Plate
Choose OEM Pressure Plate that meet Jeep factory standards. Jeep designs and tests every component for precision and durability. Each Pressure Plate follows strict manufacturing steps to lock in quality and fit. If your Jeep Wrangler matters to you, OEM parts make the smart choice. You'll get the exact look, feel, and performance you expect. Shop genuine Wrangler parts at the highly competitive prices online. Enjoy a manufacturer's warranty, a hassle-free return policy, and rapid delivery. No more guesswork with off brands. Get genuine parts with exact fit and true factory performance. Shop with confidence today at JeepPartsDeal.com.
Jeep Wrangler Pressure Plate Parts and Q&A
- Q: How to Maintain and Fix a Pressure Plate on Jeep Wrangler?A:The pressure plate should be serviced or repaired after removing the transmission. Should you need to put on the original clutch cover again, put a mark on the Flywheel with paint or a scriber to help assembly. Removing the bolts from the clutch cover for replacement is not important, however, you must turn and unscrew the bolts in rotation when changing the original cover to prevent damage to the clutch. After you have removed the cover bolts, remove the cover and disc. Gently abrade the flywheel face with 180 grit emery cloth and afterward use a wax and grease remover to clean it. It is important to lubricate the Pilot Bearing with Mopar high temperature bearing grease. Connect the clutch disc to the splines on the transmission input shaft to see if it slides effortlessly. Keep the disc on the shaft and then test the face runout using a dial indicator at the disc hub and 6 mm (1/4 inch) from its edge; if it exceeds 0.5 mm (0.020 inch), you need a new clutch disc. Position the clutch disc so that the marking labeled flywheel side (if any) is opposite the point on the flywheel known as the pilot bearing. Check the pressure plate on the clutch cover. If it is worn, heat checked, cracked or scored, replace it. Put the clutch alignment tool through both the clutch disc and the pilot bearing, keeping the disc's hub marked Flywheel Side against the flywheel. Position the clutch cover over the disc and the flywheel and use your hands to tighten the clutch cover bolts just a bit. Screw each bolt by hand, with set of 3 on each side, then tighten 3 larger bolts 3/4s of the way, switching from each set, before finishing off by tightening all bolts fully. After cleaning, apply a light coat of high-temperature bearing grease to the disc hub and transmission's input shaft splines, do not add too much to prevent grease on the disc and reinstall the transmission.
Related Jeep Wrangler Parts
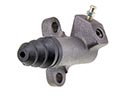 Jeep Wrangler Clutch Slave Cylinder
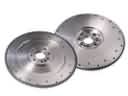 Jeep Wrangler Flywheel
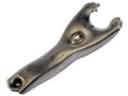 Jeep Wrangler Clutch Fork
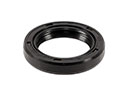 Jeep Wrangler Automatic Transmission Input Shaft Seal
 Jeep Wrangler Automatic Transmission Shift Levers
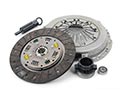 Jeep Wrangler Clutch Disc
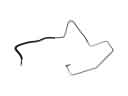 Jeep Wrangler Clutch Hydraulic Lines
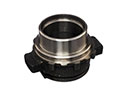 Jeep Wrangler Clutch Release Bearing
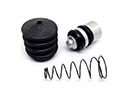 Jeep Wrangler Clutch Slave Repair Kit
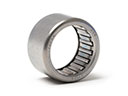 Jeep Wrangler Needle Bearing
 Jeep Wrangler Pilot Bearing
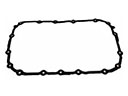 Jeep Wrangler Transmission Gasket