JeepParts
My Garage
My Account
Cart
OEM 2000 Dodge Caravan ABS Control Module
Anti Lock Brake Control Module- Select Vehicle by Model
- Select Vehicle by VIN
Select Vehicle by Model
orMake
Model
Year
Select Vehicle by VIN
For the most accurate results, select vehicle by your VIN (Vehicle Identification Number).
3 ABS Control Modules found


2000 Dodge Caravan Control Module Part Number: 5013865AB
Product Specifications- Other Name: Master Cylinder - Anti-Lock Brake; Electronic Control; Control Unit Package Anti-Lock Brake
- Replaces: 4882649AA, 5013865AA
- Item Weight: 2.20 Pounds
- Condition: New
- Fitment Type: Direct Replacement
- SKU: 5013865AB
- Warranty: This genuine part is guaranteed by Mopar's factory warranty.
2000 Dodge Caravan Control Module Part Number: 5013864AB
Product Specifications- Other Name: Control - Anti-Lock Brake; ABS Control Module; Electronic Control; Control Unit Package Anti-Lock Brake
- Replaces: 4882648AB, 4882648AA
- Item Weight: 2.10 Pounds
- Item Dimensions: 6.3 x 6.3 x 3.5 inches
- Condition: New
- Fitment Type: Direct Replacement
- SKU: 5013864AB
- Warranty: This genuine part is guaranteed by Mopar's factory warranty.

2000 Dodge Caravan Modulator Valve Part Number: 4882646
Product Specifications- Other Name: Master Cylinder - Anti-Lock Brake System; ABS Control Module; ABS Control Unit; Hydraulic Control Unit Anti-Lock Brake System
- Item Weight: 4.90 Pounds
- Item Dimensions: 7.0 x 7.0 x 6.2 inches
- Condition: New
- Fitment Type: Direct Replacement
- SKU: 4882646
- Warranty: This genuine part is guaranteed by Mopar's factory warranty.
2000 Dodge Caravan ABS Control Module Parts and Q&A
- Q: How to Service and Repair the ABS Control Module for Antilock Brakes on 2000 Dodge Caravan?A: Initially, before handling and repairing the Hydraulic Control Assembly, unplug the negative battery cable and block it off from other systems. When you are removing the brake tubes from the HCU, set the brake pedal down a little further than 1 inch using a brake pedal depressor. Place jackstands underneath the vehicle or a frame contact style hoist. Take out the routing clip linking the wiring harness to the ICU mount on the vehicle. Do not use a 12-volt power source on any terminals of the 25 way HCU connector if it is disconnected. Take the 25 way connector out of the CAB by holding the lock and carefully pulling it. Wipe the surfaces of the HCU and brake tube nuts with Mopar Brake Parts Cleaner to ensure dirt does not get in to the ports. Pull the brake tubes from both ports in the HCU, unscrew the 3 bolts securing the ICU bracket to the car's front suspension crossmember, then remove the ICU and bracket as a unit. Take out the 3 bolts to separate the ICU from the bracket. Fix the ICU onto the mounting bracket and attach it with the 3 bolts which should be tightened to 11 Nm (97 inch lbs.). Because of their special corrosion treatment, use Mopar original or replacement bolts when installing the ice cooler bracket. Put the ICU and its bracket assembly back onto the front suspension crossmember and fasten with 3 bolts tightened to 28 Nm (250 inch lbs.). Make sure the brake tubes are nicely aligned, not touching one another or nearby components and add all of the spacer clips back onto the pipes. Attach the six chassis brake tubes to their appropriate ports on the HCU valve block, turning the tube nuts no more than 17 Nm (145 inch lbs.). Make sure the seal is in place before connecting the 25 way connector to the CAB. Insert the connector into the socket of the CAB and then slide it down. Make sure the left CAB wire is clipped to the ICU bracket so it doesn't contact the brake tubes or car body. Screw in the routing clips onto the brake tubes, bring the vehicle down, connect the negative cable to the battery and bleed the base and ABS hydraulic systems. At last, check the base and antilock brake systems by testing the vehicle during a road test.
Related 2000 Dodge Caravan Parts
 2000 Dodge Caravan Brake Booster
 2000 Dodge Caravan Brake Caliper
 2000 Dodge Caravan Speed Sensor
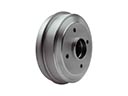 2000 Dodge Caravan Brake Drum
 2000 Dodge Caravan Brake Disc
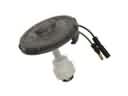 2000 Dodge Caravan Brake Fluid Level Sensor
 2000 Dodge Caravan Brake Line
 2000 Dodge Caravan Brake Pad
 2000 Dodge Caravan Brake Proportioning Valve
 2000 Dodge Caravan Hydraulic Hose
 2000 Dodge Caravan Parking Brake Shoe
 2000 Dodge Caravan Wheel Stud