JeepParts
My Garage
My Account
Cart
OEM 2000 Dodge Caravan Brake Booster
Brake Power Booster- Select Vehicle by Model
- Select Vehicle by VIN
Select Vehicle by Model
orMake
Model
Year
Select Vehicle by VIN
For the most accurate results, select vehicle by your VIN (Vehicle Identification Number).
2 Brake Boosters found

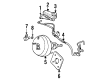
2000 Dodge Caravan Brake Booster Part Number: 4721338AA
Product Specifications- Other Name: Power Brake; Booster Assembly; Booster Power Brake
- Item Weight: 9.60 Pounds
- Condition: New
- Fitment Type: Direct Replacement
- SKU: 4721338AA
- Warranty: This genuine part is guaranteed by Mopar's factory warranty.

2000 Dodge Caravan Brake Booster Part Number: 4797614
Product Specifications- Other Name: Booster - Power Brake; Booster Assembly, Brake (Bendix); Booster Power Brake
- Item Weight: 9.60 Pounds
- Item Dimensions: 13.1 x 12.4 x 12.4 inches
- Condition: New
- Fitment Type: Direct Replacement
- SKU: 4797614
- Warranty: This genuine part is guaranteed by Mopar's factory warranty.
2000 Dodge Caravan Brake Booster Parts and Q&A
- Q: How to Remove and Reinstall a Master Cylinder from a Brake Booster on 2000 Dodge Caravan?A: Before taking the master cylinder out of the vacuum brake booster, you must push the brake pedal until you feel a firm pressure when the engine is not running. First, press the brake four or five times before disconnecting the two battery cables and taking out the thermal guard and battery. Remove the air inlet resonator and its hoses together from the throat of the air cleaner and the throttle body. If the speed control is there, unfasten the wiring connector from the speed control servo and take away the vacuum lines from the servo and its reservoir on the battery tray. Remove the bolt connected to the speed control servo bracket at the rear of the battery tray, then pull the bracket forward enough to get it out. Take out the two bolts and the nut underneath the battery tray that hold it in place, then unplug the brake fluid level sensor's wiring in the master cylinder reservoir. Use Mopar Brake Parts Cleaner to wipe the region around the master cylinder where the power brake booster is installed. Unclasp the connection between the drain hose for the wiper module and the brake tube at the master cylinder, remove the drain hose and undo the two nuts holding the master cylinder to the vacuum booster, as you don't have to remove the brake tubes. Cut the brake tubes as an assembly from the car and then put the assembly on the left motor mount. Undo the fitting between the vacuum hose and the check valve on the vacuum booster instead of removing the valve from the booster. Under the instrument panel, identify the vacuum booster input rod to brake pedal attachment and reach the retaining clip on the brake pedal pin with a small screwdriver. Once removed, toss the clip aside. From underneath the dash, around the steering column and pedal bracket area, unscrew the four nuts holding the vacuum booster to the dashboard. Take the vacuum booster forward up until the mounting studs are clear of the dash panel and then tilt it up and toward the center of the vehicle for easy access. See to it that the vacuum booster installation does not trap the heater hoses. Put the vacuum booster onto the dash panel and attach four mounting nuts, tightening them to a torque of 29 Nm (250 inch lbs.). Lubricate the brake pedal pin area with a lubriplate, link the input rod of your vacuum booster to the pin and add a replacement retaining clip. Join the vacuum line to the check valve in the vacuum booster and always replace the master cylinder's vacuum seal with a new one when you remove the master cylinder for service. Gently press a soft tool into the slot at the master cylinder mounting flange and replace the old seal with a new one. Put the master cylinder on the studs and make sure the push rod points at the master cylinder piston. After that, secure both nuts with a torque of 25 Nm (225 inch lbs.). Plug back in the wiper module drain hose and pacify it with a tie strap so it isn't too tight. Reconnect the wires from the brake sensor back to the master cylinder reservoir. Then replace the battery tray with its two bolts and nut and tighten both to 14 Nm (125 inch lbs.). Should your machine feature speed control, fit the speed control servo and bracket beneath the battery tray, secure it with a bolt and link back the connecting harness and vacuum lines. Tighten the clip on the air inlet resonator hose, put in the battery and then handle the thermal guard, connecting the ground and battery cables, inspecting and adjusting the stop lamp switch.
Related 2000 Dodge Caravan Parts
 2000 Dodge Caravan Brake Caliper
 2000 Dodge Caravan Brake Master Cylinder
 2000 Dodge Caravan Parking Brake Cable
 2000 Dodge Caravan Speed Sensor
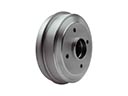 2000 Dodge Caravan Brake Drum
 2000 Dodge Caravan ABS Control Module
 2000 Dodge Caravan Brake Disc
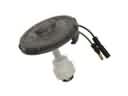 2000 Dodge Caravan Brake Fluid Level Sensor
 2000 Dodge Caravan Brake Line
 2000 Dodge Caravan Brake Proportioning Valve
 2000 Dodge Caravan Hydraulic Hose
 2000 Dodge Caravan Wheel Cylinder