JeepParts
My Garage
My Account
Cart
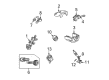
OEM 2001 Chrysler PT Cruiser Rack And Pinion
Steering Rack And Pinion- Select Vehicle by Model
- Select Vehicle by VIN
Select Vehicle by Model
orMake
Model
Year
Select Vehicle by VIN
For the most accurate results, select vehicle by your VIN (Vehicle Identification Number).
3 Rack And Pinions found

2001 Chrysler PT Cruiser Steering Gear Part Number: 5093437AA
$309.50 MSRP: $444.00You Save: $134.50 (31%)Ships in 1-2 Business DaysProduct Specifications- Other Name: Gear - Power Steering; Rack and Pinion Assembly; Steering Gearbox
- Replaces: 4656747AD
- Item Weight: 18.50 Pounds
- Condition: New
- Fitment Type: Direct Replacement
- SKU: 5093437AA
- Warranty: This genuine part is guaranteed by Mopar's factory warranty.

2001 Chrysler PT Cruiser Steering Gear Part Number: 5101849AC
$55.53 MSRP: $500.00You Save: $444.47 (89%)Ships in 1-2 Business DaysProduct Specifications- Other Name: Gear - Power Steering; Rack and Pinion Assembly; Steering Gearbox; Gear Assembly
- Replaces: 4656746AD, 5101849AB, 5101849AA
- Condition: New
- Fitment Type: Direct Replacement
- SKU: 5101849AC
- Warranty: This genuine part is guaranteed by Mopar's factory warranty.
2001 Chrysler PT Cruiser Steering Gear Part Number: 5093418AB
Product Specifications- Other Name: Gear - Rack And Pinion; Rack and Pinion Assembly; Steering Gearbox; Gear Assembly
- Replaces: 4656456AE, 4656679AE, 4656458AD, 5093418AA
- Item Weight: 16.90 Pounds
- Item Dimensions: 61.2 x 11.6 x 8.6 inches
- Condition: New
- Fitment Type: Direct Replacement
- SKU: 5093418AB
- Warranty: This genuine part is guaranteed by Mopar's factory warranty.
2001 Chrysler PT Cruiser Rack And Pinion Parts and Q&A
- Q: How to Service and Repair a Rack and Pinion Steering System on 2001 Chrysler PT Cruiser?A: Before servicing or repairing the power steering rack and pinion, straighten the steering wheel, lock it in place and check that the Clock Spring is properly faced. Leave out the silencer pad and knee blocker, then pull the steering column coupling retainer pin, open the pinch bolt nut and take out the pinch bolt to stop the steering column couplings from being connected. Elevate the vehicle and get rid of the front tire and wheel assemblies. After removing the nuts, get rid of them with Remover, Special Tool MB991113 and then remove the tie rod heat shields. Take off the wiring harness from the pressure switch, free the tube nut securing the fluid hose and slide off the cooler hose at the rack and pinion fitting. Put the cooler tube back into the left routing clip, detach both securing screws and hang the cooler by the tube. Take out the pencil strut, along with the washer that's behind the torque strut bolt and work on accessing the drive-belt splash shield screw. Extract the bolt linking the engine torque strut to the front suspension crossmember and be sure to mark the crossmember's exact location on the vehicle body. Under the car, secure the transmission jack under the crossmember, loosen the crossmember's six bolts holding it to the frame rails and lower it far enough that the rack and pinion can be taken out. Unscrew the roll pin joining the steering column lower coupling to the power steering rack and pinion pinion shaft and the pinion shaft dash cover seal from the rack and pinion housing. Four bolts connect the power steering rack and pinion to the front suspension crossmember; remove them and the rack and pinion. During installation, put the rack and pinion on the crossmember, secure all four bolts with 61 Nm (45 ft.lbs.) of torque and put in the pinion shaft dash cover seal. Look at the power steering rack and pinion pinion shaft and place the steering column lower coupling lower, securing with the roll pin as you do and set the rack at the center. Remove and guide the steering column down inside the dash panel, then lift the crossmember and add two bolts to the front. Loosely tighten the bolts to 2 Nm (20 inch lbs.). Making sure the crossmember matches the scribed marks, fasten the rear isolator bushings bolts at 250 Nm (185 ft. lbs.) and the rest at 153 Nm (113 ft. lbs.). Connect the engine torque strut and pencil strut, tighten all nuts to 58 Nm (43 ft. lbs.) and then mount the drive-belt splash shield and front fascia screws. Wash the fittings at each end of the power steering hose and put in a new pressure hose O-ring, c unused but lubricated with power steering fluid. Insert the cooler hose into the routing clip, place the cooler against the crossmember and circle the fluid cooler hose tightly so there is proper space when tightened to 47 Nm (35 ft. lbs.). Connect the wiring harness connector and place the heat shields on the tie rod tubes, attaching the outer tie rods and torqueing the nuts at 55 Nm (40 ft. lbs.). Raise the vehicle slightly, attach the tire and wheel assembly and tighten the wheel nuts with a torque gun to 135 Nm (100 ft. lbs.). Afterwards, bring the vehicle back down and set the dash-to-lower coupling seal in place. After that, fix the steering column lower coupling, fasten the pinch bolt nut to 28 Nm (250 inch lbs.) and top it off with the pinch bolt retainer pin. Facing the front of the vehicle, unclip the steering wheel holder, run the lower coupling, slide in the knee blocker and silencer pad, start up the power steering pump, check for leaks and adjust the front toe setting.
Related 2001 Chrysler PT Cruiser Parts
 2001 Chrysler PT Cruiser Power Steering Pump
 2001 Chrysler PT Cruiser Power Steering Hose
 2001 Chrysler PT Cruiser Power Steering Reservoir
 2001 Chrysler PT Cruiser Steering Column
 2001 Chrysler PT Cruiser Steering Column Cover
 2001 Chrysler PT Cruiser Steering Gear Box
 2001 Chrysler PT Cruiser Steering Wheel
 2001 Chrysler PT Cruiser Tie Rod End