JeepParts
My Garage
My Account
Cart
OEM 2001 Dodge Durango Intake Manifold
Engine Intake Manifold- Select Vehicle by Model
- Select Vehicle by VIN
Select Vehicle by Model
orMake
Model
Year
Select Vehicle by VIN
For the most accurate results, select vehicle by your VIN (Vehicle Identification Number).
1 Intake Manifold found

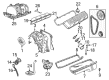
2001 Dodge Durango Intake Manifold Part Number: 4897490AC
Product Specifications- Other Name: Manifold - Intake; Engine Intake Manifold; Manifold Intake
- Condition: New
- Fitment Type: Direct Replacement
- SKU: 4897490AC
- Warranty: This genuine part is guaranteed by Mopar's factory warranty.
2001 Dodge Durango Intake Manifold Parts and Q&A
- Q: How to Remove and Install an Intake Manifold on 2001 Dodge Durango?A: To unlock the intake manifold, separate the negative battery cable and drain the system that cools the engine. Then, take out the A/c compressor, generator, the accessory drive bracket and air cleaner. Complete the Fuel System Pressure step and remove the fuel lines from the engine. If your vehicle is equipped, take out the kickdown cable, the speed control and the accelerator linkage and later remove the return spring. Take the distributor cap and wires off, unplug the coil wires, heat indicator sending unit wire, heater hoses and the bypass hose. Begin with removing the crankcase ventilation system, proceed to the evaporation control system and end with removing the bolts on the intake manifold. Assemble the intake manifold and throttle body before pulling them out of the engine compartment and then take off the flange side gasket and both seals at each end. Remove all the bolts on the throttle body and slide the throttle body off the manifold without keeping the old gasket. Remove the plenum pan and gasket and throw out the gasket when needed. During installation, apply the plenum gasket, set the plenum pan in place and tighten all the bolts to 5.4 Nm at first and further to 9.5 Nm. Line up each gasket so that the tab on the edge visible on the flange rests against the deck of the engine block and the long tab faces the tabs on the cylinder head gasket and the word Manifold Side can be clearly seen on the flange. At each corner, place 5 mm by 15 mm of Mopar Gen Ii Silicone Rubber Adhesive Sealant on the inside surface. Attach the front and rear seals and push the molded dowel pins in the cylinder block so they are in their correct holes. Place the intake manifold inside and watch to confirm that the seals are correctly attached. Next, fit the new gasket and tighten the bolts of the throttle body onto the intake manifold to 23 Nm. Secure the intake manifold bolts and tighten bolts 1 through 4 in turns of 1.4 Nm, each time to 8 Nm and then tighten all 12 bolts to 8 Nm. Verify all bolts are torqued to 8 Nm before going on to secure all bolts with 16 Nm. Re-connect the closed crankcase ventilation and evaporation control systems, plug the termination ends, heater hoses and bypass hose into the system. Attach the distributor cap and terminals, tie down the return spring and fasten the accelerator, speed control and transmission kickdown cables. Connect the fuel lines and the accessory drive bracket, assemble the A/c compressor, install the generator, position the drive belt and tighten the generator bolt to 41 Nm. Put the air cleaner in place, top up the coolant and reattach the negative battery cable.
Related 2001 Dodge Durango Parts
 2001 Dodge Durango Air Filter
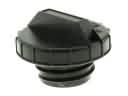 2001 Dodge Durango Gas Cap
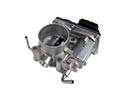 2001 Dodge Durango Throttle Body
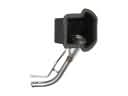 2001 Dodge Durango Fuel Filler Neck
 2001 Dodge Durango Fuel Injector
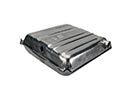 2001 Dodge Durango Fuel Tank
 2001 Dodge Durango Intake Manifold Gasket
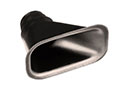 2001 Dodge Durango Air Duct
 2001 Dodge Durango Air Filter Box
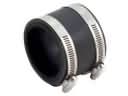 2001 Dodge Durango Air Intake Coupling
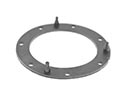 2001 Dodge Durango Fuel Pump Gasket
 2001 Dodge Durango Idle Control Valve