JeepParts
My Garage
My Account
Cart
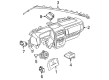
OEM 2001 Jeep Grand Cherokee Clock Spring
Spiral Cable Clock Spring- Select Vehicle by Model
- Select Vehicle by VIN
Select Vehicle by Model
orMake
Model
Year
Select Vehicle by VIN
For the most accurate results, select vehicle by your VIN (Vehicle Identification Number).
1 Clock Spring found

2001 Jeep Grand Cherokee Clockspring Part Number: 56042341AF
$463.72 MSRP: $527.00You Save: $63.28 (13%)Ships in 1-2 Business DaysProduct Specifications- Other Name: Air Bag Clockspring
- Replaces: 56042341AE
- Item Weight: 0.80 Pounds
- Item Dimensions: 5.2 x 4.2 x 2.2 inches
- Condition: New
- Fitment Type: Direct Replacement
- SKU: 56042341AF
- Warranty: This genuine part is guaranteed by Mopar's factory warranty.
2001 Jeep Grand Cherokee Clock Spring Parts and Q&A
- Q: How to Replace a Faulty Clock Spring on 2001 Jeep Grand Cherokee?A: Should the Clock Spring fail, be damaged or the driver air bag has released, it must be replaced since it cannot be repaired. Disconnect the battery's negative terminal and let it remain disconnected for two minutes to drain the air bag system's capacitor, then you can start. Turn the steering wheel until the front wheels are sources the front end in the middle of the road. Pull the air bag out of the steering wheel, separate the wire connectors from the upper Clock Spring area located between the steering wheel hub's top spokes and then unscrew the armature from the steering column upper shaft. To remove the steering wheel from the upper shaft, set the puller jaws (Special Tool C-3894-A) in the holes underneath the steering wheel armature and pull it off the shaft. Take out the screw that holds the lower tilting shroud to the switch assembly, undo the clips that keep the shroud sealed and detach both wire harness connectors from the Clock Spring connector receptacles. Detach the screws connecting the Clock Spring case to the multi-function switch. After that, remove the Clock Spring. When the Clock Spring will be used again, fix the rotor to the case to keep everything aligned until you put it in place; if it won't be reused, you need to center it again manually before putting it back. Make sure the Clock Spring is set up so it is symmetrical with the steering wheel, shaft and gear to allow for proper installation. Pre-centered Clock Springs for service use have a locking pin that should not be disturbed until they are mounted. After holding the Clock Spring hub and case secure, slide the Clock Spring down onto the upper shaft of the steering column, move it to ensure all three pins are in the turn signal cancel cam holes and check that one pin and both case mounting holes line up with the multi-function switch holes. Put in the two Clock Spring mounting screws, set them to 2.5 Nm (22 in. lbs.), link the two instrument panel harness connectors, position the lower steering column shroud and attach it by tightening a screw to 1.9 Nm (17 in. lbs.). Load the upper tilting column shroud over the steering column, snap it in place and center the steering wheel on the upper mounting shaft with the alignment splines in order. After passing the Clock Spring wire harness above the hole in the armature's upper part, join the steering wheel to the mounting plate, secure it tightly with a torque of 47 Nm (420 in. lbs.), reconnect the steering wheel's wiring connector and install the driver air bag.
Related 2001 Jeep Grand Cherokee Parts
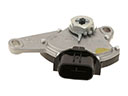 2001 Jeep Grand Cherokee Neutral Safety Switch
 2001 Jeep Grand Cherokee Brake Light Switch
 2001 Jeep Grand Cherokee Ignition Switch
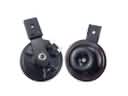 2001 Jeep Grand Cherokee Horn
 2001 Jeep Grand Cherokee Ignition Lock Cylinder
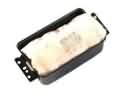 2001 Jeep Grand Cherokee Air Bag
 2001 Jeep Grand Cherokee Air Bag Control Module
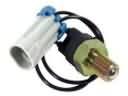 2001 Jeep Grand Cherokee Back Up Light Switch
 2001 Jeep Grand Cherokee Ignition Lock Assembly
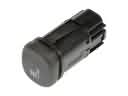 2001 Jeep Grand Cherokee Seat Heater Switch
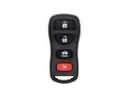 2001 Jeep Grand Cherokee Transmitter
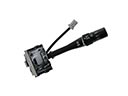 2001 Jeep Grand Cherokee Wiper Switch