JeepParts
My Garage
My Account
Cart
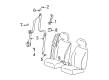
OEM 2002 Chrysler PT Cruiser Seat Belt
Seat Safety Belt- Select Vehicle by Model
- Select Vehicle by VIN
Select Vehicle by Model
orMake
Model
Year
Select Vehicle by VIN
For the most accurate results, select vehicle by your VIN (Vehicle Identification Number).
9 Seat Belts found

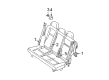
2002 Chrysler PT Cruiser Buckle End, Rear Outer Part Number: UC791L8AC
$39.09 MSRP: $85.75You Save: $46.66 (55%)Ships in 1-2 Business DaysProduct Specifications- Other Name: Seat Belt - Rear Lap Buckle; Seat Belt Receptacle, Rear, Rear Outer; Outer Buckle; Latch; Seat Belt Rear Lap Buckle For Dream Cruiser Series 2
- Position: Rear Outer
- Replaces: UC791L8AB
- Item Weight: 0.80 Pounds
- Item Dimensions: 10.2 x 3.0 x 1.6 inches
- Condition: New
- Fitment Type: Direct Replacement
- SKU: UC791L8AC
- Warranty: This genuine part is guaranteed by Mopar's factory warranty.

2002 Chrysler PT Cruiser Buckle End, Front Inner Part Number: TR541L8AC
$44.59 MSRP: $86.75You Save: $42.16 (49%)Ships in 1-2 Business DaysProduct Specifications- Other Name: Seat Belt - Front Inner; Seat Belt Receptacle, Front; Latch; Seat Belt Front Inner
- Position: Front Inner
- Replaces: TR541L8AA, TR541L8AB
- Item Weight: 1.30 Pounds
- Item Dimensions: 10.0 x 2.3 x 1.3 inches
- Condition: New
- Fitment Type: Direct Replacement
- SKU: TR541L8AC
- Warranty: This genuine part is guaranteed by Mopar's factory warranty.

 Product Specifications
- Other Name: Seat Belt - Rear; Seat Belt Lap and Shoulder Belt, Center Left, Rear Left Outer; Center Belt Assembly; Outer Belt Assembly; Seat Belt Rear
- Position: Rear Center Driver Side
- Item Weight: 2.30 Pounds
- Item Dimensions: 10.9 x 5.4 x 4.1 inches
- Condition: New
- Fitment Type: Direct Replacement
- SKU: RL351L8AD
- Warranty: This genuine part is guaranteed by Mopar's factory warranty.
 Product Specifications
- Other Name: Seatbelt - Front Outer; Seat Belt Lap and Shoulder Belt, Front Left; Belt & Retractor
- Position: Front Driver Side
- Item Weight: 3.20 Pounds
- Item Dimensions: 11.1 x 5.4 x 4.4 inches
- Condition: New
- Fitment Type: Direct Replacement
- SKU: RL291L8AG
- Warranty: This genuine part is guaranteed by Mopar's factory warranty.
- Product Specifications
- Other Name: Seat Belt - Rear; Seat Belt Lap and Shoulder Belt, Center Right; Center Belt Assembly
- Position: Rear Center Passenger Side
- Item Weight: 2.20 Pounds
- Item Dimensions: 11.0 x 5.4 x 4.2 inches
- Condition: New
- Fitment Type: Direct Replacement
- SKU: RL341L8BB
- Warranty: This genuine part is guaranteed by Mopar's factory warranty.
 Product Specifications
- Other Name: Seat Belt - Rear Outer; Seat Belt Lap and Shoulder Belt, Rear Left Outer; Outer Belt Assembly; Seat Belt Rear Outer
- Position: Rear Outer Driver Side
- Replaces: RL371L8AC
- Item Weight: 2.40 Pounds
- Item Dimensions: 10.9 x 5.6 x 4.2 inches
- Condition: New
- Fitment Type: Direct Replacement
- SKU: RL371L8AD
- Warranty: This genuine part is guaranteed by Mopar's factory warranty.
- Product Specifications
- Other Name: Seat Belt - Rear Outer; Seat Belt Lap and Shoulder Belt, Rear Right Outer; Outer Belt Assembly; Seat Belt Rear Outer
- Position: Rear Outer Passenger Side
- Replaces: RL361L8AC
- Item Weight: 2.20 Pounds
- Item Dimensions: 11.0 x 5.5 x 4.1 inches
- Condition: New
- Fitment Type: Direct Replacement
- SKU: RL361L8AD
- Warranty: This genuine part is guaranteed by Mopar's factory warranty.

2002 Chrysler PT Cruiser Height Adjuster Button Part Number: 4645780
Product Specifications- Other Name: Button - Seat Belt Adjuster; Seat Belt Buckle Button Stop; Height Adjuster Knob; Adjuster Button; Seat Belt Adjuster, 1996.
- Item Weight: 0.50 Pounds
- Item Dimensions: 1.3 x 1.0 x 0.7 inches
- Condition: New
- Fitment Type: Direct Replacement
- SKU: 4645780
- Warranty: This genuine part is guaranteed by Mopar's factory warranty.
- Product Specifications
- Other Name: Seatbelt - Front Outer; Seat Belt Lap and Shoulder Belt, Front Right; Belt & Retractor; Seat Belt Front Outer
- Position: Front Passenger Side
- Item Weight: 3.00 Pounds
- Item Dimensions: 11.5 x 5.4 x 4.0 inches
- Condition: New
- Fitment Type: Direct Replacement
- SKU: RL281L8AE
- Warranty: This genuine part is guaranteed by Mopar's factory warranty.
2002 Chrysler PT Cruiser Seat Belt Parts and Q&A
- Q: How to Maintain and Fix a Seat Belt and Retractor on 2002 Chrysler PT Cruiser?A: Before working on and repairing the front seat belt and retractor this requires the disconnection and isolation of the battery negative cable followed by a two minute wait period to discharge the system capacitor. Motivate the plastic covering of the turning loop, the shoulder belt height control knob as well as the thread that fastens the turning loop to the belt adjuster. The next step is to remove the upper B-pillar trim and the access cover of the B-pillar trim and to release the anchor bolt of the lower B-pillar and release the clips which are used to attach it to the B-pillar trim. Pull the seat belt turning loop, seat belt, remove the electrical connector and remove the two screws that fasten the webbing mid guide prior to removing the lower B-pillar trim and the front seat belt retractor. During setting up, make sure that all seat belt bolts are tightened up to a 40 Nm (30 ft.lbs.) torque. Install the front seat belt retractor followed by installation of the lower B-pillar trim panel close to the B-pillar and use the two screws to mount the webbing mid guide. Install the electrical connector, route the seat belt turning loop and seat belt into the trim panel, align the locating pins on the back side of the trim panel with mating holes in the B-pillar and push the trim panel side clips which go into the slots located in the B-pillar. Secure the B-pillar trim access cover, the installation of the bolt securing the lower seat belt anchorage to the floor pan kick-up followed by the bolt to secure the turning loop to belt adjuster. Slide the height adjuster all the way down, fix the upper B-pillar trim, the shoulder belt height control knob and lastly the plastic turning loop cover. Do not even attach the battery negative cable.
Related 2002 Chrysler PT Cruiser Parts
 2002 Chrysler PT Cruiser Antenna
 2002 Chrysler PT Cruiser Throttle Position Sensor
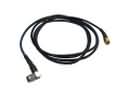 2002 Chrysler PT Cruiser Antenna Cable
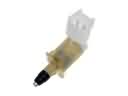 2002 Chrysler PT Cruiser Door Jamb Switch
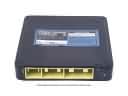 2002 Chrysler PT Cruiser Engine Control Module
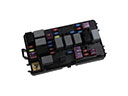 2002 Chrysler PT Cruiser Fuse
 2002 Chrysler PT Cruiser Headlight Switch
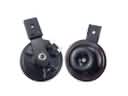 2002 Chrysler PT Cruiser Horn
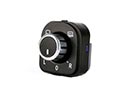 2002 Chrysler PT Cruiser Mirror Switch
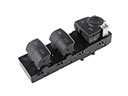 2002 Chrysler PT Cruiser Power Window Switch
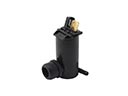 2002 Chrysler PT Cruiser Washer Pump
 2002 Chrysler PT Cruiser Window Motor