JeepParts
My Garage
My Account
Cart
OEM 2003 Dodge Dakota Axle Shaft
Car Axle Shaft- Select Vehicle by Model
- Select Vehicle by VIN
Select Vehicle by Model
orMake
Model
Year
Select Vehicle by VIN
For the most accurate results, select vehicle by your VIN (Vehicle Identification Number).
7 Axle Shafts found

2003 Dodge Dakota Axle Shaft, Rear Passenger Side Part Number: 52069512AB
$471.32 MSRP: $777.00You Save: $305.68 (40%)Ships in 1-2 Business DaysProduct Specifications- Other Name: Shaft - Axle; Drive Axle Shaft, Rear Right; Axle Shafts
- Position: Rear Passenger Side
- Item Weight: 18.00 Pounds
- Condition: New
- Fitment Type: Direct Replacement
- SKU: 52069512AB
- Warranty: This genuine part is guaranteed by Mopar's factory warranty.


 Product Specifications
- Other Name: Shaft - Axle Half; CV Axle Assembly, Front Left, Front Right; Axle Shaft
- Position: Front Driver Side
- Replaces: 5072214AA
- Item Weight: 17.50 Pounds
- Item Dimensions: 24.4 x 5.4 x 5.3 inches
- Condition: New
- Fitment Type: Direct Replacement
- SKU: RL072214AA
- Warranty: This genuine part is guaranteed by Mopar's factory warranty.

 Product Specifications
- Other Name: Shaft - Axle; Drive Axle Shaft, Rear Right; Axle Shafts
- Position: Rear Passenger Side
- Item Weight: 19.10 Pounds
- Condition: New
- Fitment Type: Direct Replacement
- SKU: 52069388AB
- Warranty: This genuine part is guaranteed by Mopar's factory warranty.
2003 Dodge Dakota Axle Shaft, Rear Driver Side Part Number: 52069513AB
Product Specifications- Other Name: Shaft - Axle; Drive Axle Shaft, Rear Left; Axle Shafts
- Position: Rear Driver Side
- Item Weight: 18.40 Pounds
- Condition: New
- Fitment Type: Direct Replacement
- SKU: 52069513AB
- Warranty: This genuine part is guaranteed by Mopar's factory warranty.
2003 Dodge Dakota Axle Shaft, Rear Driver Side Part Number: 52069389AB
Product Specifications- Other Name: Shaft - Axle; Drive Axle Shaft, Rear Left; Axle Shafts
- Position: Rear Driver Side
- Item Weight: 18.70 Pounds
- Condition: New
- Fitment Type: Direct Replacement
- SKU: 52069389AB
- Warranty: This genuine part is guaranteed by Mopar's factory warranty.

 Product Specifications
- Other Name: Shaft - Axle; Drive Axle Shaft, Front Right; CV Intermediate Shaft; Intermediate Shaft; Axle Shafts; Output Shaft; Intermed Shaft; Shaft Axle
- Position: Front Passenger Side
- Item Weight: 7.30 Pounds
- Item Dimensions: 21.5 x 3.6 x 1.6 inches
- Condition: New
- Fitment Type: Direct Replacement
- SKU: 52069886AB
- Warranty: This genuine part is guaranteed by Mopar's factory warranty.
- Product Specifications
- Other Name: Shaft - Axle; Drive Axle Shaft, Front Left; Intermediate Shaft; Axle Shafts; Output Shaft; Intermed Shaft; Shaft Axle
- Position: Front Driver Side
- Condition: New
- Fitment Type: Direct Replacement
- SKU: 52069887AB
- Warranty: This genuine part is guaranteed by Mopar's factory warranty.
2003 Dodge Dakota Axle Shaft Parts and Q&A
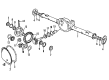
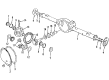
- Q: How to Remove and Install an 8 1/4 Inch Axle Shaft on 2003 Dodge Dakota?A: The rear axle shaft (8 1/4 inch) is replaced by putting the transmission in neutral, then raising the vehicle and supporting it. Take the wheel and tire set away first, then remove the brake drum. Empty the lubricant after the differential cover has been removed. Shift the differential case over to find the pinion shaft lock screw and after you have removed it, remove the lock screw and pinion shaft. Move the axle shaft inside and remove the C-lock at the shaft. Before you remove the axle shaft, check the shaft bearing and seal are not damaged; after removing the shaft, look at the seal for leaks and check the surface of the shaft contacting the bearing for brinelling, galling and pitting. To set up the shaft, smear the bearing bore and seal edge with gear lubricant, place the shaft inside the seal and bearing, engage it into the side gear splines and avoid letting the shaft damage the seal lip. Set the C-lock into the axle shaft at its end and use your fingers to seat the C-lock in the side gear. Next up, after applying the thrust washers, insert the pinion shaft into the differential case and position the shaft's hole over the hole in the differential case. Use Loctite and properly tighten the lock screw to 11 Nm (8 ft. lbs.). Cover the cover once more and fill the reservoir with gear lubricant, allowing it to pour up to the bottom of the plug hole. Next, install brake drum and wheel and tire assemblies. Afterward, take out the assistance and lower the vehicle to the ground.
Related 2003 Dodge Dakota Parts
 2003 Dodge Dakota Differential
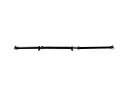 2003 Dodge Dakota Drive Shaft
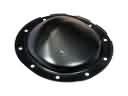 2003 Dodge Dakota Differential Cover
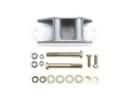 2003 Dodge Dakota Carrier Bearing Spacer
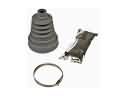 2003 Dodge Dakota CV Boot
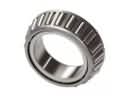 2003 Dodge Dakota Differential Bearing
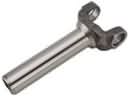 2003 Dodge Dakota Driveshaft Yokes
 2003 Dodge Dakota Mainshaft Washer
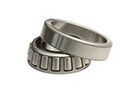 2003 Dodge Dakota Pinion Bearing
 2003 Dodge Dakota Pinion Washer
 2003 Dodge Dakota Transfer Case Seal
 2003 Dodge Dakota Transfer Case Shim