JeepParts
My Garage
My Account
Cart
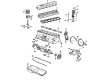
OEM 2004 Jeep Wrangler Piston
Engine Pistons- Select Vehicle by Model
- Select Vehicle by VIN
Select Vehicle by Model
orMake
Model
Year
Select Vehicle by VIN
For the most accurate results, select vehicle by your VIN (Vehicle Identification Number).
3 Pistons found


2004 Jeep Wrangler Vibration Damper Part Number: 5142303AB
$56.55 MSRP: $81.25You Save: $24.70 (31%)Ships in 1-3 Business DaysProduct Specifications- Other Name: Piston; Piston Pin And Rod
- Replaces: 5142303AA, 5066565AB
- Item Weight: 3.00 Pounds
- Item Dimensions: 5.7 x 4.4 x 12.6 inches
- Condition: New
- Fitment Type: Direct Replacement
- SKU: 5142303AB
- Warranty: This genuine part is guaranteed by Mopar's factory warranty.


2004 Jeep Wrangler Piston Part Number: 4798329AC
$138.85 MSRP: $200.00You Save: $61.15 (31%)Ships in 1-2 Business DaysProduct Specifications- Other Name: Piston Pin And Rod; Piston Pin And Rod
- Item Weight: 3.20 Pounds
- Item Dimensions: 13.8 x 6.2 x 4.7 inches
- Condition: New
- Fitment Type: Direct Replacement
- SKU: 4798329AC
- Warranty: This genuine part is guaranteed by Mopar's factory warranty.
2004 Jeep Wrangler Piston Part Number: 4798332AC
Product Specifications- Other Name: Piston Pin And Rod; Piston Pin And Rod
- Replaces: 4798333AC, 4798331AC, 4798333AB, 4798330AB, 4798330AC
- Item Weight: 3.20 Pounds
- Item Dimensions: 13.3 x 6.1 x 4.4 inches
- Condition: New
- Fitment Type: Direct Replacement
- SKU: 4798332AC
- Warranty: This genuine part is guaranteed by Mopar's factory warranty.
2004 Jeep Wrangler Piston Parts and Q&A
- Q: How to Maintain and Fix a Piston and Its Connecting Rod on 2004 Jeep Wrangler?A: First, take out the cylinder head and then use a strong ridge reamer to smooth down the top ridge in each cylinder bore with the piston cover still in place. Be sure to mark each piston with the label of its cylinder as you remove them. You should then remove the oil pan, add the cylinder number on the rod and cap as a mark for quick identification. There will be a directional stamping on the front half of the pistons pointing toward the engine's front. Reach inside the cylinder block through the top and remove the pistons and connecting rods by moving the crankshaft until the rods are lined up in the middle of each bore block, then extract the Balance Shaft Assembly and connect rod cap bolts and press the piston and rod assemblies out of the bores carefully, avoiding the crankshaft bearings. After the old bearing is removed, put the bearing cap on the mating rod, as the piston and rod are meant to be handled together. When you install the engine, line up the expansion ends of the oil rings with the gap between the rail sections and make sure the compression ring gaps are alternated. Oil the piston head and rings, then, making sure the ring order does not change, place the ring compressor over the piston. The stamp on the piston should be directed from the back of the engine forward. Move the crankshaft to place the connecting rod journal at the center of the bore, slide in the rod and piston assembly and send the rod over the crankshaft journal. Gently guide the connecting rod onto its journal as you drive the piston into the cylinder using a hammer handle. Instead of reusing the original connecting rod cap bolts, coat the new bolt threads with clean oil, hand-tighten each and then turn each bolt in a proper alternating order using your hands, but don't finish with the torque wrench. After that, tighten all of the bolts to 54 Nm and add another 1/4 of a turn before checking the connecting rod side clearance with a feeler gauge.
Related 2004 Jeep Wrangler Parts
 2004 Jeep Wrangler Oil Pan Gasket
 2004 Jeep Wrangler Crankshaft
 2004 Jeep Wrangler Dipstick
 2004 Jeep Wrangler Rocker Arm
 2004 Jeep Wrangler Cam Gear
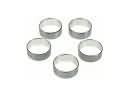 2004 Jeep Wrangler Camshaft Bearing
 2004 Jeep Wrangler Camshaft Seal
 2004 Jeep Wrangler Crankshaft Timing Gear
 2004 Jeep Wrangler Dipstick Tube
 2004 Jeep Wrangler Intake Valve
 2004 Jeep Wrangler Lash Adjuster
 2004 Jeep Wrangler Timing Chain Tensioner