JeepParts
My Garage
My Account
Cart
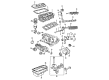
OEM 2005 Dodge Neon Crankshaft
Crank Shaft- Select Vehicle by Model
- Select Vehicle by VIN
Select Vehicle by Model
orMake
Model
Year
Select Vehicle by VIN
For the most accurate results, select vehicle by your VIN (Vehicle Identification Number).
2 Crankshafts found


2005 Dodge Neon Crankshaft Part Number: 4781643AA
$539.13 MSRP: $818.00You Save: $278.87 (35%)Ships in 1-2 Business DaysProduct Specifications- Other Name: Crankshft; Crankshaft Includes Target Ring And Screw
- Item Weight: 47.80 Pounds
- Item Dimensions: 24.5 x 8.8 x 8.5 inches
- Condition: New
- Fitment Type: Direct Replacement
- SKU: 4781643AA
- Warranty: This genuine part is guaranteed by Mopar's factory warranty.

2005 Dodge Neon Crankshaft Part Number: 4884109AA
Product Specifications- Other Name: Crankshft
- Item Weight: 38.20 Pounds
- Condition: New
- Fitment Type: Direct Replacement
- SKU: 4884109AA
- Warranty: This genuine part is guaranteed by Mopar's factory warranty.
2005 Dodge Neon Crankshaft Parts and Q&A
- Q: How to Remove and Replace a Crankshaft on 2005 Dodge Neon?A: Before removing the crankshaft, first take out the engine assembly from the car and disconnect the transaxle from it. Then, remove the drive plate/flexplate along with the rear crankshaft oil seal, set the engine on a repair stand and drain out the oil. Remove the crankshaft vibration damper, the front timing belt cover, two front engine mount brackets, the timing belt, the tensioner and pulley bracket and camshaft sprockets, along with the rear timing belt cover as well. Take off the crankshaft sprocket, oil filter and adapter, oil pan, oil pump pick-up tube and oil pump. Remove the crankshaft position sensor and then use a permanent marker or paint to write the number of the cylinder on every connecting rod cap to avoid harming them with a stamp or punch. Detach every connecting rod bolt and cap and avoid harming the surfaces of the fracture rod and cap. Loosen all bed plate bolts from the engine block and carefully tap the bed plate off the engine block dowel pins so that it comes off evenly and safely. Be careful to lift out the crankshaft with no harm to the journals or main bearings and set aside the target ring mounting screws, before removing the target ring. Look at the crankshaft journals to make sure they are not worn, tapered or scored too much and that the taper or roundness is within 0.025 mm (0.001 inch) and journal grinding does not surpass 0.305 mm (0.012 inch) under the standard diameter. The crankshaft relies on five main bearings and its upper bearing shells are designed with passages for oil, but the lower shells are left plain. Put the main bearing upper shells in place with the lubrication groove and oil hole facing each other in the engine block, so the holes line up. Wash the crankshaft and target ring with Mopar brake parts cleaner and then dry them with compressed air. Next, install the screws you have replaced, starting with #1 and shave off excess torque to the proper levels by following the guide in the sequence shown. Cover the crankshaft bearings and shafts in engine oil before fitting it into the block and apply leopard Bed Plate Sealant just to the bed plate. Attach the lower main bearings into the main bearing cap/bed plate, checking that the bearing tabs are all seated and then apply oil. Give the cylinder block a 1.5 to 2.0 mm (0.059 to 0.078 inch) bead of Mopar Bed Plate Sealant and then lower the main bearing/bed plate into the engine block. Spread oil onto the bolts' threads first, then put on the main bearing bed plate only finger tight onto the engine block and tighten it until it comes in touch with the cylinder block. Set the number 4 piston at Tdc, push and pull the crankshaft to the limit, wedge a tool there to hold it in place and use greater than 30 ft/lbs. of torque to tighten the bolts. Repeat on the bolts and then set the bearing bed plate with engine block bolt installation, ensuring each is torqued to 34 Nm (25 ft. lbs.) one by one. Check the torque on the crankshaft, as no more than 5.6 Nm (50 inch lbs.) should be found and be sure the side-to-side chatter of the crankshaft is not excessive. Place clean oil on the threads of the new cap bolts, line each bolt up loosely and alternately torque each bolt to 27 Nm (20 ft. lbs.) and then turn it one more quarter-turn. Secure the oil pump and the pick-up tube to the engine, then torque the fastener to 23 Nm (200 inch lbs.), replacing the oil pan, oil filter adapter and oil filter. Put in the rear timing belt cover and camshaft sprocket, then install the front crankshaft oil seal and crankshaft sprocket, leave the timing belt tensioner and pulley bracket, place in the timing belt, the front engine mount bracket and end with the front timing belt cover. Reconnect the crankshaft vibration damper and sensor and put in a fresh oil filter. Lift the engine off the repair stand and move it to Special Tools 6135 and 6710 Engine Dolly and Cradle. Secure it in place with safety straps. After that, secure the crankshaft rear oil seal, put the drive plate/flex plate in place with Mopar Lock & Seal Adhesive on its bolt threads and fasten the transaxle to the engine.
Related 2005 Dodge Neon Parts
 2005 Dodge Neon Oil Pan
 2005 Dodge Neon Oil Pump
 2005 Dodge Neon Timing Cover
 2005 Dodge Neon Cam Gear
 2005 Dodge Neon Camshaft Seal
 2005 Dodge Neon Crankshaft Pulley
 2005 Dodge Neon Crankshaft Thrust Washer Set
 2005 Dodge Neon Dipstick Tube
 2005 Dodge Neon Engine Mount Torque Strut
 2005 Dodge Neon Oil Filler Cap
 2005 Dodge Neon Piston
 2005 Dodge Neon Rocker Arm Pivot