JeepParts
My Garage
My Account
Cart
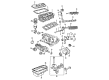
OEM Dodge Neon Crankshaft
Crank Shaft- Select Vehicle by Model
- Select Vehicle by VIN
Select Vehicle by Model
orMake
Model
Year
Select Vehicle by VIN
For the most accurate results, select vehicle by your VIN (Vehicle Identification Number).
2 Crankshafts found


Dodge Neon Crankshaft Part Number: 4781643AA
$539.13 MSRP: $818.00You Save: $278.87 (35%)Ships in 1-2 Business Days
Dodge Neon Crankshaft Part Number: 4884109AA
Dodge Neon Crankshaft
Choose OEM Crankshaft that meet Dodge factory standards. Dodge designs and tests every component for precision and durability. Each Crankshaft follows strict manufacturing steps to lock in quality and fit. If your Dodge Neon matters to you, OEM parts make the smart choice. You'll get the exact look, feel, and performance you expect. Shop genuine Neon parts at the highly competitive prices online. Enjoy a manufacturer's warranty, a hassle-free return policy, and rapid delivery. No more guesswork with off brands. Get genuine parts with exact fit and true factory performance. Shop with confidence today at JeepPartsDeal.com.
Dodge Neon Crankshaft Parts and Q&A
- Q: How to Remove and Replace a Crankshaft on Dodge Neon?A:You should first remove the engine and disconnect it from the transaxle to change and replace the crankshaft. After that, remove the drive plate/flexplate and the crankshaft rear oil seal and position the engine on an effective repair stand. Get rid of the crankshaft vibration damper, the engine mount bracket and the front Timing Belt cover before sorting the timing belt and tensioner. Separate the camshaft sprocket and the rear timing belt cover and next take away the crankshaft sprocket. Disconnect the lower torque strut/air conditioning compressor holder, Oil Filter and adapter, plus the Oil Pan, oil pump pick-up tube and oil pump. Put your permanent ink or paint marker to work and write the cylinder number on each connecting rod cap to avoid marking them with a dangerous number stamp or punch. After removing the connecting rod bolts and caps, check the surfaces of the fracture rod and cap to be sure these are undamaged and never use old bolts again. Unscrew each main bearing cap and bedplate bolt from the engine block, then knock the bedplate free from the engine block dowel pins by tapping from the center, not from one side. Take out the bedplate from all sides evenly and then lift out the crankshaft without causing harm to the main bearings or journals. Five main bearings support the crankshaft and the upper shells from the bearing in the crankcase have oil grooves versus the plain lower shells found in the bedplate. A flange on the number three main bearing journal keeps the crankshaft's end play in check and the upper and lower main bearing shells do not match up and could not be exchanged. Make sure that taper or out of round crankshaft journals do not exceed 0.025 mm (0.001 inch) and that journal grinding is not higher than 0.305 mm (0.012 inch) under the journal's standard outer diameter. Do not grind the thrust faces of the No. 3 main bearing or the crank pin or bearing fillets and following the grinding, clean the rogue edges on the crankshaft oil holes and fully clean all passages. When finishing nodular cast iron crankshafts, polish in the same rotation direction as your engine will run. Make sure to clean the bearing cap bolts and give them a protective coating and always stock standard and undersized bearing shells. When installing, set the upper main bearings where the lubrication groove faces down into the block and slide the O-ring into the correct groove in the engine block. Don't get oil on the bedplate surface, use an anaerobic sealer to connect the crankshaft to the cylinder block and make sure to grease the bearings and journals. Seal the cylinder block with a 1.5 - 2.0 mm (0.059 - 0.078 inch) bead of Mopar Bed Plate Sealant, slide the lower main bearings into the main bearing cap/bedplate after each side of the bearing tab is seated and then secure the clips. Put the main bearing/bedplate into the engine block, coat the bolt threads with oil, fit them loosely with your fingers and then tighten them to make contact between the bedplate and the engine block. Secure all mounting bolts to the bearing bedplate and the engine block starting with the main ones and tightening them to 81 Nm (60 ft. lbs.). After that, tighten the rest of the bolts to 34 Nm (25 ft. lbs.). Once fitted, inspect both the crankshaft torque at the outer pinhole (not more than 5.6 Nm) and its end movement that should also be within specific limits. Install all the bearings and rod covers, tighten the new bolts to the specified torque and turn by about a quarter and then add the oil pump, oil seal, tube and oil pan. After cleaning, replace the oil filter adapter, the oil filter, the torque strut/air conditioning compressor mounting bracket, rear Timing Cover, camshaft sprocket, crankshaft sprocket, timing belt, front timing belt cover and engine mount bracket. Take the engine out of the repair stand, place it on Special Tools 6135 and 6710 Engine Dolly and Cradle and use safety straps to keep everything in place. In the final stage, fit the assembly in reverse, setting up the crankshaft rear oil seal, the flex plate, drilling the transaxle to engine mating, placing the engine assembly and doing the crankshaft and camshaft timing relearn procedure using the DRB 1116 hooked to the data link connector in the passenger compartment next to the steering column, with the turnign the ignition switch on, getting into "Engine" diagnostics, then "Miscellaneous," and following the instructions on the DRB III screen.

Related Dodge Neon Parts
 Dodge Neon Camshaft
 Dodge Neon Engine Mount
 Dodge Neon Oil Pan Gasket
 Dodge Neon Timing Belt Tensioner
 Dodge Neon Transmission Mount
 Dodge Neon Cam Gear
 Dodge Neon Crankshaft Seal
 Dodge Neon Crankshaft Timing Gear
 Dodge Neon Cylinder Head Gasket
 Dodge Neon Harmonic Balancer
 Dodge Neon Rocker Arm Pivot
 Dodge Neon Variable Timing Sprocket