JeepParts
My Garage
My Account
Cart
OEM 2006 Chrysler Crossfire Timing Cover
Engine Timing Cover- Select Vehicle by Model
- Select Vehicle by VIN
Select Vehicle by Model
orMake
Model
Year
Select Vehicle by VIN
For the most accurate results, select vehicle by your VIN (Vehicle Identification Number).
2 Timing Covers found

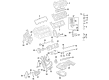
2006 Chrysler Crossfire Front Cover Part Number: 5143042AA
Product Specifications- Other Name: Cover - Timing Case; Timing Cover; Cover Timing Case
- Item Weight: 12.90 Pounds
- Item Dimensions: 21.1 x 18.2 x 5.2 inches
- Condition: New
- Fitment Type: Direct Replacement
- SKU: 5143042AA
- Warranty: This genuine part is guaranteed by Mopar's factory warranty.
2006 Chrysler Crossfire Timing Cover Part Number: 5098172AA
Product Specifications- Other Name: Cover - Timing Case; Engine Timing Cover; Front Cover; Cover Timing Case
- Item Weight: 11.30 Pounds
- Item Dimensions: 22.4 x 20.5 x 7.1 inches
- Condition: New
- Fitment Type: Direct Replacement
- SKU: 5098172AA
- Warranty: This genuine part is guaranteed by Mopar's factory warranty.
2006 Chrysler Crossfire Timing Cover Parts and Q&A
- Q: How to Remove and Install a Timing Cover on 2006 Chrysler Crossfire?A: To start, take out the negative battery cable and pump the coolant from the system. After that, uninstall the engine cover, radiator fan, accessory drive belt, idler pulley, and accessory drive belt tensioner. Following this, take away the vibration damper, unfasten the lower radiator and heater connectors from the water pump, and remove the power steering pump and AIR pump. Coming next, remove the cylinder head covers and the front cylinder head to timing chain cover retaining bolts and then remove the generator. After raising and holding the vehicle, take out the lower oil pan and upper oil pan and then the starter. Turn the crankshaft to 40°. Fit Special Tool 9102 Flywheel Locking Tool into the starter opening to properly lock the flywheel with ATDC. After that, take out the timing chain tensioner and the bolts and covering of the timing chain cover. When installing, make sure that valve timing doesn't change from 40° ATDC and apply sealer only to the required area, using a 2.0 mm ± 0.5 mm bead, within 10 minutes without flattening or spreading. Cover the designated area with a 1.5 to 2.0 mm bead of Loctite 5900 or similar, attach the timing cover on the front of the engine, insert and tighten the cover bolts to 20 Nm (15 ft. lbs.). With the tensioner in place, give it a tightness of 80 Nm (59 ft. lbs) and then remove the Flywheel Locking Tool. When replacing the starter, upper oil pan, lower oil pan, and generator, lubricate the head bolt threads gently with a light coating before fixation. Before installing the front cylinder head cover, tighten the cylinder head to timing chain cover bolts to 20 Nm (7-15 ft. lbs.). Next, bring the hoses from the lower radiator and heater back together with the water pump and attach the vibration damper, idler pulley, tensioner, and belts. Next, add the radiator fan, put on the engine cover, ensure every engine fluid is replaced, and tie the negative battery cable back.
Related 2006 Chrysler Crossfire Parts
 2006 Chrysler Crossfire Camshaft
 2006 Chrysler Crossfire Crankshaft Pulley
 2006 Chrysler Crossfire Crankshaft Thrust Washer Set
 2006 Chrysler Crossfire Crankshaft Timing Gear
 2006 Chrysler Crossfire Dipstick Tube
 2006 Chrysler Crossfire Engine Mount
 2006 Chrysler Crossfire Engine Mount Bracket
 2006 Chrysler Crossfire Exhaust Valve
 2006 Chrysler Crossfire Oil Pump
 2006 Chrysler Crossfire Rocker Arm
 2006 Chrysler Crossfire Timing Chain
 2006 Chrysler Crossfire Transmission Mount