JeepParts
My Garage
My Account
Cart
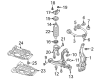
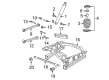
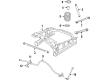
OEM 2006 Jeep Grand Cherokee Shock Absorber
Suspension Shock Absorber- Select Vehicle by Model
- Select Vehicle by VIN
Select Vehicle by Model
orMake
Model
Year
Select Vehicle by VIN
For the most accurate results, select vehicle by your VIN (Vehicle Identification Number).
5 Shock Absorbers found


2006 Jeep Grand Cherokee Shock Absorber, Front Part Number: 5175959AC
$346.97 MSRP: $527.00You Save: $180.03 (35%)Ships in 1-2 Business DaysProduct Specifications- Other Name: Absorber - Suspension; Shock Absorber, Front; Strut; Shock Absorber Package Suspension Front; Shock Absorber Kit Suspension Front
- Position: Front
- Item Weight: 8.60 Pounds
- Item Dimensions: 29.0 x 6.1 x 5.2 inches
- Condition: New
- Fitment Type: Direct Replacement
- SKU: 5175959AC
- Warranty: This genuine part is guaranteed by Mopar's factory warranty.


2006 Jeep Grand Cherokee Shock Absorber, Rear Part Number: 52089751AL
$84.23 MSRP: $125.00You Save: $40.77 (33%)Ships in 1-2 Business DaysProduct Specifications- Other Name: Absorber - Suspension; Shock Absorber, Rear; Suspension Shock Absorber; Shock; Shock Absorber Suspension Rear
- Position: Rear
- Replaces: 52089752AD, 52089751AJ, 52089751AK, 52089751AH, 52089751AF, 52089751AG, 52089751AI
- Item Weight: 5.40 Pounds
- Item Dimensions: 3.2 x 7.7 x 31.8 inches
- Condition: New
- Fitment Type: Direct Replacement
- Require Quantity: 2
- SKU: 52089751AL
- Warranty: This genuine part is guaranteed by Mopar's factory warranty.


2006 Jeep Grand Cherokee Shock Absorber, Front Part Number: 5135573AJ
$259.68 MSRP: $391.00You Save: $131.32 (34%)Product Specifications- Other Name: Absorber - Suspension; Front Shock Absorber Assembly Kit; Strut and Coil Spring Assembly; Complete Strut.; Shock; Strut; Shock Absorber Package Suspension Front; Shock Absorber Kit Suspension Front
- Position: Front
- Replaces: 5135573AC, 5135573AI, 5135573AG, 5135577AC, 5135573AE, 5135573AD, 5135573AF, 5135573AH, 5135577AD
- Item Weight: 10.10 Pounds
- Item Dimensions: 5.4 x 6.2 x 30.2 inches
- Condition: New
- Fitment Type: Direct Replacement
- SKU: 5135573AJ
- Warranty: This genuine part is guaranteed by Mopar's factory warranty.


2006 Jeep Grand Cherokee Shock Absorber, Rear Part Number: 5290641AC
$274.19 MSRP: $408.00You Save: $133.81 (33%)Product Specifications- Other Name: Absorber - Suspension; Shock Absorber, Rear; Shock; Shock Absorber Suspension Rear
- Position: Rear
- Replaces: 5290641AB
- Item Weight: 4.60 Pounds
- Item Dimensions: 28.4 x 10.3 x 2.3 inches
- Condition: New
- Fitment Type: Direct Replacement
- SKU: 5290641AC
- Warranty: This genuine part is guaranteed by Mopar's factory warranty.
2006 Jeep Grand Cherokee Shock Absorber, Rear Part Number: 52089751AE
Product Specifications- Other Name: Absorber - Suspension; Rear Shock Absorber; Strut and Coil Spring Assembly Kit; Complete Strut.
- Position: Rear
- Replaces: 52089751AD
- Item Weight: 5.60 Pounds
- Item Dimensions: 29.0 x 6.1 x 5.2 inches
- Condition: New
- Fitment Type: Direct Replacement
- SKU: 52089751AE
- Warranty: This genuine part is guaranteed by Mopar's factory warranty.
2006 Jeep Grand Cherokee Shock Absorber Parts and Q&A
- Q: How to Effectively Service and Repair Shock Absorbers on 2006 Jeep Grand Cherokee?A: Before you service the shock absorbers, take care of the right front shock by removing the air box cover and air intake hose, disconnecting the cruise control servo electric connection and moving the coolant reservoir aside after loosening its mounting bolt. After that, unscrew the four shock mounting nuts, raise the vehicle and remove the tire. Untighten the brake caliper adapter bolts, so that the brake caliper and caliper adapter do not hang from the brake hose and then take out the disc brake rotor. Get rid of the upper ball joint nut and use special tool 8677 to separate it from the knuckle. Go ahead and remove the lower clevis bolt together with the lower stabilizer bolt at the lower control arm and remove the shock and spring if that's what's needed. Install the clevis bracket on the shock, fasten it with 122 Nm and install the shock assembly, securing the four upper shock nuts with 95 Nm. Add the coolant reservoir bolt back, rejoin the cruise control servo wiring and place the airbox cover and the air intake hose back into place. Lift the vehicle again, fit the lower stabilizer bolt and next the lower clevis bolt, tightening all to 169 Nm. Get the upper ball joint onto the knuckle, put in the new nut and tighten it to 75 Nm. Once that is done, bolt the rotor and caliper adapter to the knuckle until the torque is at 176 Nm. Then, set the tire and wheel in place before bringing down the vehicle. To do the left front, open the small lid that covers the air filter and unplug the hose, followed by removing the three nuts on the bracket to reach the nuts on the shock mount. Remove the tire, lower bolts, upper ball joint, brake caliper and rotors from the vehicle just as you did with the other side. Attach the clevis bracket to one end of the shock, secure with 122 Nm of force, then fit the complete shock assembly and tighten the upper nuts to 95 Nm. Fit the PDC bracket nuts, raise the vehicle and tighten the lower stabilizer bolt to 115 Nm, then the lower clevis bolt to 169 Nm. After that, connect the upper ball joint, return the disc brake components to their proper place and fit the wheel and tire before bringing the vehicle down.
Related 2006 Jeep Grand Cherokee Parts
 2006 Jeep Grand Cherokee Wheel Bearing
 2006 Jeep Grand Cherokee Control Arm
 2006 Jeep Grand Cherokee Lug Nuts
 2006 Jeep Grand Cherokee Coil Spring Insulator
 2006 Jeep Grand Cherokee Steering Knuckle
 2006 Jeep Grand Cherokee Sway Bar Link
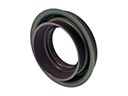 2006 Jeep Grand Cherokee Axle Shaft Seal
 2006 Jeep Grand Cherokee Bump Stop
 2006 Jeep Grand Cherokee Control Arm Bolt
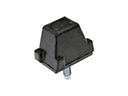 2006 Jeep Grand Cherokee Control Arm Bumper
 2006 Jeep Grand Cherokee Sway Bar Bracket
 2006 Jeep Grand Cherokee Sway Bar Bushing