JeepParts
My Garage
My Account
Cart
OEM 2007 Chrysler PT Cruiser Air Duct
Air Hose- Select Vehicle by Model
- Select Vehicle by VIN
Select Vehicle by Model
orMake
Model
Year
Select Vehicle by VIN
For the most accurate results, select vehicle by your VIN (Vehicle Identification Number).
7 Air Ducts found


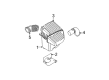
2007 Chrysler PT Cruiser Hose Part Number: 4891406AD
$90.09 MSRP: $135.00You Save: $44.91 (34%)Ships in 1-2 Business DaysProduct Specifications- Other Name: Hose - Clean Air; Engine Air Intake Hose; Intake Coupling; Hose Clean Air; Air Intake Hose
- Replaces: 4891406AB
- Item Weight: 4.40 Pounds
- Item Dimensions: 4.7 x 4.8 x 16.4 inches
- Condition: New
- Fitment Type: Direct Replacement
- SKU: 4891406AD
- Warranty: This genuine part is guaranteed by Mopar's factory warranty.


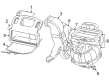
2007 Chrysler PT Cruiser Hose Part Number: 4891558AA
$55.97 MSRP: $83.95You Save: $27.98 (34%)Ships in 1-2 Business DaysProduct Specifications- Other Name: Hose - Air Cleaner To Throttle Body; Engine Air Intake Hose; Intake Coupling; Hose Air Cleaner To Throttle Body; Air Intake Hose
- Item Weight: 1.00 Pounds
- Item Dimensions: 3.5 x 5.9 x 7.7 inches
- Condition: New
- Fitment Type: Direct Replacement
- SKU: 4891558AA
- Warranty: This genuine part is guaranteed by Mopar's factory warranty.

 Product Specifications
- Other Name: Duct - Air Distribution; Instrument Panel Air Duct, Left, Right, Upper; Duct Air Distribution; Duct Air Outlet
- Position: Passenger Side
- Item Weight: 1.50 Pounds
- Item Dimensions: 46.5 x 13.8 x 4.2 inches
- Condition: New
- Fitment Type: Direct Replacement
- SKU: 5058337AB
- Warranty: This genuine part is guaranteed by Mopar's factory warranty.

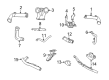
2007 Chrysler PT Cruiser Air Duct, Lower Part Number: 5179483AA
Product Specifications- Other Name: A/C And Heater; Right Lower Instrument Panel Air Duct; Cabin Air Intake Duct; Heater Duct; Floor Duct; Lower Duct; Duct A/C And Heater Right; Duct A/C And Heater
- Position: Lower
- Item Weight: 1.00 Pounds
- Item Dimensions: 16.5 x 8.7 x 5.0 inches
- Condition: New
- Fitment Type: Direct Replacement
- SKU: 5179483AA
- Warranty: This genuine part is guaranteed by Mopar's factory warranty.

2007 Chrysler PT Cruiser Center Duct Part Number: 5058339AB
Product Specifications- Other Name: Duct - Air Distribution; Instrument Panel Air Duct, Center, Center Upper; Duct Air Distribution; Duct Air Outlet
- Position: Center
- Item Weight: 0.60 Pounds
- Item Dimensions: 9.8 x 8.1 x 4.1 inches
- Condition: New
- Fitment Type: Direct Replacement
- SKU: 5058339AB
- Warranty: This genuine part is guaranteed by Mopar's factory warranty.

2007 Chrysler PT Cruiser Adapter Part Number: 5058476AB
Product Specifications- Other Name: Duct - Elbow; HVAC Duct Adapter; Duct Elbow
- Item Weight: 0.50 Pounds
- Item Dimensions: 17.7 x 9.6 x 1.2 inches
- Condition: New
- Fitment Type: Direct Replacement
- SKU: 5058476AB
- Warranty: This genuine part is guaranteed by Mopar's factory warranty.

 Product Specifications
- Other Name: Duct - A/C And Heater; Instrument Panel Air Duct, Left Lower; Cabin Air Intake Duct, Left; Instrument Panel Air Duct; Heater Duct; Floor Duct; Lower Duct; Duct A/C And Heater Left; Duct A/C And Heater
- Position: Lower Driver Side
- Item Weight: 0.50 Pounds
- Item Dimensions: 6.2 x 5.2 x 2.6 inches
- Condition: New
- Fitment Type: Direct Replacement
- SKU: 5179477AA
- Warranty: This genuine part is guaranteed by Mopar's factory warranty.
2007 Chrysler PT Cruiser Air Duct Parts and Q&A
- Q: How to Maintain Your Air Duct System on 2007 Chrysler PT Cruiser?A: Starting the service on the air duct, first take out the instrument cluster bezel, the instrument panel center bezel or the passenger side air bag cover, depending on the outlet. Should the foam seal on the air outlet be damaged in any way, you need to put on a new one. After that, take out the three screws or nuts that are connecting the air outlet(s) to the bezel or cover, depending on your setup and then remove the outlet(s).
Related 2007 Chrysler PT Cruiser Parts
 2007 Chrysler PT Cruiser Air Filter
 2007 Chrysler PT Cruiser Air Filter Box
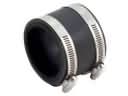 2007 Chrysler PT Cruiser Air Intake Coupling
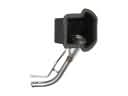 2007 Chrysler PT Cruiser Fuel Filler Neck
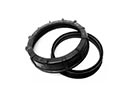 2007 Chrysler PT Cruiser Fuel Pump Seal
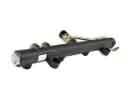 2007 Chrysler PT Cruiser Fuel Rail
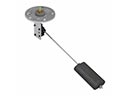 2007 Chrysler PT Cruiser Fuel Sending Unit
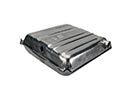 2007 Chrysler PT Cruiser Fuel Tank
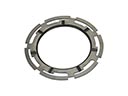 2007 Chrysler PT Cruiser Fuel Tank Lock Ring
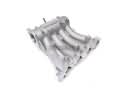 2007 Chrysler PT Cruiser Intake Manifold
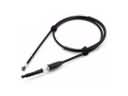 2007 Chrysler PT Cruiser Throttle Cable
 2007 Chrysler PT Cruiser Turbocharger