JeepParts
My Garage
My Account
Cart
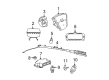
OEM 2007 Jeep Wrangler Clock Spring
Spiral Cable Clock Spring- Select Vehicle by Model
- Select Vehicle by VIN
Select Vehicle by Model
orMake
Model
Year
Select Vehicle by VIN
For the most accurate results, select vehicle by your VIN (Vehicle Identification Number).
1 Clock Spring found


2007 Jeep Wrangler Clockspring Part Number: 5156106AG
$527.85 MSRP: $769.00You Save: $241.15 (32%)Product Specifications- Other Name: Clockspring - Steering Column Control Mod; Air Bag Clockspring; Clockspring Steering Column Control Module
- Replaces: 5156106AF, 68000477AA, 5156106AE
- Item Weight: 1.90 Pounds
- Item Dimensions: 6.1 x 6.9 x 6.8 inches
- Condition: New
- Fitment Type: Direct Replacement
- SKU: 5156106AG
- Warranty: This genuine part is guaranteed by Mopar's factory warranty.
2007 Jeep Wrangler Clock Spring Parts and Q&A
- Q: How to Install a Clock Spring Assembly on 2007 Jeep Wrangler?A: The Clock Spring assembly should be installed after the supplemental restraint system is disabled and the air bag is disarmed for two minutes following battery cable disconnection. With a service replacement Clock Spring, a locking pin is set in place and it should stay there until the steering wheel is mounted, because you would otherwise have to center it all over again. First, center and lock the steering wheel with the brake set. Whenever you are installing a new Clock Spring, transfer the multifunction switch jumper harness using wires. Put the Clock Spring over the steering column upper shaft and connect the three instrument panel wire harnesses to the back of its case. Set the Clock Spring into place on the steering column lock housing and secure it with three screws in the sequence of lower right, upper left and upper right, tighten them to 3 Nm (27 in. lbs.) and this will help prevent any ticking sound when rotating the steering wheel. Replace the multi-function switches on the left and right onto the Clock Spring, then put on the upper and lower shrouds to the steering column. First, position the steering column up, lock it and then reattach the steering wheel. At this point, pull out the plastic locking pin in the rotor and attach the negative battery cable once more.
Related 2007 Jeep Wrangler Parts
 2007 Jeep Wrangler Ignition Switch
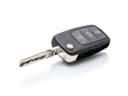 2007 Jeep Wrangler Car Key
 2007 Jeep Wrangler Headlight Switch
 2007 Jeep Wrangler Air Bag
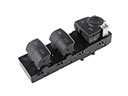 2007 Jeep Wrangler Power Window Switch
 2007 Jeep Wrangler Air Bag Control Module
 2007 Jeep Wrangler Air Bag Sensor
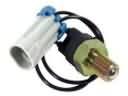 2007 Jeep Wrangler Back Up Light Switch
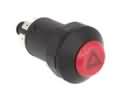 2007 Jeep Wrangler Hazard Warning Switch
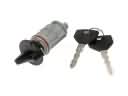 2007 Jeep Wrangler Ignition Lock Assembly
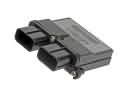 2007 Jeep Wrangler Occupant Detection Sensor
 2007 Jeep Wrangler Transmitter