JeepParts
My Garage
My Account
Cart
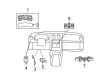
OEM 2008 Jeep Liberty Instrument Cluster
Speedometer Instrument Cluster- Select Vehicle by Model
- Select Vehicle by VIN
Select Vehicle by Model
orMake
Model
Year
Select Vehicle by VIN
For the most accurate results, select vehicle by your VIN (Vehicle Identification Number).
2 Instrument Clusters found

2008 Jeep Liberty Instrument Cluster Part Number: 5172024AK
Product Specifications- Other Name: Cluster - Instrument Panel; Cluster Assembly
- Replaces: 5172024AD, 5172024AI, 5172024AH, 5172024AJ, 5172024AG
- Item Weight: 3.10 Pounds
- Item Dimensions: 16.2 x 10.3 x 6.2 inches
- Condition: New
- Fitment Type: Direct Replacement
- SKU: 5172024AK
- Warranty: This genuine part is guaranteed by Mopar's factory warranty.
2008 Jeep Liberty Instrument Cluster Part Number: 5172023AK
Product Specifications- Other Name: Cluster - Instrument Panel; Cluster Assembly
- Replaces: 5172023AG, 5172023AJ, 5172023AI, 5172023AD, 5172023AH, 5172023AE
- Item Weight: 3.00 Pounds
- Item Dimensions: 16.3 x 10.3 x 6.1 inches
- Condition: New
- Fitment Type: Direct Replacement
- SKU: 5172023AK
- Warranty: This genuine part is guaranteed by Mopar's factory warranty.
2008 Jeep Liberty Instrument Cluster Parts and Q&A
- Q: How to Install an Instrument Cluster on a Instrument Panel on 2008 Jeep Liberty?A: The first step before installing the instrument panel is to disconnect and isolate the battery negative cable, so that the air bag system is disabled. Wait two minutes after this to allow the air bag system capacitor to discharge. Turn the steering until the front wheels are lined up ahead. Place the instrument panel in the car, then attach the 40 way electrical connectors and Nag 1 connector for the transmission, if there is one. Secure the brackets for the lower and upper instrument panel and finally set up the glove box. Secure fasteners onto the center instrument panel, join the cables for the control head, lighter and switch group and slide the center bezel of the instrument panel into place. After the base bracket, install the bolts where marked on the bottom and front of the pedal support bracket and remember to connect the electrical connector to the inner brace side. Make sure the center stack and clips in-between the HVAC duct and instrument panel are locked before you tighten the upper instrument panel bolts. Put on the instrument panel with two bolts and clamp it firmly, not exceeding 28 Nm (20.5 ft. lbs.), to prevent the defroster grille clips from being broken. Place the defroster grille in its position and close its clips by hand pressure. Connect the steering column, seating it in the column holder and tighten the bolts to 6 Nm (55 in. lbs.). Also, at the lower instrument panel, tighten the bolts on the nuts to 30.5 Nm (22.5 ft. lbs.). Attach the cowl side panels to the right and left, before lining up the instruments cover claws with the tabs to slide it in the center. Pull up the steering column cover while pressing on the clips with your hands. Attach the instrument panel bracket and nuts, tighten them up to 28 Nm (20.5 ft. lbs.) and then put in the console and the floor close-out panels, tighten those bolts to just 2.5 Nm (22 in. lbs.). Set the A-pillar trim tab from the right and left sides into the top cover slots, join the A-pillar trim molding to the chassis and at last attach the negative battery cable to the battery.
Related 2008 Jeep Liberty Parts
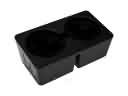 2008 Jeep Liberty Cup Holder
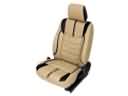 2008 Jeep Liberty Seat Cover
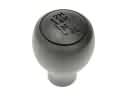 2008 Jeep Liberty Shift Knob
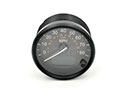 2008 Jeep Liberty Speedometer
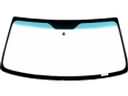 2008 Jeep Liberty Windshield
 2008 Jeep Liberty Tailgate Handle
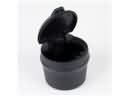 2008 Jeep Liberty Ashtray
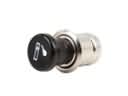 2008 Jeep Liberty Cigarette Lighter
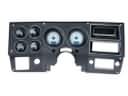 2008 Jeep Liberty Dash Panels
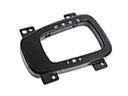 2008 Jeep Liberty Shift Indicator
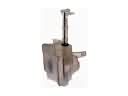 2008 Jeep Liberty Washer Reservoir
 2008 Jeep Liberty Wheelhouse