JeepParts
My Garage
My Account
Cart
OEM Jeep Liberty Instrument Cluster
Speedometer Instrument Cluster- Select Vehicle by Model
- Select Vehicle by VIN
Select Vehicle by Model
orMake
Model
Year
Select Vehicle by VIN
For the most accurate results, select vehicle by your VIN (Vehicle Identification Number).
21 Instrument Clusters found


Jeep Liberty Instrument Cluster Part Number: 56010575AE
$515.25 MSRP: $750.00You Save: $234.75 (32%)Ships in 1-3 Business Days
Jeep Liberty Instrument Cluster Part Number: 5172860AF
$537.01 MSRP: $786.00You Save: $248.99 (32%)
Jeep Liberty Instrument Cluster Part Number: 56044881AD

Jeep Liberty Cluster Assembly Part Number: 56044875AD
Jeep Liberty Instrument Cluster Part Number: 56044865AD
Jeep Liberty Instrument Cluster Part Number: 56010582AE
Jeep Liberty Instrument Cluster Part Number: 56010572AE
Jeep Liberty Instrument Cluster Part Number: 56010539AG
Jeep Liberty Instrument Cluster Part Number: 56010528AG
Jeep Liberty Instrument Cluster Part Number: 5172902AB
Jeep Liberty Cluster Assembly Part Number: 5172924AE
Jeep Liberty Cluster Assembly Part Number: 5172751AC
Jeep Liberty Instrument Cluster Part Number: 5172753AC
Jeep Liberty Instrument Cluster Part Number: 5172023AK
Jeep Liberty Instrument Cluster Part Number: 56010573AE

Jeep Liberty Instrument Cluster Part Number: 5172752AC
Jeep Liberty Instrument Cluster Part Number: 5172024AK
Jeep Liberty Instrument Cluster Part Number: 5172920AE

Jeep Liberty Instrument Cluster Part Number: 5172921AE
Jeep Liberty Instrument Cluster Part Number: 5172861AF
| Page 1 of 2 |Next >
1-20 of 21 Results
Jeep Liberty Instrument Cluster
Choose OEM Instrument Cluster that meet Jeep factory standards. Jeep designs and tests every component for precision and durability. Each Instrument Cluster follows strict manufacturing steps to lock in quality and fit. If your Jeep Liberty matters to you, OEM parts make the smart choice. You'll get the exact look, feel, and performance you expect. Shop genuine Liberty parts at the highly competitive prices online. Enjoy a manufacturer's warranty, a hassle-free return policy, and rapid delivery. No more guesswork with off brands. Get genuine parts with exact fit and true factory performance. Shop with confidence today at JeepPartsDeal.com.
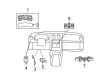
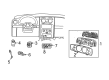
The Instrument Cluster is another important part of Jeep Liberty vehicles located at the rear of the Steering Wheel responsible for conveying vital information concerning the driving environment. This consists the speedometer, the tachometer and the fuel gauge and numerous other lights and symbols that notify the driver about the general performance of the automobile, the condition of the engine and safety symbols like for instance those for the seat belts. As is the case with a typical car model, Jeep Liberty has employed various styles of Instrument Clusters over the years. The basic function is to inform the driver and such additional options may include different types of displays as well as the ability to provide better performance data readings. Any problems with the Instrument Cluster, for instance, faulty gauges or if the factory unit is no longer operational, then It can be changed for a remanufactured cluster to help the driver keep track of the state of the vehicle.
Jeep Liberty Instrument Cluster Parts and Q&A
- Q: How to Install an Instrument Cluster on a Dashboard on Jeep Liberty?A:Installation of the instrument panel starts by disconnecting the battery's negative cable, let the air bag system discharge for two minutes and disable the air bag system. Turn the Steering Wheel all the way until you can see the front wheels facing straight ahead. Begin by mounting the instrument panel to the car and joining the two electric connectors, not forgetting those used for right-hand drive. Use fasteners to secure both sides of the instrument panel and then set the Glove Box in place and secure the center instrument panel fasteners. First, attach the control head, lighter and the switch bank and after that, set in the instrument panel center bezel. Fasten two bolts to the base of the plastic pedal support and two others to its edge that faces the dash; then, put the electrical connector on the pedal support where it says R on the dash. Only tighten the bolts holding the upper instrument panel when the clips in the center and in between the HVAC duct and instrument panel are engaged. Secure the instrument panel to the body with two bolts, tightening each to 28 Nm (20.5 ft. lbs.), be careful not to break them while fitting the defroster grille clips. Place the defroster grilles, followed by the Steering Column and tighten the bolts of both items to 6 Nm (55 in. lbs.) and the nuts underneath the lower instrument panel to 30.5 Nm (22.5 ft. lbs.). Put on the right and left cowl side panels, attach the kneeblocker and set in the instrument panel support bracket, tightening with 28 Nm (20.5 ft. lbs.) of nuts. Fit both the floor console and the close-out panels, attaching them using 2.5 Nm (22 in. lbs.) bolts. Snap the A-pillar trim tab on each side into the top cover slot on the instrument panel, align them with the trim molding and lastly, connect the vehicle's negative Battery Cable to the battery.
- Q: How to Remove and Replace an Instrument Cluster Safely on Jeep Liberty?A:Before installing the instrument cluster, stop the Supplemental Restraint System by disconnecting the negative Battery Cable and then wait two minutes. Mount the cluster near the instrument panel to link the wire harness plug and receptacles. Match the tabs on the instrument cluster with the holes in the instrument panel base trim and fasten them by screwing in the four screws, tightened to 2 Nm (17 in. lbs.). Place the cluster bezel on the instrument panel and link the battery negative cable again. The indicators in the instrument cluster are automatically set up for optional equipment; if one of these indicators remains unlit, disconnect the negative battery cable, wait five minutes and reconnect it before turning on the Ignition Switch.


Related Jeep Liberty Parts
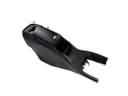 Jeep Liberty Center Console
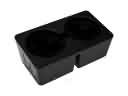 Jeep Liberty Cup Holder
 Jeep Liberty Shift Knob
 Jeep Liberty Speedometer
 Jeep Liberty Air Deflector
 Jeep Liberty Ashtray
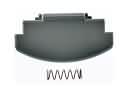 Jeep Liberty Center Console Latch
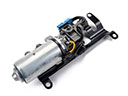 Jeep Liberty Convertible Top Motor
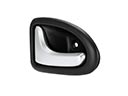 Jeep Liberty Interior Door Handle
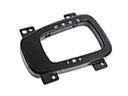 Jeep Liberty Shift Indicator
 Jeep Liberty Shift Linkage Boot
 Jeep Liberty Tailgate Lock