JeepParts
My Garage
My Account
Cart
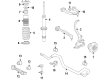
OEM 2009 Dodge Challenger Control Arm
Suspension Arm- Select Vehicle by Model
- Select Vehicle by VIN
Select Vehicle by Model
orMake
Model
Year
Select Vehicle by VIN
For the most accurate results, select vehicle by your VIN (Vehicle Identification Number).
3 Control Arms found


2009 Dodge Challenger Lower Control Arm, Front Part Number: 68002123AC
$220.94 MSRP: $329.00You Save: $108.06 (33%)Ships in 1-2 Business DaysProduct Specifications- Other Name: Arm - Lower Control; Suspension Control Arm, Front Lower Rearward; Suspension Control Arm Bushing; Upper Control Arm; Arm Lower Control Front Lower; Arm Lower Control Front; Suspension Control Arm; Control Arm
- Position: Front Lower
- Replaces: 68002123AA, 68002123AB
- Item Weight: 6.40 Pounds
- Item Dimensions: 3.1 x 4.1 x 16.8 inches
- Condition: New
- Fitment Type: Direct Replacement
- Require Quantity: 2
- SKU: 68002123AC
- Warranty: This genuine part is guaranteed by Mopar's factory warranty.

2009 Dodge Challenger Upper Control Arm, Front Driver Side Part Number: 4782665AF
$127.11 MSRP: $190.00You Save: $62.89 (34%)Ships in 1-3 Business DaysProduct Specifications- Other Name: Arm - Upper Control; Front Left Upper Suspension Control Arm and Ball Joint Assembly.
- Position: Front Upper Driver Side
- Replaces: 4782665AE, 4782665AC
- Item Weight: 6.00 Pounds
- Item Dimensions: 3.1 x 11.8 x 12.6 inches
- Condition: New
- Fitment Type: Direct Replacement
- SKU: 4782665AF
- Warranty: This genuine part is guaranteed by Mopar's factory warranty.

2009 Dodge Challenger Upper Control Arm, Front Passenger Side Part Number: 4782666AF
$243.60 MSRP: $361.00You Save: $117.40 (33%)Product Specifications- Other Name: Arm - Upper Control; Front Right Upper Suspension Control Arm and Ball Joint Assembly.
- Position: Front Upper Passenger Side
- Replaces: 4782666AC, 4782666AE
- Item Weight: 6.10 Pounds
- Item Dimensions: 2.7 x 12.4 x 13.1 inches
- Condition: New
- Fitment Type: Direct Replacement
- SKU: 4782666AF
- Warranty: This genuine part is guaranteed by Mopar's factory warranty.
2009 Dodge Challenger Control Arm Parts and Q&A
- Q: How to Remove the Front Lower Control Arm on 2009 Dodge Challenger?A: Do this by holding the vehicle up, undoing the nuts in the wheel mounting and taking out the tire and wheel. After that, take the belly pan off and get rid of the screws connecting the stabilizer bar heat shield to the side of the control arm. Take out the bolts that hold the retainer and the halves of the retainer around the stabilizer bar bushing. Use the slit to help you take out the bushing from the stabilizer bar. Remove the cradle bolt from beneath the car through the opening made by removing the bushing, avoiding twisting it if the bolt has a lengthwise grooved shaft. With a wrench onto the bolt, twist the nut off and pull the bolt out. Watch how it was attached so you can match the position when you put it back. Unbolt and release the nut that fastens the lower control arm to the engine cradle. However, be sure to remember how it was placed before removing it. After that, get rid of the bolt holding the shock assembly to the lower control arm and take out the screw connecting the wheel speed sensor to the knuckle before removing and pulling the sensor head out. Take off the wheel speed sensor cable routing clip from the bracket where the brake flex hose is attached. Unlock the nut that holds the ball joint stud, keeping it level with the stud, to prevent damage as you move on. Use Ball Joint Remover 9360 to separate the stud from the lower arm and then pull the nut off the ball joint stud. Push the knuckle downward and withdraw the ball joint stud from the lower control arm, so the knuckle faces outward. Remove the lower arm from the engine cradle and then out of the entire vehicle.
Related 2009 Dodge Challenger Parts
 2009 Dodge Challenger Ball Joint
 2009 Dodge Challenger Wheel Bearing
 2009 Dodge Challenger Shock Absorber
 2009 Dodge Challenger Coil Spring Insulator
 2009 Dodge Challenger Coil Springs
 2009 Dodge Challenger Lateral Link
 2009 Dodge Challenger Leaf Spring Bushing
 2009 Dodge Challenger Shock And Strut Mount
 2009 Dodge Challenger Sway Bar Bracket
 2009 Dodge Challenger Sway Bar Kit
 2009 Dodge Challenger Wheel Cover
 2009 Dodge Challenger Wheel Hub