JeepParts
My Garage
My Account
Cart
OEM 2009 Dodge Challenger Timing Belt
Engine Timing Belt- Select Vehicle by Model
- Select Vehicle by VIN
Select Vehicle by Model
orMake
Model
Year
Select Vehicle by VIN
For the most accurate results, select vehicle by your VIN (Vehicle Identification Number).
1 Timing Belt found


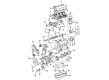
2009 Dodge Challenger Timing Belt Part Number: 4792353
$85.20 MSRP: $127.00You Save: $41.80 (33%)Product Specifications- Other Name: Belt - Timing; Engine Timing Belt; Timing Belt Kit; Belt Timing
- Item Weight: 0.90 Pounds
- Item Dimensions: 3.0 x 9.7 x 12.1 inches
- Condition: New
- Fitment Type: Direct Replacement
- SKU: 4792353
- Warranty: This genuine part is guaranteed by Mopar's factory warranty.
2009 Dodge Challenger Timing Belt Parts and Q&A
- Q: How to Properly Align and Replace a Timing Belt on a 2009 Dodge Challenger?A: The first step to removing and installing the timing belt is to cut off the negative cable from the battery. Following that, take out the cover for the timing belt at the front. Should the timing belt need to be used again, mark its running direction on it. It's important to turn the crankshaft to line up timing marks, because if you skip that, the valves and pistons could be damaged. Rotate the crankshaft clockwise until its mark at the oil pump housing is aligned with TDC and the camshaft sprocket timing marks are also aligned with marks found on the rear cover. Unmount the timing belt tensioner first and afterward, the timing belt as well. Inspect the arm and pulley area for leaking fluid and check the arm pivot and bolt for movement, grease leaks and smooth rotation; if it turns freely, do nothing, but if not, replace the whole arm and pulley unit. Make sure that when pulling out the tensioner, you squeeze it to let it index in the vise as the engine has it fitted, so the tensioner pin is ready for installation. Fit the tensioner into a vise and, while slightly pushing the plunger, let the air out for about two minutes. With the tensioner body pushing on the plunger, add a pin through the holes in both parts, so that the plunger stays in place until the tensioner assembly is in place.
Related 2009 Dodge Challenger Parts
 2009 Dodge Challenger Dipstick
 2009 Dodge Challenger Oil Pan
 2009 Dodge Challenger Oil Pump
 2009 Dodge Challenger Valve Cover Gasket
 2009 Dodge Challenger Crankshaft
 2009 Dodge Challenger Cylinder Head Gasket
 2009 Dodge Challenger Oil Filler Cap
 2009 Dodge Challenger Oil Pan Gasket
 2009 Dodge Challenger Rocker Arm Pivot
 2009 Dodge Challenger Timing Cover
 2009 Dodge Challenger Timing Cover Gasket
 2009 Dodge Challenger Transmission Mount