JeepParts
My Garage
My Account
Cart
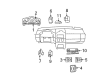
OEM 2009 Dodge Grand Caravan A/C Switch
Air Conditioning Switch- Select Vehicle by Model
- Select Vehicle by VIN
Select Vehicle by Model
orMake
Model
Year
Select Vehicle by VIN
For the most accurate results, select vehicle by your VIN (Vehicle Identification Number).
8 A/C Switches found


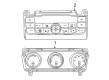
2009 Dodge Grand Caravan Control Assembly, Front Part Number: 55111805AJ
$418.80 MSRP: $632.00You Save: $213.20 (34%)Ships in 1-2 Business DaysProduct Specifications- Other Name: Control - A/C And Heater; HVAC Temperature Control Panel, Front, Front Lower; Climate Control Module; Dash Control Unit; Controller
- Position: Front
- Replaces: 55111805AI, 55111805AF, 55111805AE, 55111805AD, 55111805AB, 55111805AC, 55111805AG, 55111805AH
- Item Weight: 1.80 Pounds
- Item Dimensions: 4.5 x 5.7 x 12.4 inches
- Condition: New
- Fitment Type: Direct Replacement
- SKU: 55111805AJ
- Warranty: This genuine part is guaranteed by Mopar's factory warranty.


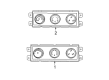
2009 Dodge Grand Caravan Control Assembly, Rear Part Number: 55111810AD
$90.32 MSRP: $200.00You Save: $109.68 (55%)Ships in 1-2 Business DaysProduct Specifications- Other Name: Control - A/C And Heater - Auxiliary; HVAC Temperature Control Panel, Rear; Climate Control Module; Heater & A/C Control; Control A/C And Heater - Auxiliary No Serviceable Components; Control A/C And Heater - Auxiliary
- Position: Rear
- Replaces: 55111810AA, 55111810AC, 55111812AA
- Item Weight: 1.30 Pounds
- Item Dimensions: 10.2 x 5.3 x 3.6 inches
- Condition: New
- Fitment Type: Direct Replacement
- SKU: 55111810AD
- Warranty: This genuine part is guaranteed by Mopar's factory warranty.

2009 Dodge Grand Caravan Control Assembly, Rear Part Number: 55111812AD
$118.97 MSRP: $176.00You Save: $57.03 (33%)Product Specifications- Other Name: Control - A/C And Heater - Auxiliary; HVAC Temperature Control Panel, Rear; Climate Control Module; Heater & A/C Control; Dash Control Unit; Auxiliary, No Serviceable Components.
- Position: Rear
- Replaces: 55111818AB, 55111812AC
- Item Weight: 3.50 Pounds
- Item Dimensions: 7.8 x 2.7 x 2.3 inches
- Condition: New
- Fitment Type: Direct Replacement
- SKU: 55111812AD
- Warranty: This genuine part is guaranteed by Mopar's factory warranty.


 Product Specifications
- Other Name: Control - A/C And Heater; HVAC Temperature Control Panel, Front, Front Lower; Climate Control Module; Dash Control Unit; Controller
- Position: Front Lower
- Replaces: 55111804AC, 55111804AI, 55111804AF, 55111804AH, 55111804AD, 55111804AG, 55111804AB, 55111804AE
- Item Weight: 1.60 Pounds
- Item Dimensions: 12.4 x 5.5 x 4.6 inches
- Condition: New
- Fitment Type: Direct Replacement
- SKU: 55111804AJ
- Warranty: This genuine part is guaranteed by Mopar's factory warranty.


 Product Specifications
- Other Name: Control - A/C And Heater - Auxiliary; HVAC Temperature Control Panel, Front; Climate Control Module; Dash Control Unit
- Position: Front
- Replaces: 55111946AB, 55111946AC, 55111946AA
- Item Weight: 1.30 Pounds
- Item Dimensions: 10.9 x 3.9 x 3.6 inches
- Condition: New
- Fitment Type: Direct Replacement
- SKU: 55111946AD
- Warranty: This genuine part is guaranteed by Mopar's factory warranty.


2009 Dodge Grand Caravan Control Assembly, Front Part Number: 55111807AK
$480.90 MSRP: $703.00You Save: $222.10 (32%)Product Specifications- Other Name: Control - A/C And Heater; HVAC Temperature Control Panel, Front; Climate Control Module; Dash Control Unit
- Position: Front
- Replaces: 55111807AE, 55111807AC, 55111807AJ, 55111807AI, 55111807AG, 55111807AH, 55111807AD, 55111807AF
- Item Weight: 2.30 Pounds
- Item Dimensions: 13.3 x 6.2 x 4.6 inches
- Condition: New
- Fitment Type: Direct Replacement
- SKU: 55111807AK
- Warranty: This genuine part is guaranteed by Mopar's factory warranty.
- Product Specifications
- Other Name: Control - A/C And Heater; HVAC Temperature Control Panel, Front; Climate Control Module; Dash Control Unit
- Position: Front
- Replaces: 55111808AF, 55111808AC, 55111808AE, 55111808AG, 55111808AI, 55111808AH, 55111808AJ, 55111808AD
- Item Weight: 2.00 Pounds
- Item Dimensions: 12.6 x 5.7 x 4.5 inches
- Condition: New
- Fitment Type: Direct Replacement
- SKU: 55111808AK
- Warranty: This genuine part is guaranteed by Mopar's factory warranty.
 Product Specifications
- Other Name: Control - A/C And Heater; HVAC Temperature Control Panel, Front; Climate Control Module; Dash Control Unit; Control A/C And Heater
- Position: Front
- Replaces: 55111801AC, 55111933AA, 55111801AH, 55111801AD, 55111801AG, 55111801AE, 55111801AF
- Item Weight: 1.30 Pounds
- Item Dimensions: 8.8 x 3.4 x 3.3 inches
- Condition: New
- Fitment Type: Direct Replacement
- SKU: 55111933AB
- Warranty: This genuine part is guaranteed by Mopar's factory warranty.
2009 Dodge Grand Caravan A/C Switch Parts and Q&A
- Q: How to Safely Service the A/C Switch Without Causing Damage on 2009 Dodge Grand Caravan?A: Service of the control assembly starts by first turning off the air bags by disconnecting the negative battery cable, then let the air bags discharge for two minutes to make sure they don't go off and hurt someone during servicing. Keep the front surface of the instrument panel center bezel protected during the work. For all cases, first unplug the negative battery cable and remember where and which connector is used on the A/C-heater control back. Remove the bezel from the center of your instrument panel, then place it down on a workbench. As the last step, unscrew the four screws holding the A/C-heater control to the instrument panel center bezel and take out the control.
Related 2009 Dodge Grand Caravan Parts
 2009 Dodge Grand Caravan Blend Door Actuator
 2009 Dodge Grand Caravan Blower Motor
 2009 Dodge Grand Caravan Blower Motor Resistor
 2009 Dodge Grand Caravan Heater Core
 2009 Dodge Grand Caravan A/C Accumulator
 2009 Dodge Grand Caravan A/C Compressor
 2009 Dodge Grand Caravan A/C Condenser
 2009 Dodge Grand Caravan A/C Expansion Valve
 2009 Dodge Grand Caravan A/C Hose
 2009 Dodge Grand Caravan Ambient Temperature Sensor
 2009 Dodge Grand Caravan Blower Control Switches
 2009 Dodge Grand Caravan Evaporator