JeepParts
My Garage
My Account
Cart
OEM 2010 Dodge Grand Caravan Clock Spring
Spiral Cable Clock Spring- Select Vehicle by Model
- Select Vehicle by VIN
Select Vehicle by Model
orMake
Model
Year
Select Vehicle by VIN
For the most accurate results, select vehicle by your VIN (Vehicle Identification Number).
1 Clock Spring found

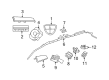
2010 Dodge Grand Caravan Clockspring Part Number: 56046241AC
Product Specifications- Other Name: Clockspring - Steering Angle/Clockspring; Air Bag Clockspring; Sensor Steering Angle/Clockspring Assembly
- Replaces: 56046119AB, 56046241AA, 56046241AB, 56046119AA, 68036567AA, 68036567AB
- Item Weight: 1.50 Pounds
- Item Dimensions: 7.3 x 7.9 x 8.2 inches
- Condition: New
- Fitment Type: Direct Replacement
- SKU: 56046241AC
- Warranty: This genuine part is guaranteed by Mopar's factory warranty.
2010 Dodge Grand Caravan Clock Spring Parts and Q&A
- Q: How to Install a Clock Spring Assembly on 2010 Dodge Grand Caravan?A: Before installing the Clock Spring assembly, cut the battery cabin's negative cable, enable the ignition and then give it two minutes to avoid triggering the air bags when connecting the batteries back together. The Clock Spring must be centered between the Steering Angle Sensor (SAS), steering wheel, steering shaft and steering gear to prevent problems and DTCs from occurring. Replacement Clock Springs are already centered with a pin which should remain in until you install the Clock Spring on the steering column. It's important to reinstall the adjustable pedal switch blank filler or switch before positioning the multi-function switch. After the rotor and case are secured, insert the Clock Spring over the steering column upper shaft and link back up the multi-function switch connector, SAS connector, two Clock Spring connectors and adjustable pedal switch connector. Carefully place the Clock Spring on the steering column housing and insert the two captive screws that are provided to properly secure its back end. Tighten both screws to 3 Nm (25 in. lbs.). Next, attach the screw to the face of the Clock Spring, secure it to the steering column and tighten it to 3 Nm (25 in. lbs.). Once the shrouds are reinstalled on the steering housing, remove the plastic locking pin to allow the Clock Spring to keep its center. Fit the steering wheel into place, so the drive pin on the Clock Spring fits into the wheel's hole and secure the wire harness to the upper Clock Spring connector receptacle in its correct track. Last, place the air bag driver onto the steering wheel and reconnect the negative cable of the battery and use a diagnostic scanner to ensure the Clock Spring is installed correctly by looking at the SAS Menu Item, Data Display setting.
Related 2010 Dodge Grand Caravan Parts
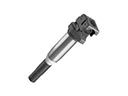 2010 Dodge Grand Caravan Ignition Coil
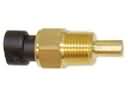 2010 Dodge Grand Caravan Coolant Temperature Sensor
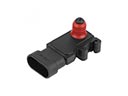 2010 Dodge Grand Caravan MAP Sensor
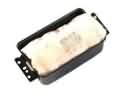 2010 Dodge Grand Caravan Air Bag
 2010 Dodge Grand Caravan Air Bag Control Module
 2010 Dodge Grand Caravan Air Bag Sensor
 2010 Dodge Grand Caravan Brake Light Switch
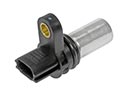 2010 Dodge Grand Caravan Camshaft Position Sensor
 2010 Dodge Grand Caravan Engine Control Module
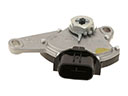 2010 Dodge Grand Caravan Neutral Safety Switch
 2010 Dodge Grand Caravan Occupant Detection Sensor
 2010 Dodge Grand Caravan Transmitter