JeepParts
My Garage
My Account
Cart
OEM Chrysler Aspen Clock Spring
Spiral Cable Clock Spring- Select Vehicle by Model
- Select Vehicle by VIN
Select Vehicle by Model
orMake
Model
Year
Select Vehicle by VIN
For the most accurate results, select vehicle by your VIN (Vehicle Identification Number).
2 Clock Springs found


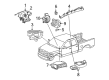
Chrysler Aspen Clockspring Part Number: 56049795AE
$226.60 MSRP: $334.00You Save: $107.40 (33%)


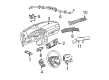
Chrysler Aspen Clockspring Part Number: R5082062AJ
Chrysler Aspen Clock Spring
Choose OEM Clock Spring that meet Chrysler factory standards. Chrysler designs and tests every component for precision and durability. Each Clock Spring follows strict manufacturing steps to lock in quality and fit. If your Chrysler Aspen matters to you, OEM parts make the smart choice. You'll get the exact look, feel, and performance you expect. Shop genuine Aspen parts at the highly competitive prices online. Enjoy a manufacturer's warranty, a hassle-free return policy, and rapid delivery. No more guesswork with off brands. Get genuine parts with exact fit and true factory performance. Shop with confidence today at JeepPartsDeal.com.
The Chrysler Aspen Clock Spring functions as a key Supplemental Restraint System (SRS) part which maintains dependable electrical links between the airbag module and vehicle electrical system. The connection remains essential to activate airbags swiftly in crashes since it improves passenger protection significantly. The Chrysler Aspen Clock Spring integrates a flat multicore cable structure that winds into a spiral form for energy storage purposes and ensuring wheel steering rotation. The Clock Spring works for every Chrysler Aspen model from 2006 through 2008 and is essential to keep airbag system function safe thus improving vehicle safety features. The Chrysler Aspen obtains reliable and efficient performance from its Clock Spring component because this safety system enables seamless operation of the vehicle's safety features. The special features integrated with the Clock Spring design such as spring-loaded brushes and concentric slip rings elevate it as a distinctive automotive market solution. The Chrysler Aspen Clock Spring stands out as an essential component that delivers performance excellence and solid durability to the the automaker model while ensuring its operational safety and becoming a remarkable feature of this luxury full-size SUV.
Chrysler Aspen Clock Spring Parts and Q&A
- Q: How to Remove and Replace a Clock Spring Assembly on Chrysler Aspen?A:The first step to remove and replace the Clock Spring Assembly is to unplug and isolate the battery negative cable, making sure to wait two minutes after that for the SRS's capacitor to discharge. Turn the Steering Wheel until the front tires are pointing right in front of you. Wait and now lift out the driver air bag from the steering wheel as well as take out the steering wheel wire harness connectors from the upper Clock Spring connector receptacles. Don't rush when you take out the steering wheel to ensure that the toggle on the steering wheel puller is secure and won't harm the Clock Spring. Loosen the screw around the tilt Steering Column knob and take it away from the tilt actuator. From under the steering column, remove the two screws at the side of the upper shroud that are holding it against the lower shroud and then press the sides of the upper shroud in gently to release the snaps. Take the upper shroud off, next remove the screw in the center holding the lower shroud to the steering column and then remove the lower shroud. Separate the two connections between the instrument panel wire harness and their receptacles found below the steering column on the back of the Clock Spring housing, as well as remove the instrument panel wire harness connector from the Steering Angle Sensor (SAS) plug. Remove the two screws holding the Clock Spring to the multi-function switch mounting housing and pull out the Clock Spring, because it cannot be fixed and must be swapped if anything is wrong with it. If you plan to reuse the Clock Spring, connect the rotor to the Clock Spring case to keep it centered prior to installing it; if it isn't centered, the Clock Spring must be re-centered before you install it.
- Q: How to Install a Clock Spring Assembly on Chrysler Aspen?A:Unplug the negative battery cable to turn off the Supplemental Restraint System (SRS) and wait two minutes for the system capacitor to discharge before pulling apart the old and new Clock Spring assembly. For cars with Hybrid Electric Vehicles, make sure you pull out the high voltage service disconnect. Verify first that the front wheels are directly facing the front of the car. Center the Clock Spring rotor and case or keep the plastic locking pin in place, then slowly pull the Clock Spring down along the steering column inner shaft. Position the hole on the Clock Spring case over the locating pin on the multi-function switch mounting housing, fasten using two screws and tighten them to 2 Nm (20 in. lbs.). Plug each of the wire connectors from the panel back into the Clock Spring housing and the SAS connector's receptacles at the back. Set the lower piece of the shroud onto the steering column and use one center screw to attach it, making sure it's tightened to 2 Nm (20 in. lbs.). Lay the upper shroud above the lower shroud, making sure the gearshift lever gap hider is in place, snap then together and use two outboard screws to secure them, tightening both to 2 Nm (20 in. lbs.). After that, connect the tilt steering column knob to the tilt adjuster actuator and tighten the screw to 2 Nm (20 in. lbs.). When you put in a new Clock Spring, remove the plastic locking pin to keep the spring centered. Thread the engagement dowel into the Steering Wheel collar, connect the wire harness at the correct places and secure the steering wheel. Make sure to mount the driver air bag on the steering wheel again and reconnect the negative battery cable. Do not forget to replace the high voltage service disconnect for vehicles with hybrid engines.


Related Chrysler Aspen Parts
 Chrysler Aspen Air Bag Control Module
 Chrysler Aspen Air Bag Sensor
 Chrysler Aspen Airbag
 Chrysler Aspen Antenna Mast
 Chrysler Aspen Fuse
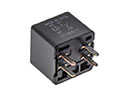 Chrysler Aspen HVAC Relay
 Chrysler Aspen Ignition Switch
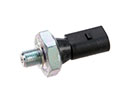 Chrysler Aspen Oil Pressure Switch
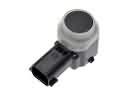 Chrysler Aspen Parking Assist Sensor
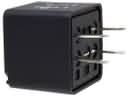 Chrysler Aspen Relay
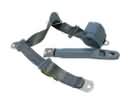 Chrysler Aspen Seat Belt
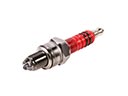 Chrysler Aspen Spark Plug