JeepParts
My Garage
My Account
Cart
OEM Chrysler Cirrus Front Cross-Member
Front Engine Cross Member- Select Vehicle by Model
- Select Vehicle by VIN
Select Vehicle by Model
orMake
Model
Year
Select Vehicle by VIN
For the most accurate results, select vehicle by your VIN (Vehicle Identification Number).
2 Front Cross-Members found

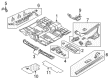
Chrysler Cirrus Crossmember, Front Part Number: 4646682AD

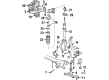
Chrysler Cirrus Engine Cradle, Front Part Number: 4626920AC
Chrysler Cirrus Front Cross-Member
Choose OEM Front Cross-Member that meet Chrysler factory standards. Chrysler designs and tests every component for precision and durability. Each Front Cross-Member follows strict manufacturing steps to lock in quality and fit. If your Chrysler Cirrus matters to you, OEM parts make the smart choice. You'll get the exact look, feel, and performance you expect. Shop genuine Cirrus parts at the highly competitive prices online. Enjoy a manufacturer's warranty, a hassle-free return policy, and rapid delivery. No more guesswork with off brands. Get genuine parts with exact fit and true factory performance. Shop with confidence today at JeepPartsDeal.com.
Chrysler Cirrus Front Cross-Member Parts and Q&A
- Q: How to Maintain the Front Cross-Member on Chrysler Cirrus?A:Before touching the front suspension crossmember, support and raise the vehicle on safety stands, then lift it at the crossmember with the appropriate device. Loosen and remove the bolts holding the suspension strut to the lower control arm and take out the lower Ball Joints from the lower control arms. Alternatively, take out the bolts linking the front of the suspension crossmember to the railway under the control arms and loosen those along the rear, so that the front of the crossmember can be moved away from the frames. Take out the bolts holding the steering gear to the top of the suspension crossmember, being sure not to have the steering gear suspended by the hoses to prevent damage. Connect the steering gear to the support above using mechanics wire, lift the crossmember into place and take out the bolts that are holding the rear of the crossmember to the torque boxes. During installation, move the front suspension crossmember into place and temporarily attach the crossmember rears to the torque boxes in the frame rail. Raise the suspension crossmember, hook the bolts to the underside and screw them to the steering gear. Then lower the crossmember down and tighten the bolts that secure the rear crossmember to the frame rail torque boxes. Then, put in the bolts holding the front of the suspension crossmember to the frame rails under upper control arm, connect the lower ball joint to the lower control arms and connect the bolts attaching the suspension strut alone.

Related Chrysler Cirrus Parts
 Chrysler Cirrus Air Deflector
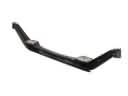 Chrysler Cirrus Axle Beam
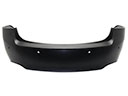 Chrysler Cirrus Bumper Cover
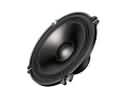 Chrysler Cirrus Car Speakers
 Chrysler Cirrus Floor Pan
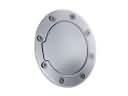 Chrysler Cirrus Fuel Door
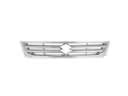 Chrysler Cirrus Grille
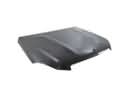 Chrysler Cirrus Hood
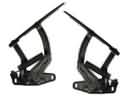 Chrysler Cirrus Hood Hinge
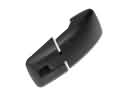 Chrysler Cirrus Liftgate Hinge
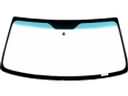 Chrysler Cirrus Windshield
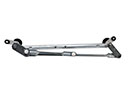 Chrysler Cirrus Wiper Pivot