JeepParts
My Garage
My Account
Cart
OEM Chrysler PT Cruiser Occupant Detection Sensor
OPDS Sensor- Select Vehicle by Model
- Select Vehicle by VIN
Select Vehicle by Model
orMake
Model
Year
Select Vehicle by VIN
For the most accurate results, select vehicle by your VIN (Vehicle Identification Number).
1 Occupant Detection Sensor found

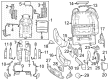
Chrysler PT Cruiser Position Sensor Part Number: 68605049AA
$26.73 MSRP: $39.25You Save: $12.52 (32%)Ships in 1-2 Business Days
Chrysler PT Cruiser Occupant Detection Sensor
Choose OEM Occupant Detection Sensor that meet Chrysler factory standards. Chrysler designs and tests every component for precision and durability. Each Occupant Detection Sensor follows strict manufacturing steps to lock in quality and fit. If your Chrysler PT Cruiser matters to you, OEM parts make the smart choice. You'll get the exact look, feel, and performance you expect. Shop genuine PT Cruiser parts at the highly competitive prices online. Enjoy a manufacturer's warranty, a hassle-free return policy, and rapid delivery. No more guesswork with off brands. Get genuine parts with exact fit and true factory performance. Shop with confidence today at JeepPartsDeal.com.
Chrysler PT Cruiser Occupant Detection Sensor Parts and Q&A
- Q: How to Properly Install an Occupant Detection Sensor on Chrysler PT Cruiser?A:Handle both the sensor and the passenger seat assembly gently, as damaging them could result in calibration problems and you must not put any weight on the seat when it is removed for installation. Should a sensor fall or break, put in a new unit and if the seat has been dropped with the weight sensors out, change all of them. After you've taken out or released the passenger side front seat assembly, use a diagnostic scan tool and the Occupant Classification Seat Weight special tool to complete the Occupant Classification System Verification Test. Keep the sensor stud bolt in position using alignment tool 9689 when you install the nut into the seat adjuster riser and make sure to use hand tools for any sensor fastener service. Fit the weight sensor onto the adjuster track and fasten it with nuts tightened to 21 ft. lbs. (28 Nm), after that attach the seat track to the riser and fasten a nut on each center stud for every weight sensor, making sure you don't tighten a center nut without the tool for straining the sensor. Place the fork into the weight sensor hole and seat the support yoke against the weight sensor cage, fasten the nut until it reaches 45 Nm (33 ft. lbs.) for all sensors and snap each weight sensor connection into place after the passenger front seat is installed. Be sure not to link the negative Battery Cable until you finish the system test and after the status of the air bag Verification test shows OK, use the diagnostic scan tool and Occupant Classification Seat Weight tool 9077 to confirm the Occupant Classification System test.

Related Chrysler PT Cruiser Parts
 Chrysler PT Cruiser Air Bag Control Module
 Chrysler PT Cruiser Air Bag Sensor
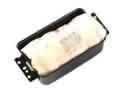 Chrysler PT Cruiser Airbag
 Chrysler PT Cruiser Clock Spring
 Chrysler PT Cruiser Cooling Fan Relay
 Chrysler PT Cruiser Horn Relay
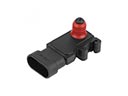 Chrysler PT Cruiser MAP Sensor
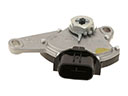 Chrysler PT Cruiser Neutral Safety Switch
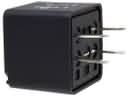 Chrysler PT Cruiser Relay
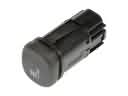 Chrysler PT Cruiser Seat Heater Switch
 Chrysler PT Cruiser Spark Plug
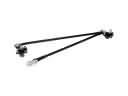 Chrysler PT Cruiser Wiper Linkage