JeepParts
My Garage
My Account
Cart
OEM Dodge Caliber Occupant Detection Sensor
OPDS Sensor- Select Vehicle by Model
- Select Vehicle by VIN
Select Vehicle by Model
orMake
Model
Year
Select Vehicle by VIN
For the most accurate results, select vehicle by your VIN (Vehicle Identification Number).
2 Occupant Detection Sensors found

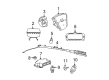
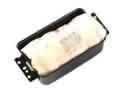
Dodge Caliber Occupant Sensor Part Number: 4896024AE
$12.14 MSRP: $298.00You Save: $285.86 (96%)Ships in 1-2 Business Days
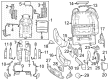
Dodge Caliber Position Sensor Part Number: 68605049AA
$26.73 MSRP: $39.25You Save: $12.52 (32%)Ships in 1-2 Business Days
Dodge Caliber Occupant Detection Sensor
Choose OEM Occupant Detection Sensor that meet Dodge factory standards. Dodge designs and tests every component for precision and durability. Each Occupant Detection Sensor follows strict manufacturing steps to lock in quality and fit. If your Dodge Caliber matters to you, OEM parts make the smart choice. You'll get the exact look, feel, and performance you expect. Shop genuine Caliber parts at the highly competitive prices online. Enjoy a manufacturer's warranty, a hassle-free return policy, and rapid delivery. No more guesswork with off brands. Get genuine parts with exact fit and true factory performance. Shop with confidence today at JeepPartsDeal.com.
Dodge Caliber Occupant Detection Sensor Parts and Q&A
- Q: How Can an Occupant Detection Sensor Be Installed to Prevent Damage and Ensure Proper Functionality on Dodge Caliber?A:Take care to install the occupant detection sensor, as shaping or striking the front passenger seat with your hand can make it out of calibration and may cause damage. On no account put weight on the passenger side seat while it is taken off its mounts. If you damage a sensor or drop it, replace it with a new unit and if the seat has either been dropped or loaded with no occupant detection sensors present, change all those sensors to new ones so the supplemental restraints will function properly. Whenever you remove or loosen the passenger side front seat assembly, use a diagnostic scan tool and the special Occupant Classification Seat Weight tool to verify the Occupant Classification System after it is reinstalled. While placing the nut on the fastener stud, attach the strain gauge alignment tool 9689 to avoid the sensor from rotating; use hands while working on any of the sensor fasteners to keep from damaging them. Attachment of the occupant detection sensor using nuts and securing the adjuster to the track by tightening them to 28 Nm (21 ft. lb.). When putting the seat track on the riser, add the four center nuts but not the main nut until the strain gauge is lined up using the alignment tool. Hook the fork into the occupant detection sensor, make sure the support yoke sits against the occupant detection sensor cage and tighten the nut for all four sensors to 45 Nm, before connecting the electrical wire and putting back the passenger front seat. Before testing the PCM system, do not link the negative battery wire to the system. Commit to performing the Occupant Classification System Verification Test with a diagnostic scan tool and the Occupant Classification Seat Weight tool 9077 after the proper PCM verification test is accomplished.

Related Dodge Caliber Parts
 Dodge Caliber Airbag
 Dodge Caliber Clock Spring
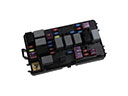 Dodge Caliber Fuse
 Dodge Caliber Key Fob
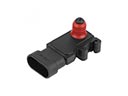 Dodge Caliber MAP Sensor
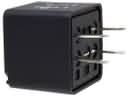 Dodge Caliber Relay
 Dodge Caliber Air Bag Control Module
 Dodge Caliber Air Bag Sensor
 Dodge Caliber Ignition Lock Cylinder
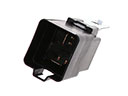 Dodge Caliber Radiator Fan Relay
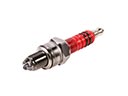 Dodge Caliber Spark Plug
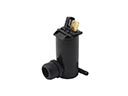 Dodge Caliber Windshield Washer Pump