JeepParts
My Garage
My Account
Cart
OEM Dodge Caravan Brake Proportioning Valve
Proportioning Valve- Select Vehicle by Model
- Select Vehicle by VIN
Select Vehicle by Model
orMake
Model
Year
Select Vehicle by VIN
For the most accurate results, select vehicle by your VIN (Vehicle Identification Number).
7 Brake Proportioning Valves found


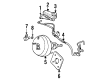
Dodge Caravan Pressure Metering Valve Part Number: 4683519
$69.45 MSRP: $88.03You Save: $18.58 (22%)Ships in 1-2 Business Days
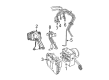
Dodge Caravan Junction Block Part Number: 4683950AA
$33.45 MSRP: $42.41You Save: $8.96 (22%)Ships in 1-2 Business Days
Dodge Caravan Pressure Metering Valve Part Number: 4683517
$58.32 MSRP: $73.93You Save: $15.61 (22%)Ships in 1-2 Business Days
Dodge Caravan Pressure Metering Valve Part Number: 4509322
$49.60 MSRP: $62.88You Save: $13.28 (22%)Ships in 1-2 Business Days
Dodge Caravan Pressure Metering Valve Part Number: 4721533


Dodge Caravan Junction Block Part Number: 4683943AA


Dodge Caravan Pressure Metering Valve Part Number: 4509187
Dodge Caravan Brake Proportioning Valve
Choose OEM Brake Proportioning Valve that meet Dodge factory standards. Dodge designs and tests every component for precision and durability. Each Brake Proportioning Valve follows strict manufacturing steps to lock in quality and fit. If your Dodge Caravan matters to you, OEM parts make the smart choice. You'll get the exact look, feel, and performance you expect. Shop genuine Caravan parts at the highly competitive prices online. Enjoy a manufacturer's warranty, a hassle-free return policy, and rapid delivery. No more guesswork with off brands. Get genuine parts with exact fit and true factory performance. Shop with confidence today at JeepPartsDeal.com.
The Brake Proportioning Valve that is used in the Dodge Caravan cars is a very important part of the braking system since it regulates the brake fluid pressures. Its main purpose is to prevent the rear drum brakes from being engaged before the front discs in any hard-stop application thus improving safety and likely handling. This is done by controlling the pressure supplied to the rear brakes as is instrumental in obtaining the right braking efficiency. F ordinately this valve is used on the Dodge Caravan models to adjust the braking forces especially given that the front disc brakes and rear drum brakes are differently proportioned. The Brake Proportioning Valve works under hydraulic pressure and controls the output forces in correspondence to the brake lines' cross-sectional area. This mechanism is vital for safe emergency car stopping and where a vehicle has to respond promptly in any way possible I think it will make the car respond safely.
Dodge Caravan Brake Proportioning Valve Parts and Q&A
- Q: How to Service and Replace a Brake Proportioning Valve Without Antilock Brakes on Dodge Caravan?A:Because the parts of a proportioning valve cannot be fixed or replaced, a malfunctioning part requires the complete valve to be changed out. Before you take off any brake tubes, press the brake pedal down with the depressor so that the master cylinder does not drain its fluid. Raise the vehicle up on jackstands or a hoist, then clean the proportioning valve and brake pipes to make sure nothing can get inside them. Take out the 4 chassis brake tubes from the inlet and outlet ports of the proportioning valve, then unscrew the 2 bolts that fasten the valve to its mounting bracket and lift it away. Separate the end of the proportioning valve actuator that is hooked onto the isolator bushing on the lever of the height proportioning valve. To install the actuator, fasten its hooked end to the proportioning valve lever, placing the isolator bushing in the hook fully and slide the valve shield between the valve and the mounting bracket. Fix the height-sensing valve to the mounting bracket with 23 Nm (200 inch lbs.) of tightening force and connect the 4 chassis Brake Lines to the valve's ports, tighten them with 16 Nm (142 inch lbs. of force). Modify the proportioning valve actuator and run the brake bleeder until all the air in the hydraulic lines is out. Next, take the vehicle out on the road and use the brakes to check if the system is running as it should.

Related Dodge Caravan Parts
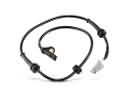 Dodge Caravan ABS Sensor
 Dodge Caravan Brake Booster
 Dodge Caravan Brake Master Cylinder
 Dodge Caravan ABS Control Module
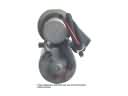 Dodge Caravan ABS Pump And Motor Assembly
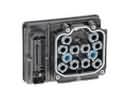 Dodge Caravan Brake Controller
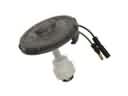 Dodge Caravan Brake Fluid Level Sensor
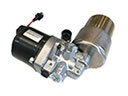 Dodge Caravan Brake Fluid Pump
 Dodge Caravan Brake Line
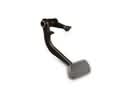 Dodge Caravan Brake Pedal
 Dodge Caravan Wheel Seal
 Dodge Caravan Wheel Stud