JeepParts
My Garage
My Account
Cart
OEM Dodge Caravan Brake Booster
Brake Power Booster- Select Vehicle by Model
- Select Vehicle by VIN
Select Vehicle by Model
orMake
Model
Year
Select Vehicle by VIN
For the most accurate results, select vehicle by your VIN (Vehicle Identification Number).
4 Brake Boosters found

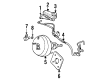
Dodge Caravan Brake Booster Part Number: 4797614


Dodge Caravan Brake Booster Part Number: 4721721AA
Dodge Caravan Brake Booster Part Number: 4721613AA

Dodge Caravan Brake Booster Part Number: 4721338AA
Dodge Caravan Brake Booster
Choose OEM Brake Booster that meet Dodge factory standards. Dodge designs and tests every component for precision and durability. Each Brake Booster follows strict manufacturing steps to lock in quality and fit. If your Dodge Caravan matters to you, OEM parts make the smart choice. You'll get the exact look, feel, and performance you expect. Shop genuine Caravan parts at the highly competitive prices online. Enjoy a manufacturer's warranty, a hassle-free return policy, and rapid delivery. No more guesswork with off brands. Get genuine parts with exact fit and true factory performance. Shop with confidence today at JeepPartsDeal.com.
The Brake Booster on Dodge Caravan automobiles plays an important role in the booster which helps improve braking power to half or less of the driver's input force. Located between the brake pedal and the MC the Brake Booster applies either vacuum or hydraulic action to increase the force applied at the brake. Vacuum operated boosters work by the difference between engine vacuum and atmospheric pressure and hydraulic boosters work on the pressure exerted by the fluid available in the power steering pump or an electric motor. Through the years, Dodge Caravan models have mainly used vacuum power boosters for the brakes, which have been very dependable, although not beyond the usual breakdowns here and there. These boosters are available in single or dual diaphragm kind and with varying diameters to determine the level of power assist. If you want the optimal performance, especially when using discs, it is vital that you choose the right diameter and angle the diaphragms at as well. In a nutshell, the Brake Booster greatly improves driving in Dodge Caravan vehicles making the braking efforts much more comfortable and effective.
Dodge Caravan Brake Booster Parts and Q&A
- Q: How to Remove and Install a Vacuum Brake Booster in a Right-Hand Drive on Dodge Caravan?A:Before servicing or repairing the vacuum brake booster on a right-hand drive car, press the brake pedal 4 or 5 times with the engine off until the pedal feels firm. Cut off the connectors from the battery terminal posts, get rid of the battery basic heat shield and get the battery itself, along with the clamp and nut, out of the vehicle. If your ATV has speed control, first detach the vacuum hose at the tank and then get out the Battery Tray by undoing the two nuts and the bolt. With speed control, cut the wiring harness from the speed control servo, remove the two nuts demanding the servo and place it sideways. If you have a 2.5L diesel engine, take out the coolant recovery pressure container and bracket. Unhook the wiring harness from the brake fluid level switch in the master cylinder reservoir, then clean the place where the master cylinder attaches to the booster using Mopar Brake Parts Cleaner or a substitute solvent. Pull off both nuts connecting the master cylinder to the booster, then take out the master cylinder, replacing the vacuum seal each time you remove it. Tug on the vacuum hose to unlink it from the check valve on the booster and then remove the brake pedal torque shaft pin's retaining clip and the trim cover, throwing out the old clip. Take out the booster input rod and the three nuts holding the booster to the dash panel, leaving just the fourth nut a little loose as you move the booster all the way forward until it can be removed from the engine compartment. When installing, put the new booster in place on the dash, add both mounting nuts and tighten them to 29 Nm (250 in. lbs.). Lubricate both sides of the brake pedal torque shaft pin and fit the fresh retaining clip on the end of the booster input rod. Reattach the vacuum hose to the check valve and put the new vacuum seal into place on the master cylinder. Put the master cylinder in position with the booster and fix it using two nuts tightened to 25 Nm. Join the wire harness to the brake fluid switch, install the coolant recovery pressure container again if needed and seal the speed control pivot and attaching cables with the recommended 14 Nm (124 in. lbs. of torque. Fit the battery tray again, making sure it is not loose and secure it using the two nuts and one bolt, each measured at 14 Nm (124 in. lbs.). Plug back in the servo vacuum hose if available and set the battery in place along with its cables. Replace the brake lamp switch, bleed the base brakes as necessary and check the brakes during a road test.
- Q: How to Service and Repair a Vacuum Brake Booster on a Right-Hand Drive on Dodge Caravan?A:It's important to empty the vacuum in the power brake booster by working the brake pedal, with the engine turned off, until you feel a firm pedal reply. First, remove the negative and positive cable ends from the battery, then unhook the battery thermal guard shield and take the battery, its clamp and nut apart. When speed control is available, undo the nuts and one bolt to take out the Battery Tray after removing the vacuum hose from the tank. On cars with speed control, unplug the harness from the speed control servo, take out the two nuts that hold it and set the servo aside. If there is a 2.5L diesel engine, discard the coolant recovery pressure container and the bracket. Remove the wiring harness from the brake fluid level switch in the reservoir of the master cylinder and wipe the area where the master cylinder connects to the booster using a solvent called Mopar Brake Parts Cleaner. Take out the bolts attaching the master cylinder to the booster and move the master cylinder, always making sure you replace the vacuum seal. Vacuum hose is removed from the check valve on the booster without actually taking off the check valve. After removing the booster input rod trim cover, loosen the retaining clip on the brake pedal torque shaft pin and unhook the input rod, as you'll have to replace the clip once the booster is reinstalled. Moving the booster forward, unscrew and remove the three nuts on the dash panel, loosen the fourth nut and pull it out of the engine compartment. To install it, set the booster on the dash panel, place and tighten the upper and lower mounting nuts at an effort of 29 Nm (250 in. lbs.). Coat the brake pedal torque shaft pin in lubricant and put the booster input rod in with a new retaining clip, after which you should reinstall the trim cover. After completing a hose connection, remove the old rear seal from the master cylinder, connect its new seal and finally place it on the booster to align the push rod with the Piston. Attach the master cylinder with two nuts set at 25 Nm (225 in. lbs.); then connect the wiring harness to the brake fluid level switch. If needed, again attach and tighten the coolant recovery pressure container and the bracket, after that reconnect the speed control servo and the wiring pin, using 14 Nm (124 in. lbs.). Insert the battery tray, tighten it with two nuts and a bolt and attach the servo vacuum hose if you have it. When all is finished, put in the battery, join the positive and negative cables and put the battery thermal guard shield back on. Exchange the Brake Light Switch, bleed the base brakes if required and check the brakes by going on a test drive.

Related Dodge Caravan Parts
 Dodge Caravan Brake Master Cylinder
 Dodge Caravan Parking Brake Cable
 Dodge Caravan ABS Control Module
 Dodge Caravan Brake Caliper Piston
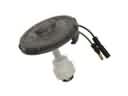 Dodge Caravan Brake Fluid Level Sensor
 Dodge Caravan Brake Line
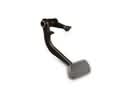 Dodge Caravan Brake Pedal
 Dodge Caravan Brake Proportioning Valve
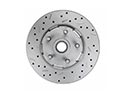 Dodge Caravan Brake Rotor
 Dodge Caravan Wheel Bearing Dust Cap
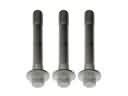 Dodge Caravan Wheel Hub Bolt
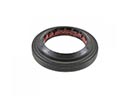 Dodge Caravan Wheel Seal