JeepParts
My Garage
My Account
Cart
OEM Dodge Charger Timing Chain
Engine Timing Chain- Select Vehicle by Model
- Select Vehicle by VIN
Select Vehicle by Model
orMake
Model
Year
Select Vehicle by VIN
For the most accurate results, select vehicle by your VIN (Vehicle Identification Number).
7 Timing Chains found


Dodge Charger Timing Chain Part Number: 5184355AF
$34.43 MSRP: $50.85You Save: $16.42 (33%)Ships in 1-3 Business Days


Dodge Charger Timing Chain Part Number: 5184352AF
$147.90 MSRP: $259.00You Save: $111.10 (43%)Ships in 1-3 Business Days


Dodge Charger Timing Belt Part Number: 4663635
$141.63 MSRP: $209.00You Save: $67.37 (33%)


Dodge Charger Timing Chain Part Number: 4663674AD
$40.34 MSRP: $57.20You Save: $16.86 (30%)Ships in 1-2 Business Days


Dodge Charger Timing Chain Part Number: 4892349AA
$276.65 MSRP: $315.00You Save: $38.35 (13%)Ships in 1-2 Business Days
Dodge Charger Chain Part Number: 4663674AF
$64.67 MSRP: $73.15You Save: $8.48 (12%)Ships in 1-2 Business Days


Dodge Charger Timing Chain Part Number: 53022316AC
$65.71 MSRP: $96.70You Save: $30.99 (33%)
Dodge Charger Timing Chain
Choose OEM Timing Chain that meet Dodge factory standards. Dodge designs and tests every component for precision and durability. Each Timing Chain follows strict manufacturing steps to lock in quality and fit. If your Dodge Charger matters to you, OEM parts make the smart choice. You'll get the exact look, feel, and performance you expect. Shop genuine Charger parts at the highly competitive prices online. Enjoy a manufacturer's warranty, a hassle-free return policy, and rapid delivery. No more guesswork with off brands. Get genuine parts with exact fit and true factory performance. Shop with confidence today at JeepPartsDeal.com.
Timing Chain on Dodge Charger is an important part that controls the rotation of the camshaft and crankshaft so that the valves can open and close at the right time for the optimal engine performance. This component is situated at the front of the engine and is normally used in high displacement engines; in order to operate this part needs oiling. The Dodge Charger models have used metal timing chains in their cars since the 1990s and these are preferred because they are more durable and they don't wear out easily as the rubber timing belts. Timing chains use very little and can wear down only when there are problems with the lubrication or tensioner and chain guides; the symptoms include rattling noise from the engine. In pushrod engines a short chain drive is used to reduce noise and wear and tear and this makes it suitable for use in the Dodge Charger models.
Dodge Charger Timing Chain Parts and Q&A
- Q: How to Ensure Proper Alignment and Tensioning When Inspecting and Installing Timing Chain Sprockets and Guides on Dodge Charger?A:Inspect the sprockets at positions 4, 9 and 11 and the chain guides at 2, 5 and 10, so you can swap out any that are worn. If you replace them, set the new right and left side short chain guides 11, tightening their bolts to 28 Nm (250 in. lbs.). Move the timing mark at the Crankshaft sprocket to match the mark on the oil pump housing 3 and cover the chain and its guides with fresh engine oil before fitting them into place. Place the primary chain sprocket from the left side onto the chain and make sure the timing mark aligns between the two plated timing links 1, then drop the left side sprocket through the left cylinder head into place. While you mount the camshaft sprockets, let them float freely on the hub, put the left side camshaft sprocket over the camshaft hub loosely and attach the timing plated link to the timing mark on the crankshaft sprocket 3. Place the primary chain on the water pump drive sprocket 11, adjust the right camshaft sprocket timing mark to the timing chain 8 plated link and simply set it over the camshaft hub for now. Check that all chain timing plated links line up with the timing marks on all sprockets and then put in lower chain guide 2 on the left side and install the tensioner arm 5. Be sure to tighten the bolts connecting them to 250 in. lbs. (28 Nm). Before installing the chain, remove the O-ring and check it; if needed, replace it, then install the plugs into the cylinder heads, secure them tightly with 20 Nm (15 ft. lbs.) of force. Use Special Tool 8186 3, placing the end of the check ball 2 of the Timing Chain Tensioner into the shallow end and slowly press down until the oil comes out. Move Cylinder Plunger 4 inside Special Tool 8186 3 until it stops and press downward until you hear the tensioner click, to be sure it resets and doesn't jam. Look for cuts or nicks on the tensioner O-ring 2 and check that the snap ring 1 is securely installed, replacing anything you notice is needed. Add the tensioner 1 into the right head cylinder, slide on the holding plate 2 and tighten the bolts to a value of 12 Nm (105 in. lbs.). Opening the right cylinder bank first, fit the camshaft damper 1 in place on top of the camshaft hub, connect a 3/8" square drive extension to the hub of the intake camshaft using a breaker bar and slowly rotate the camshaft until both its hub and damper are aligned with the sprocket and attaching holes. Screw in the attaching bolts of the sprocket and tighten them to 28 Nm (250 in. lbs.). Put a 3/8" square drive extension into the hub of the intake camshaft with a breaker bar and spin the camshaft until the bolts can be installed at the sprocket and give them a torque of 28 Nm (250 in. lbs.). Turn the engine a little clockwise to take up any slack in the timing chain, push the tensioner arm gently toward the tensioner device and check that the tensioner is now active. Put the camshaft position sensor 2 in place, hook up the electrical connector and again install the timing chain cover, crankshaft vibration damper and cylinder head covers. Assemble the upper Intake Manifold, fill the cooling system and link the negative battery 1 cable. When you start the engine for the first time after fitting a reset tensioner, it may be noisy, but the sound should disappear shortly afterward.
- Q: How is the Timing Chain Serviced on Dodge Charger?A:Before working on the timing chain, remove the negative Battery Cable and get rid of all the coolant in the system. After that, disconnect the upper Intake Manifold, cylinder head covers, crankshaft vibration damper and timing chain cover. Rotate the crankshaft by turning it and never attempt to rotate the engine using the camshaft. Bring the crankshaft timing mark to the oil pump mark which is 60° after top dead center. First cylinder in the air-temperature correction. When the timing chain is removed with the cylinder heads fitted, do not move either camshaft or crankshaft without first knowing the positive position of the crankshaft which is important for safety. Take off the primary Timing Chain Tensioner retainer cap and tensioner from the right cylinder head. After that, separate and remove the Camshaft Position Sensor from the left cylinder head. First, take out the access plugs for the timing chain guide from the cylinder heads and keep in mind that the camshafts will spin clockwise once its bolts are undone. Start by selecting the proper camshaft sprocket, unbolting it and removing both the camshaft damper if you have one and the sprocket. After that, loosen and take out the attaching bolts on the left side camshaft sprocket cover as well as the cover and sprocket. Get rid of the chain guide and tensioner arm at the bottom and then remove the primary timing chain. Use the right service documentation to remove the crankshaft sprocket.


Related Dodge Charger Parts
 Dodge Charger Dipstick
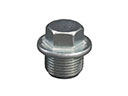 Dodge Charger Oil Drain Plug
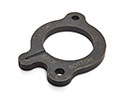 Dodge Charger Camshaft Thrust Plate
 Dodge Charger Crankshaft Timing Gear
 Dodge Charger Dipstick Tube
 Dodge Charger Intake Valve
 Dodge Charger Lash Adjuster
 Dodge Charger Oil Filler Cap
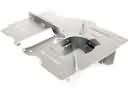 Dodge Charger Oil Pan Baffle
 Dodge Charger Oil Pump Gasket
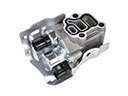 Dodge Charger Spool Valve
 Dodge Charger Valve Cover Grommet