JeepParts
My Garage
My Account
Cart
OEM Dodge Intrepid Oil Cooler
Engine Oil Cooler- Select Vehicle by Model
- Select Vehicle by VIN
Select Vehicle by Model
orMake
Model
Year
Select Vehicle by VIN
For the most accurate results, select vehicle by your VIN (Vehicle Identification Number).
2 Oil Coolers found

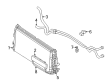
Dodge Intrepid Transmission Cooler Part Number: 5010360AC
$670.65 MSRP: $851.00You Save: $180.35 (22%)Ships in 1-2 Business Days
Dodge Intrepid Transmission Cooler Part Number: 5014113AA
Dodge Intrepid Oil Cooler
Choose OEM Oil Cooler that meet Dodge factory standards. Dodge designs and tests every component for precision and durability. Each Oil Cooler follows strict manufacturing steps to lock in quality and fit. If your Dodge Intrepid matters to you, OEM parts make the smart choice. You'll get the exact look, feel, and performance you expect. Shop genuine Intrepid parts at the highly competitive prices online. Enjoy a manufacturer's warranty, a hassle-free return policy, and rapid delivery. No more guesswork with off brands. Get genuine parts with exact fit and true factory performance. Shop with confidence today at JeepPartsDeal.com.
Dodge Intrepid Oil Cooler Parts and Q&A
- Q: How to Maintain an Oil Cooler on Dodge Intrepid?A:Begin by removing the cooler lines by unscrewing them from the engine and the radiator. Since these are a one-time assembly, also unscrew the fittings from the engine and Oil Pan. After that, separate the lines from their attachment to the support bracket and retainer and take out the lines. For the pressure control valve, cut off the supply hose and take out the valve by turning the fitting on the engine block. When installing the radiator, set the radiator bracket and tighten all radiator fittings to 160 in. lbs. Lead the cooler lines to the fittings and push the retainer clip on, making sure you tighten everything to 18 Nm (160 in. lbs.). For the new lines to the coolers, slip the fittings over the oil pan and engine block flanges, tighten them securely to 30 Nm (260 in. lbs.), place the lines into the fittings and push them in till they are locked and secure them on the support bracket. Once you use the original cooler lines again, set up their joints with the engine block and oil pan, fasten them with a torque of 30 Nm (260 in. lbs.) and secure these lines to the support bracket. After attaching the valve's supply line to the engine, tighten it to 30 Nm (260 in. lbs.). Then, place the control valve in the fitting and make sure it is secure and screw the supply line to the valve, tightening the nut to the specified torque.
- Q: How to Service an Oil Cooler on Dodge Intrepid?A:If you want to service the engine oil cooler, first, disconnect the cooler lines from the radiator, since the one-time design means you must also unscrew the fittings from the block and Oil Pan. After that, take out the fittings from the connections on the engine block and oil pan and afterward remove the lines from the support bracket and retainer as well. Joint control line from the pressure control valve and remove it by unscrewing the fitting from the engine. At the start, fit the radiator shell to your vehicle and tighten the oil cooler lines to ensure they fit well to the radiator inlets (it is recommended to use 18 Nm/160 in. lbs. torque). Screw the cooler lines into the radiator fittings and retainer clip, making certain the connection is tightened to 18 Nm (160 in. lbs.). For both new radiator and header coolers, put the fittings on the engine block and oil pan, tighten to the required torque, then place the lines in position and ensure they stay before clipping the lines to the brackets. If using the original cooler pipes, put them to the engine block and oil pan, tighten the fittings to 30 Nm or 260 in. lbs. and attach them to the support bracket. Connect the supply line to the engine block using the fitting, make it snug by tightening it to 30 Nm (260 in. lbs.), fit the control valve to the connection point so it locks and secure the remains of the supply line to the control valve, tightening thatconnector to the same pressure.


Related Dodge Intrepid Parts
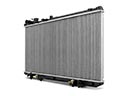 Dodge Intrepid Radiator
 Dodge Intrepid Thermostat
 Dodge Intrepid Thermostat Housing
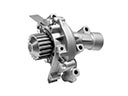 Dodge Intrepid Water Pump
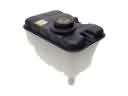 Dodge Intrepid Coolant Reservoir
 Dodge Intrepid Drain Plug
 Dodge Intrepid Drive Belt
 Dodge Intrepid Fan Motor
 Dodge Intrepid Thermostat Gasket
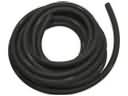 Dodge Intrepid Transmission Oil Cooler Hose
 Dodge Intrepid Water Pump Gasket
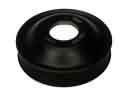 Dodge Intrepid Water Pump Pulley