JeepParts
My Garage
My Account
Cart
OEM Dodge Neon Piston
Engine Pistons- Select Vehicle by Model
- Select Vehicle by VIN
Select Vehicle by Model
orMake
Model
Year
Select Vehicle by VIN
For the most accurate results, select vehicle by your VIN (Vehicle Identification Number).
3 Pistons found

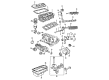
Dodge Neon Piston Part Number: 68067340AA
$116.01Ships in 1-2 Business Days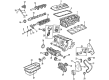
Dodge Neon Piston Part Number: 5103509AA


Dodge Neon Piston Part Number: 4884247AD
Dodge Neon Piston
Choose OEM Piston that meet Dodge factory standards. Dodge designs and tests every component for precision and durability. Each Piston follows strict manufacturing steps to lock in quality and fit. If your Dodge Neon matters to you, OEM parts make the smart choice. You'll get the exact look, feel, and performance you expect. Shop genuine Neon parts at the highly competitive prices online. Enjoy a manufacturer's warranty, a hassle-free return policy, and rapid delivery. No more guesswork with off brands. Get genuine parts with exact fit and true factory performance. Shop with confidence today at JeepPartsDeal.com.
Dodge Neon Piston Parts and Q&A
- Q: How to Remove and Replace a Piston in an Engine on Dodge Neon?A:Before replacing the piston, you shall first take out the cylinder head and the Oil Pan. Apply a reliable ridge reamer on the cylinder bores to get rid of the top ridge and remember to cover the top of the pistons before you take them out. Stamp each piston with the number of its cylinder and write the number on the side of both the rod and cap using a permanent marker or scribe tool. The stamp on the pistons will show whether the arrow points to the left or the right for light pistons and an arrow to the right for heavy. The service piston assemblies carry the letter S which can work with either L or H pistons. Apply the weight stickers so they can be seen by the Timing Belt on the engine. With the Crankshaft rotated, carefully take out the pistons and connecting rods from the top of the cylinder block so the connecting rods are perfectly centered. Be sure not to use the same bolts as before to replace the connecting rod cap bolts. Put Special Tool 8189 in place to safeguard the crank journal and using rod guides help push each piston and rod unit out of the cylinder, keeping the joints on the fractured rod from being damaged. After removing the guides, fit the bearing cap onto the mating rod and remove the piston rings. First, add the piston rings to the piston and make sure the gaps in the compression rings aren't the same as the gap in the oil ring rail. Make sure to check that the oil ring expander ends meet and that the rail gaps are in the right places before activating the ring compressor. Dip the piston head and rings in clean oil and with the rings unchanged, place the ring compressor over the piston. Be sure that the engine's weight stamp has the letters L or H facing out toward the front of the vehicle. Step the crankshaft label to place the connecting rod bearing in the cylinder's center, then apply clean engine oil to the journal. Set the upper half of the bearing in position and add the connecting rod guides with Special Tool 8189. Put the assembly into the bore, guiding the piston over the journal and use a hammer handle to push down the piston as you place the connecting rod onto the crankshaft journal, guiding it into position. Remove the connecting rod guides, put the lower bearing half and cap in place and screw them in with new bolts to 27 Nm (20 ft. lbs.), adding an additional 1/4 turn. The last step is to replace the cylinder head and the oil pan.

Related Dodge Neon Parts
 Dodge Neon Timing Belt
 Dodge Neon Timing Belt Tensioner
 Dodge Neon Transmission Mount
 Dodge Neon Camshaft Seal
 Dodge Neon Crankshaft Pulley
 Dodge Neon Crankshaft Thrust Washer
 Dodge Neon Harmonic Balancer
 Dodge Neon Rocker Arm
 Dodge Neon Rocker Arm Pivot
 Dodge Neon Rod Bearing
 Dodge Neon Valve Stem Seal
 Dodge Neon Variable Timing Sprocket