JeepParts
My Garage
My Account
Cart
OEM Dodge Nitro Piston
Engine Pistons- Select Vehicle by Model
- Select Vehicle by VIN
Select Vehicle by Model
orMake
Model
Year
Select Vehicle by VIN
For the most accurate results, select vehicle by your VIN (Vehicle Identification Number).
2 Pistons found


Dodge Nitro Piston Part Number: 5019316AC

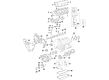
Dodge Nitro Piston Part Number: R4593589AB
Dodge Nitro Piston
Choose OEM Piston that meet Dodge factory standards. Dodge designs and tests every component for precision and durability. Each Piston follows strict manufacturing steps to lock in quality and fit. If your Dodge Nitro matters to you, OEM parts make the smart choice. You'll get the exact look, feel, and performance you expect. Shop genuine Nitro parts at the highly competitive prices online. Enjoy a manufacturer's warranty, a hassle-free return policy, and rapid delivery. No more guesswork with off brands. Get genuine parts with exact fit and true factory performance. Shop with confidence today at JeepPartsDeal.com.
The Piston in Dodge Nitro vehicles helps in powerstroke, in conversion of combustion power into energy that is used to drive the vehicles. It is a critical part of the internal combustion engine whereby it transmits forces developed by the expanding pace to the crankshaft. Dodge Nitro pistons are commonly made from light alloys, with special focus on aluminum, while high-performance engines are made from forged or billet pistons. Different types of the pistons have been used on Dodge Nitro over the years, although those built into the trunk, as they take side loads and include the rings for the oil. Further, the racing pistons are light and strong to stand the pace and turning rate called by racing activities. Proper engineering of these pistons is done in a such a way that they do not only offer high performance but also durability and therefore they are part of the Dodge Nitro's engine performance.
Dodge Nitro Piston Parts and Q&A
- Q: How to Remove and Replace a Piston in an Engine on Dodge Nitro?A:Begin by taking out the negative cable from the battery to remove and replace the piston and connecting rod. Following this, lift up the Oil Pan and its gasket/windage tray, remove the cylinder head covers, the timing chain cover and the cylinder head(s). Before you take out the pistons, use a reliable ridge reamer to take off the ridge on the cylinder if needed. Make certain the tops of the pistons stay covered while you work on the cylinder. It is necessary to remove the pistons and connecting rods from above the cylinder block, as you turn the Crankshaft to center the connecting rods. Please do not stamp or punch the connecting rod or caps with a number; this could damage them. Make marks on the connecting rods and bearing caps with a permanent ink marker or scribe tool so they will be in the correct places after cleaning the surface joint spots, because any damage could lead to problems in the engine. Lift off the connecting rod cap and put Special Tool 8507 into the connecting rod as it comes out, followed by removing the piston from its bore. Do this for each piston you work with. The journals of the crankshaft must be protected from nicks to prevent damage to the engine. Install the bearing cap at the mating connection rod immediately after removing the piston and rod, to prevent harm to the cracked cap and rod.
- Q: How to Install Piston and Connecting Rod Assemblies into the Bore on Dodge Nitro?A:Before putting the piston and connecting rod assemblies in the bore, first fit the piston rings. After cleaning the piston head and rings in engine oil, slide on the ring compressor and fasten it to make sure the piston rings do not move. Make sure to line up the tabs in the bearing shell with the indentations in the connecting rod and that the two parting lines match. Cross-hatched washers and light coatings with new clean engine oil can help. Secure Connecting Rod Guides 8507 (4) with bolts onto each connecting rod bolt. An "F" is raised on the piston pin bore to show where the piston must be installed, with the connecting rod oil slinger slot (2) also facing this direction at both ends of the engine. Carefully remove all the dirt in the cylinder bore and then oil it with engine oil. Let the connecting rod journal be at the center of the cylinder bore before you insert the rod and piston and carefully place the connecting rod guides over the Crankshaft journal. While giving the hammer handle a hit, push the piston into the cylinder bore and at the same time slide the connecting rod onto the rod journal. Connecting Rod Bolts are only used once and must be changed any time they are taken off or loosened; never reuse these bolts. Lubricate the rod bolts and all bearing surfaces with engine oil, set the connecting rod into place and the bearing, then tighten the bolts to 27 Nm (20 ft. lbs.) plus 90°. Join the cylinder head(s), Timing Chain and cover, cylinder head covers and Oil Pan with its gasket or windage tray. Pour the correct oil into the crankcase and then attach the negative cable to the battery.


Related Dodge Nitro Parts
 Dodge Nitro Oil Pan
 Dodge Nitro Timing Belt
 Dodge Nitro Crankshaft
 Dodge Nitro Cylinder Head
 Dodge Nitro Engine Mount
 Dodge Nitro Harmonic Balancer
 Dodge Nitro Lash Adjuster
 Dodge Nitro Oil Pump
 Dodge Nitro Rocker Arm Pivot
 Dodge Nitro Timing Belt Tensioner
 Dodge Nitro Timing Cover
 Dodge Nitro Valve Stem Seal