JeepParts
My Garage
My Account
Cart
OEM Dodge Ram 3500 Intercooler
Front Intercooler- Select Vehicle by Model
- Select Vehicle by VIN
Select Vehicle by Model
orMake
Model
Year
Select Vehicle by VIN
For the most accurate results, select vehicle by your VIN (Vehicle Identification Number).
3 Intercoolers found

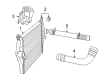
Dodge Ram 3500 Intercooler Part Number: 55056902AE
$773.50 MSRP: $1175.00You Save: $401.50 (35%)Ships in 1-2 Business Days


Dodge Ram 3500 Intercooler Part Number: 5170704AJ

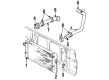
Dodge Ram 3500 Intercooler Part Number: 52028724AG
Dodge Ram 3500 Intercooler
Choose OEM Intercooler that meet Dodge factory standards. Dodge designs and tests every component for precision and durability. Each Intercooler follows strict manufacturing steps to lock in quality and fit. If your Dodge Ram 3500 matters to you, OEM parts make the smart choice. You'll get the exact look, feel, and performance you expect. Shop genuine Ram 3500 parts at the highly competitive prices online. Enjoy a manufacturer's warranty, a hassle-free return policy, and rapid delivery. No more guesswork with off brands. Get genuine parts with exact fit and true factory performance. Shop with confidence today at JeepPartsDeal.com.
Known as on Intercooler in Dodge ram 3500 vehicle is highly important for boosting the performance of the engine through its ability to cool the compressed air from the turbochargers or superchargers. This cooling process eliminates pre- ignition and enables dense induction of air hence enabling an injection of more fuel and result in better power outputs. The Dodge Ram 3500 cars apply air-to-air or air-to-liquid cooler intercoolers, air-to-air being lighter, more normal in automobile, and air-to-liquid cooler heavier, used when necessary, as in marine engines. The Intercooler, mainly works for minimizing the heat produced when air pressure is increased so as to maximize the engine performance. In some designs it is possible to use several intercoolers in various stages of the forced induction system to increase the performance. Forced induction systems are usually associated with increased performance and power outputs as well as increased fuel consumptions and the Intercooler on the Dodge Ram 3500 ensures that these attributes are fully harnessed in the most efficient manner possible.
Dodge Ram 3500 Intercooler Parts and Q&A
- Q: How to Service and Repair an Intercooler on Dodge Ram 3500?A:Connecting the power supply to a battery is hazardous and should be avoided until any service to the intercooler is complete. Take out the front Bumper and the front support bracket. When A/C is fitted on the vehicle, first release the system and take away the condenser, before removing the transmission auxiliary cooler. Separate both boost tubes from the charge air cooler, then undo the cooler bolts, swing the cooler forward and up and take it out. While cleaning, don't use strong cleaners; for any accumulation of debris inside from turbocharger problems, the charge air cooler needs to be cleaned from inside. Arrange the cooler so the inlet and outlet tubes stand straight, flush one side with solvent counter to how air usually flows, shake it and lightly hit both tanks with a rubber mallet to stir out garbage. Flush repeatedly until the contaminants are gone, then rinse the tube with hot soapy water and then clean with plenty of clean water before letting it dry with the compressed air. Look at the charge air cooler for any splits, breaks or harm on the tubes, fins and welds and change it if you notice anything affected. The evaporator can be tested by using Charge Air Cooler Tester Kit #3824556. Place the charge air cooler, tighten its mounting bolts to 2 Nm (17 inch lbs.) and then attach and secure the air intake tubes following 11 Nm (95 inch lbs.) torque. If your car has an auxiliary transmission cooler and an A/C Condenser, install them next, recharge the A/C system, reinstall the front support bolts and then the front bumper. At last, attach the battery negative cables again, start the engine and look for leaks in the boost system.
Related Dodge Ram 3500 Parts
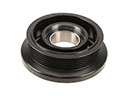 Dodge Ram 3500 A/C Idler Pulley
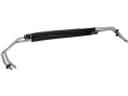 Dodge Ram 3500 Automatic Transmission Oil Cooler Line
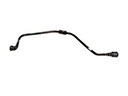 Dodge Ram 3500 Coolant Reservoir Hose
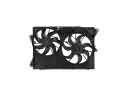 Dodge Ram 3500 Cooling Fan Assembly
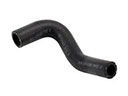 Dodge Ram 3500 Cooling Hose
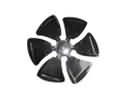 Dodge Ram 3500 Fan Blade
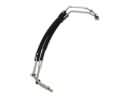 Dodge Ram 3500 Oil Cooler Hose
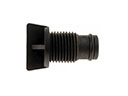 Dodge Ram 3500 Radiator Drain Plug
 Dodge Ram 3500 Thermostat Housing
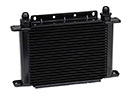 Dodge Ram 3500 Transmission Oil Cooler
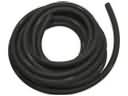 Dodge Ram 3500 Transmission Oil Cooler Hose
 Dodge Ram 3500 V-Belt