JeepParts
My Garage
My Account
Cart
OEM Jeep Fuel Tank Vent Valve
- Select Vehicle by Model
- Select Vehicle by VIN
Select Vehicle by Model
orMake
Model
Year
Select Vehicle by VIN
For the most accurate results, select vehicle by your VIN (Vehicle Identification Number).
3 Fuel Tank Vent Valves found

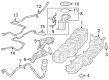
Jeep Fuel Tank Vent Valve Part Number: 68365826AA
$31.78 MSRP: $47.35You Save: $15.57 (33%)Ships in 1-2 Business DaysProduct Specifications- Other Name: Tube - Vent; Lower Hose; Tube Vent

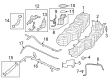
Jeep Fuel Tank Vent Valve Part Number: 68335022AA
$51.53 MSRP: $76.60You Save: $25.07 (33%)Ships in 1-2 Business DaysProduct Specifications- Other Name: Tube - Vent; Vent Tube; Filter; Tube Vent


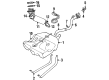
Jeep Fuel Tank Vent Valve Part Number: J5360058
Product Specifications- Other Name: Valve - Fuel Tank Rollover Safety; Vapor Valve; Shield, Heat Fuel Tank; Fuel Tank (Includes Filler Tube Seal); Rollover Safety Valve.
Jeep Fuel Tank Vent Valve
OEM parts sourced directly from Jeep deliver superior quality, long lasting strength, and a precise fit you can trust. Each item goes through strict quality checks to ensure safety, toughness, and performance that matches your factory equipment. At JeepPartsDeal online shop, you'll get top-quality, budget-friendly OEM Jeep Fuel Tank Vent Valve for your vehicle. We focus on giving you a high standard without pushing up the price. Our full selection of genuine factory products comes backed by the original manufacturer's warranty. You'll love our fast delivery, seamless shopping experience, and convenient return policy, saving you all the hassle.
Jeep Fuel Tank Vent Valve maintains a check on the vapor pressure but allows the vapor fuel to escape to the EVAP system. The Jeep cars are characterized by rock solid frames, legendary four wheel drive and a sense of adventure that starts after you get off the road. All of the modern Jeeps combine the Selec-Terrain traction dial, sophisticated driver assistance and convenient voice controlled technology and thus regardless of whether the road is snow, sand or mud you choose a mode and drive. The removable doors and roof make each ride fun and open air, and a large group of Jeep owners exchange tips and tales about their beloved Jeeps. Reliable engines, intelligent cargo capacity, and over the air updates give it even more practicality daily, and a Jeep would be at home towing, commuting, or exploring. The Fuel Tank Vent Valve is a plastic solenoid, which opens at the right time to release fumes through the tank to the charcoal canister and closes at the right time to prevent the escape of raw fuel, reducing the emissions and preventing the tank pressure spikes. In order to install the Fuel Tank Vent Valve; make sure that the Jeep is parked on level ground, disconnect the battery, and release the fuel vapor pressure through opening the gas cap at a slow pace. Unscrew under the back end, find Fuel Tank Vent Valve by the charcoal canister, and then tag and unplug vapor hoses and electrical connector. Instructions are to press locking tab, remove old unit, inspect grommets, and push the new valve in place. Disconnect the reconnect lines, screw up the cap, clear any dashboard codes and turn the engine on to ensure there is no leak.
Related Jeep Parts
 Jeep Fuel Pump
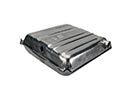 Jeep Fuel Tank
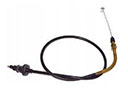 Jeep Accelerator Cable
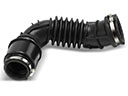 Jeep Air Intake Hose
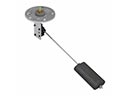 Jeep Fuel Sending Unit
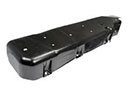 Jeep Fuel Tank Skid Plate
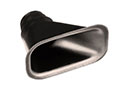 Jeep Air Duct
 Jeep Fuel Filler Hose
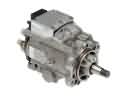 Jeep Fuel Injection Pump
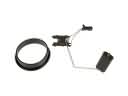 Jeep Fuel Level Sensor
 Jeep Fuel Pump Driver Module
 Jeep Fuel Pump Tank Seal