JeepParts
My Garage
My Account
Cart
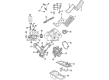
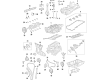
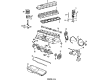
OEM Jeep Grand Cherokee Intake Valve
Engine Intake Valve- Select Vehicle by Model
- Select Vehicle by VIN
Select Vehicle by Model
orMake
Model
Year
Select Vehicle by VIN
For the most accurate results, select vehicle by your VIN (Vehicle Identification Number).
14 Intake Valves found


Jeep Grand Cherokee Intake Valve Part Number: 53022087AC
$14.57 MSRP: $37.15You Save: $22.58 (61%)Ships in 1-2 Business Days


Jeep Grand Cherokee Intake Valve Part Number: 53020747AB
$46.65 MSRP: $94.55You Save: $47.90 (51%)Ships in 1-2 Business Days


Jeep Grand Cherokee Intake Valve Part Number: 5038331AB
$93.10 MSRP: $141.00You Save: $47.90 (34%)Ships in 1-2 Business Days


Jeep Grand Cherokee Intake Valve Part Number: 5047917AA
$15.89 MSRP: $23.35You Save: $7.46 (32%)Ships in 1-2 Business Days


Jeep Grand Cherokee Intake Valve Part Number: 5184127AC
$17.03 MSRP: $25.00You Save: $7.97 (32%)Ships in 1-2 Business Days
Jeep Grand Cherokee Intake Valve Part Number: 53010512AA
$27.77 MSRP: $39.05You Save: $11.28 (29%)Ships in 1-2 Business Days

Jeep Grand Cherokee Valves Part Number: 68147265AA
$26.05 MSRP: $38.50You Save: $12.45 (33%)Ships in 1-2 Business Days
Jeep Grand Cherokee Intake Valve Part Number: 5037372AB
$34.66 MSRP: $51.20You Save: $16.54 (33%)Ships in 1-2 Business Days
Jeep Grand Cherokee Intake Valve Part Number: 53006723
$24.16 MSRP: $30.62You Save: $6.46 (22%)Ships in 1-2 Business Days


Jeep Grand Cherokee Intake Valve Part Number: 53021550AA


Jeep Grand Cherokee Intake Valve Part Number: 53021990AA

Jeep Grand Cherokee Intake Valve Part Number: 5048155AB
$12.06 MSRP: $17.55You Save: $5.49 (32%)
Jeep Grand Cherokee Intake Valve Part Number: 33003515


Jeep Grand Cherokee Intake Valve Part Number: 5175396AA
Jeep Grand Cherokee Intake Valve
Choose OEM Intake Valve that meet Jeep factory standards. Jeep designs and tests every component for precision and durability. Each Intake Valve follows strict manufacturing steps to lock in quality and fit. If your Jeep Grand Cherokee matters to you, OEM parts make the smart choice. You'll get the exact look, feel, and performance you expect. Shop genuine Grand Cherokee parts at the highly competitive prices online. Enjoy a manufacturer's warranty, a hassle-free return policy, and rapid delivery. No more guesswork with off brands. Get genuine parts with exact fit and true factory performance. Shop with confidence today at JeepPartsDeal.com.
The Intake Valve in the Jeep Grand Cherokee is a very important engine part that improves the operations of the engine remarkably. Being one of the most dependable elements of the automotive engine, the Intake Valve is responsible for controlling the stream of the air-fuel mixture and providing the optimal fuel combustion as well as issued power. This accuracy is important since the Intake Valve is so essential and when it fails there will be poor performance of the engine not to mention the price of repairs. Different generations of Jeep Grand Cherokee have been produced over the years, and all these models have been enhanced by the Intake Valve, which applies to several generations of this splendid Jeep model. Thus, understanding how to take care of the Intake Valve in a Jeep should be of paramount importance to Jeep Grand Cherokee owners because the properly functioning automobile is one that would provide optimum performance to the owners and safety on the roads. Interaction of the Intake Valve to freely allow air into the cylinder to improve the fuel efficiency also reduces exhaust emissions consistent with today's environmental requirements. Also, the Intake Valve is specifically developed to be robust enough to survive different driving environment, thus considered a distinct innovation in the automotive industry. In light of these characteristics which stress the aspects of sturdiness and efficiency, the Intake Valve might be considered as the embodiment of the Jeep Grand Cherokee which aims at the delivery of high-class luxury SUV vehicles. Maintenance of the Intake Valve is critical to the sustenance of the efficiency in the Grand Cherokee, thus will help this fantastic car to remain up to the expectation of Jeep lovers.
Jeep Grand Cherokee Intake Valve Parts and Q&A
- Q: How Can Exhaust Valve and Intake Valves Be Reworked to Ensure Proper Valve and Seat Alignment on Jeep Grand Cherokee?A:As long as the correct angle and seat size are maintained during reworking, worn or burned valve seats can be saved, but a new cylinder head is required if not. It is necessary to choose the right size valve guide pilot for resizing valves to create a completely flat surface. First, find the center of the valve seat using a reliable dial indicator to confirm total run out is below 0.051 mm (0.002 inch). Then, touch a small quantity of Prussian blue to the valve seat, lower the valve or into the cylinder head and with gentle pressure, rotate the valve. After you remove the valve, see where the transfer occurs on the valve face. If it's below the upper edge, lower the seat with a 15 degree stone and if it's on the bottom edge, use a 65 degree stone to raise the valve seat. Proper seating means the intake seat should be 1.75 - 2.36 mm wide and the exhaust seat should be 1.71 - 2.32 mm. Once the valves are refaced and the seat is installed, do not allow the valve spring installed height to surpass 40.74 mm (1.6039 inch) for both valve springs. The valve seat and valve face should have a face angle between 44.5 and 45 degrees.
- Q: How to Service and Repair Exhaust Valves and Intake Valves on Jeep Grand Cherokee?A:Before working on the valves, remove the cylinder heads, the Rocker Arms and Lash Adjusters and then the Camshaft bearing caps and camshaft. Place the valve spring in Tool C-3422-B or C-3422-C Valve Spring Compressor, held in the 8519 Adapter and carefully tap the upper part of the spring to pop open the spring retainer locks. Remove both halves of the lock, always being careful with the valve spring compressor since it is quite tight. Then, lastly, uninstall the valve spring compressor, spring retainer and spring, making certain there aren't any sharp edges in the keeper grooves and that you remove any small bends in the valve stem before the valve is extracted from the cylinder head. Valve Stem Seals may be used for either intake or exhaust, so when one is taken out, mark the valve where it would go in the correct place. Whenever you take out the valves, it's wise to inspect and test the valve springs to determine whether they are reusable. Make sure the spring is not damaged, then place the reference surface with the 40.12 mm marker over it, squish down the spring, note the torque reading when you hear a ping and double that value for the spring load at test length. Law enforcement should upgrade springs that do not adhere to the guidelines. When installing, place engine oil on the valve stem, insert it into the cylinder head and secure the valve stem seal, verifying the garter spring is unbroken and sitting securely. Place the spring and spring retainer, squeeze the spring with the compressor and put in the two retainer halves. Lift up the compressor and make sure all the retainer halves and springs are in their sockets. Apply some clean engine oil to the camshaft journal and lay the camshaft down so the sprocket dowel points to 11 o'clock on the left one and 12 o'clock on the right one. Next, fit the camshaft caps into their holes. Supports should be put in place using eight camshaft bearing cap bolts, set with 11 Nm torque in order 6-3-1-7-2-5.


Related Jeep Grand Cherokee Parts
 Jeep Grand Cherokee Oil Pan
 Jeep Grand Cherokee Oil Pump
 Jeep Grand Cherokee Rocker Arm
 Jeep Grand Cherokee Camshaft Bearing
 Jeep Grand Cherokee Camshaft Plug
 Jeep Grand Cherokee Crankshaft Thrust Washer
 Jeep Grand Cherokee Exhaust Valve
 Jeep Grand Cherokee Lash Adjuster
 Jeep Grand Cherokee Motor And Transmission Mount
 Jeep Grand Cherokee Piston
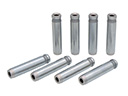 Jeep Grand Cherokee Valve Guide
 Jeep Grand Cherokee Valve Stem Seal