JeepParts
My Garage
My Account
Cart
OEM 2001 Chrysler PT Cruiser Air Duct
Air Hose- Select Vehicle by Model
- Select Vehicle by VIN
Select Vehicle by Model
orMake
Model
Year
Select Vehicle by VIN
For the most accurate results, select vehicle by your VIN (Vehicle Identification Number).
2 Air Ducts found

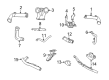
2001 Chrysler PT Cruiser Adapter Part Number: 5291447AA
$2.58 MSRP: $16.35You Save: $13.77 (85%)Ships in 1-2 Business DaysProduct Specifications- Other Name: Duct - Elbow; HVAC Duct Adapter; Duct Elbow
- Item Weight: 0.50 Pounds
- Item Dimensions: 5.4 x 5.3 x 3.4 inches
- Condition: New
- Fitment Type: Direct Replacement
- SKU: 5291447AA
- Warranty: This genuine part is guaranteed by Mopar's factory warranty.

2001 Chrysler PT Cruiser Hose Part Number: 4891136AD
Product Specifications- Other Name: Hose - Air Cleaner To Throttle Body; Engine Air Intake Hose; Intake Coupling; Hose Air Cleaner To Throttle Body; Air Intake Hose
- Replaces: 4891136AB
- Item Weight: 1.20 Pounds
- Item Dimensions: 7.9 x 6.5 x 3.7 inches
- Condition: New
- Fitment Type: Direct Replacement
- SKU: 4891136AD
- Warranty: This genuine part is guaranteed by Mopar's factory warranty.
2001 Chrysler PT Cruiser Air Duct Parts and Q&A
- Q: How to Service and Repair Air Ducts and Related Components on 2001 Chrysler PT Cruiser?A: The air outlet distribution duct can only be serviced after you take out the screws connecting it to the instrument panel, following the removal of the instrument panel from the vehicle. Disengage one right demister hose by removing it from the holder inside the right side of the distribution duct along with the intermediate demister duct and then disconnect both hoses from the nipples on that duct. After that, take out the air outlet distribution duct from the duct elbow on the left housing and the right panel duct before it can be detached from the instrument panel. Once the installation process starts, reverse the steps used for removing the hub caps and tighten the screws to 2.3 Nm (20 in.lbs.). Take off the center bezel from the instrument panel, break the screws at the center air outlet duct, disconnect it from the air outlet distribution duct, get it off the instrument panel and set the screws down to 2.3 Nm (20 in. lbs.). Take out the defroster duct from the housing above the heater-A/C unit after you take apart the instrument panel. For the demister hoses, take out the air outlet distribution duct, disconnect the demister hose from its nipple here and from the retainer for the right demister hose and remove the demister hose from the instrument panel, reversing each step for re-installation. Removing the intermediate demister duct involves detaching the hose on the right, releasing it from the demister outlet on the panel, unscrewing the duct from the panel, removing it and tightening its screws to 2.3 Nm or 20 in.lbs. To attend to the intermediate panel duct elbow, first remove the air outlet distribution duct and pull the intermediate elbow away from the left panel duct, tying it up as you did while installing. Uncover the outlet distribution duct, unscrew the elbow from the left panel duct, disconnect the panel duct from the instrument panel, disconnect it from the panel outlet and remove it, following the steps in reverse and tighten the screws to 2.3 Nm (20 in.lbs.). For the rear ducts under the floor, detach the front floor carpet and console from the car, take out the screws on the rear duct attached to the top of the floor panel console, disconnect the right rear duct from the left one at the cross-tunnel and remove the right rear duct from the car after disconnecting from the rear seat duct elbow, then tighten the screws to 2.3 Nm (20 in.lbs.) after installation. To reach the rear seat duct elbow, detach the right side floor duct, remove the two push pin retainers at the base of the front floor duct and take out the rear seat duct elbow, doing the opposite of the steps taken to install it.
Related 2001 Chrysler PT Cruiser Parts
 2001 Chrysler PT Cruiser Air Filter
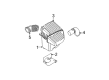
 2001 Chrysler PT Cruiser Air Filter Box
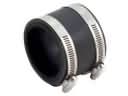 2001 Chrysler PT Cruiser Air Intake Coupling
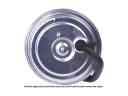 2001 Chrysler PT Cruiser Cruise Control Servo
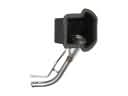 2001 Chrysler PT Cruiser Fuel Filler Neck
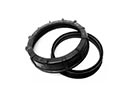 2001 Chrysler PT Cruiser Fuel Pump Seal
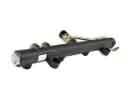 2001 Chrysler PT Cruiser Fuel Rail
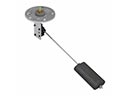 2001 Chrysler PT Cruiser Fuel Sending Unit
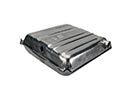 2001 Chrysler PT Cruiser Fuel Tank
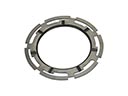 2001 Chrysler PT Cruiser Fuel Tank Lock Ring
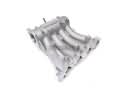 2001 Chrysler PT Cruiser Intake Manifold
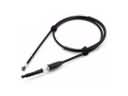 2001 Chrysler PT Cruiser Throttle Cable