JeepParts
My Garage
My Account
Cart
OEM 2001 Dodge Durango Clock Spring
Spiral Cable Clock Spring- Select Vehicle by Model
- Select Vehicle by VIN
Select Vehicle by Model
orMake
Model
Year
Select Vehicle by VIN
For the most accurate results, select vehicle by your VIN (Vehicle Identification Number).
1 Clock Spring found

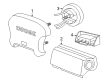
2001 Dodge Durango Clockspring Part Number: 56045403AG
$465.22Ships in 1-2 Business DaysProduct Specifications- Other Name: Air Bag Clockspring
- Replaces: 56045403AF, 56045403AE, 56045403AD
- Item Weight: 1.20 Pounds
- Item Dimensions: 4.9 x 4.9 x 3.9 inches
- Condition: New
- Fitment Type: Direct Replacement
- SKU: 56045403AG
- Warranty: This genuine part is guaranteed by Mopar's factory warranty.
2001 Dodge Durango Clock Spring Parts and Q&A
- Q: How to Replace a Faulty Clock Spring on 2001 Dodge Durango?A: It is necessary to replace the Clock Spring if it is defective, harmed or the driver air bag has activated, because it cannot be fixed. Firs, shut off the air bag system by removing and isolating the battery's negative cable, after which wait two minutes as the air bag system capacitor discharges. Make sure your steering wheel is straight to make sure the front wheels are pointed ahead. Get rid of the driver air bag, take off the steering wheel wire harness, release the connectors from the upper Clock Spring receptacles and remove the bolt holding the steering wheel armature to the steering column. Remove the steering wheel from the upper shaft spline using a steering wheel puller (Special Tool C-3428-B). Then get rid of the steering column opening cover from the instrument panel. Should the car be equipped, pull the tilt steering column knob in a straight back direction to remove it. Underneath the steering column, undo the two outboard screws under the upper shroud. Then, push gently inward on the upper shroud, remove the snap features on each side and take out the upper shroud. Underneath the shroud, you'll see a screw attaching it to the steering column lock; unscrew it and pull off the lower shroud. Remove the wire connectors from the lower Clock Spring receptacles, then free the screws holding the Clock Spring to the mounting housing and remove the Clock Spring. If reusing the Clock Spring, attach the rotor to its center hole so it doesn't move during storage; if not using it again, center it before fitting it into the movement. Before finalizing installation, confirm the Clock Spring is well centered, so it doesn't cause damage. When you buy a service replacement Clock Spring, it comes pre-centered and is locked by a plastic pin that shouldn't be taken out until it's installed in the steering column. Put the centered Clock Spring over the steering column upper shaft and get the locating tab to fit over the locating pin in the multi-function switch mounting housing; then, set the two screws into the housing and tighten them to 2 Nm (20 in. lbs.). Put the two wire harness connectors from the instrument panel back together for the Clock Spring, set the lower shroud onto the steering column and secure it onto the lock housing with a screw tightened to 2 Nm (20 in. lbs.). Attach the upper shroud to the steering column, with the gearshift lever gap hider engaged when present and secure the two pieces by hand. Screw the two brackets that attach the upper shroud to the lower shroud to 2 Nm (20 in. lbs.). If there is a knob nearby, line the tilt feature with the setting lever and push the knob onto the lever. Slide the steering column opening cover onto the instrument panel and then mount the steering wheel onto the steering column upper shaft, confirming the yellow rubber booted engagement dowel is indexed appropriately. Pull the upper Clock Spring pigtail wire through the upper hole opening between the steering wheel back trim and armature and then secure the steering wheel to the upper shaft by tightening the special screw to 61 Nm (45 ft/lbs.). After that, attach the steering wheel wire harness connectors to the upper Clock Spring connections and fix the driver air bag onto the steering wheel.
Related 2001 Dodge Durango Parts
 2001 Dodge Durango Headlight Switch
 2001 Dodge Durango Brake Light Switch
 2001 Dodge Durango Ignition Switch
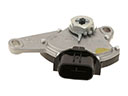 2001 Dodge Durango Neutral Safety Switch
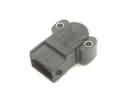 2001 Dodge Durango Throttle Position Sensor
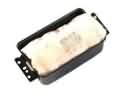 2001 Dodge Durango Air Bag
 2001 Dodge Durango Air Bag Control Module
 2001 Dodge Durango Back Up Light Switch
 2001 Dodge Durango Dimmer Switch
 2001 Dodge Durango Ignition Lock Assembly
 2001 Dodge Durango Ignition Lock Cylinder
 2001 Dodge Durango Wiper Switch