JeepParts
My Garage
My Account
Cart
OEM 2001 Dodge Neon Exhaust Manifold
Engine Exhaust Manifold- Select Vehicle by Model
- Select Vehicle by VIN
Select Vehicle by Model
orMake
Model
Year
Select Vehicle by VIN
For the most accurate results, select vehicle by your VIN (Vehicle Identification Number).
3 Exhaust Manifolds found

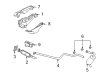
2001 Dodge Neon Exhaust Manifold Part Number: 4777619AC
Product Specifications- Other Name: Manifold - Exhaust; Manifold Exhaust
- Item Weight: 12.90 Pounds
- Item Dimensions: 15.6 x 14.3 x 6.6 inches
- Condition: New
- Fitment Type: Direct Replacement
- SKU: 4777619AC
- Warranty: This genuine part is guaranteed by Mopar's factory warranty.
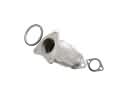
2001 Dodge Neon Exhaust Manifold Part Number: 4884070AA
Product Specifications- Other Name: Manifold - Exhaust; Manifold Exhaust
- Item Weight: 10.00 Pounds
- Condition: New
- Fitment Type: Direct Replacement
- SKU: 4884070AA
- Warranty: This genuine part is guaranteed by Mopar's factory warranty.
2001 Dodge Neon Exhaust Manifold Part Number: 4777904AC
Product Specifications- Other Name: Manifold; Manifold Exhaust
- Item Weight: 19.60 Pounds
- Condition: New
- Fitment Type: Direct Replacement
- SKU: 4777904AC
- Warranty: This genuine part is guaranteed by Mopar's factory warranty.
2001 Dodge Neon Exhaust Manifold Parts and Q&A
- Q: How to Service and Repair an Exhaust Manifold on 2001 Dodge Neon?A: Before you start, turn off the negative cable to the battery and raise the vehicle on a hoist. Unscrew the bolt holding the heat shield to the support bracket on top of the exhaust manifold for NLEV models or to the exhaust manifold itself for ULEV models, with the bolts removed, remove the top support bracket from NLEV vehicles. Take out the fasteners securing the exhaust system flex joint to the exhaust manifold flange and push the flex joint and exhaust system behind the flange studs. To build the ULEV, get rid of the support bracket from the cylinder block to the exhaust manifold. Drop the car and free the end of the make-up air hose from the rear of the cylinder head cover. If present, take out the speed control vacuum reservoir and afterward disconnect the oxygen sensor harness clip and connector. After removing the heat shield attaching bolts, use the torch to loosen the upper heat shield bolts. Unbolt the exhaust manifold and, for ULEV, lift off the cylinder head cover and cover the exposed head opening. Withdraw the exhaust manifold from where it is placed on top, between the cylinder head and the cowl. Throw away the gasket if your engine has one, then clean the surfaces on the manifold and cylinder head. Look for a flatness difference of 0.15 mm per 300 mm on the manifold gasket, as well as cracks or distortion and remember to replace the manifold if these issues are found. To install, set the exhaust manifold and gasket in place, secure them with the exhaust manifold bolts to 23 Nm in order. For ULEV, position the upper heat shield on the exhaust manifold, bolt it and tighten to 23 Nm. Install both heat shields on top of the exhaust manifold using bolts and tighten each bolt to 11 Nm. Connect the wiring from the oxygen sensor and snap the cylinder head cover into place for ULEV. Fix the speed control vacuum unit if your tractor has one and then attach the make-up air hose to the cylinder head cover port. Lift up your vehicle again, fit the new flex joint onto the manifold gasket, connect the exhaust to the flange and tighten all the fasteners to 28 Nm. Fit the exhaust manifold support bracket to NLEV and screw in the fasteners and for ULEV, fit the support bracket to the cylinder block and exhaust manifold, snugging all bolts before tightening them at 54 Nm. Connect the bolt that holds the wire harness heat shield to the support bracket for NLEV or to the exhaust manifold for ULEV, drop the car back to the ground and connect the negative battery cable.
Related 2001 Dodge Neon Parts
 2001 Dodge Neon Catalytic Converter
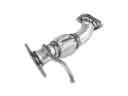 2001 Dodge Neon Exhaust Pipe
 2001 Dodge Neon Muffler
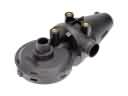 2001 Dodge Neon PCV Valve
 2001 Dodge Neon Air Injection Pump
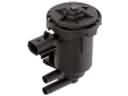 2001 Dodge Neon Canister Purge Valve
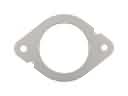 2001 Dodge Neon Catalytic Converter Gasket
 2001 Dodge Neon Exhaust Flange Gasket
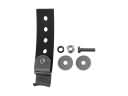 2001 Dodge Neon Exhaust Hanger
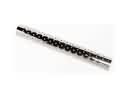 2001 Dodge Neon Exhaust Heat Shield
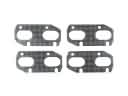 2001 Dodge Neon Exhaust Manifold Gasket
 2001 Dodge Neon Vapor Canister