JeepParts
My Garage
My Account
Cart
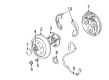
OEM 2003 Dodge Neon Parking Brake Cable
Emergency Parking Brake Release Cable- Select Vehicle by Model
- Select Vehicle by VIN
Select Vehicle by Model
orMake
Model
Year
Select Vehicle by VIN
For the most accurate results, select vehicle by your VIN (Vehicle Identification Number).
3 Parking Brake Cables found


2003 Dodge Neon Cable Part Number: 4509895AE
Product Specifications- Other Name: Cable - Parking Brake; Cable Parking Brake
- Item Weight: 2.10 Pounds
- Item Dimensions: 73.6 x 0.7 x 0.7 inches
- Condition: New
- Fitment Type: Direct Replacement
- SKU: 4509895AE
- Warranty: This genuine part is guaranteed by Mopar's factory warranty.

2003 Dodge Neon Cable Part Number: 4509893AE
Product Specifications- Other Name: Cable - Parking Brake; Cable Parking Brake
- Replaces: 4509893AD
- Item Weight: 2.20 Pounds
- Item Dimensions: 15.7 x 14.7 x 3.5 inches
- Condition: New
- Fitment Type: Direct Replacement
- SKU: 4509893AE
- Warranty: This genuine part is guaranteed by Mopar's factory warranty.
2003 Dodge Neon Cable Part Number: 4509894AE
Product Specifications- Other Name: Cable - Parking Brake; Brake Cable; Cable Parking Brake
- Item Weight: 2.20 Pounds
- Item Dimensions: 32.9 x 1.0 x 0.6 inches
- Condition: New
- Fitment Type: Direct Replacement
- SKU: 4509894AE
- Warranty: This genuine part is guaranteed by Mopar's factory warranty.
2003 Dodge Neon Parking Brake Cable Parts and Q&A
- Q: How to Service and Repair a Parking Brake Cable on 2003 Dodge Neon?A: When working on the brakes, it's important to first block the tires so that the vehicle doesn't move after you release the parking brake lever. Pull the parking brake lever all the way up and change the transmission to neutral. First, undo the screws from the center console and remove it, then press the lever that holds down the parking brake. Pull the parking brake lever output cable above the red with yellow wires at the top of the assembly and lock the automatic adjustment mechanism by inserting a pin punch into the gear and bracket below the sector lever. Unconnect the rear parking brake cables from the equalizer and remove the cushion from both rear seat cushions. Lift the rear carpeting at the edge nearest to the front to reach the brake mechanism inside. Clamp the inch wrench onto the retainer and push it down to make the cable housing slide out of the bracket. Elevate the vehicle and remove both the rear wheel and the assembly holding it. If your car uses rear drum brakes, set the drum aside, but if it has rear discs, take off the spindle bolts, hang the caliper and take out the brake disc. First, get rid of the dust cap on the rear hub and bearing, then come off the nut holding the hub and bearing and the hub and bearing themselves. When working on a car with rear disk brakes, first take out the top return spring and the two shoe hold-down clips, then spread the parking brake shoes to take them off. For cars with drum brakes, undo the cable from the actuating lever and from the rear brake support plate using a to inch box wrench to get the locking fingers to release. To release the actuating lever and cable for disc-brake vehicles, first take out the to inch offset box wrench and remove them. Pull the parking brake cable and the grommet holding it out of the floor, as well as the bracket from the strut bolts. Push the parking brake cable up from underneath and ensure you fix the sealing grommet inside the hole in the floor pan after. Fix the parking brake cable routing bracket onto the tension strut mounting bolts and tighten the nuts until they reach 28 Nm (250 in. lbs.). Install the cable from the parking brake into the brake support plate or rear disc brake adapter, so that the fingers are fully opened. When installing drum brakes, attach the parking brake cable to the actuating lever and the actuating spring to the brake shoe and adjustment lever. On vehicles with disc brakes, screw the parking brake shoes actuator lever onto the cable and the shoe assemblies onto the adapter. Fasten the hub and the bearing onto the rear spindle, adding a fresh retaining nut tightened to 217 Nm (160 ft. lbs.) It is usually best to tighten the attachment bolt to 160 ft.lb./224 Nm. If your vehicle has drums, insert the rear brake drum. If it's using disc brakes, fit the brake rotor and install the caliper, tightening the guide pin bolts on the caliper to 22 Nm (192 in. lbs.). Research "RV Weekend Tire Service video". Be sure the seal grommet is all the way in the floor pan and pass the parking brake cable under the carpet to its retaining bracket. Position the rear parking brake cables on the equalizer as instructed for correct alignment. Take out the parking brake pin from the lever area so that the brake system can adjust automatically. Rotate the parking brake lever to move the cables into the proper position, then release the lever and confirm that the rear wheels spin without problem. Fit the rear carpeting into the right place and attach the rear seat cushion safely. Tab the parking brake, put the console center back in, screw it in and get rid of any blocks placed on your tires.
Related 2003 Dodge Neon Parts
 2003 Dodge Neon Brake Booster
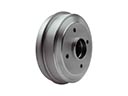 2003 Dodge Neon Brake Drum
 2003 Dodge Neon Speed Sensor
 2003 Dodge Neon Wheel Cylinder
 2003 Dodge Neon Brake Caliper Bolt
 2003 Dodge Neon Brake Caliper Piston
 2003 Dodge Neon Brake Disc
 2003 Dodge Neon Brake Line
 2003 Dodge Neon Brake Pad
 2003 Dodge Neon Hydraulic Hose
 2003 Dodge Neon Wheel Bearing Dust Cap
 2003 Dodge Neon Wheel Stud